navigate
描述 (Description)
要将应用程序另存为URL,您需要使用导航方法来更新URL。
语法 (Syntax)
router.navigate(fragment, options)
参数 (Parameters)
fragment - 它是在此参数后显示url的参数的名称。
options - 诸如trigger和replace类的选项,用于调用路由功能和更新URL。
例子 (Example)
<!DOCTYPE html>
<html>
   <head>
      <title>Router Example</title>
      <script src = "https://code.jquery.com/jquery-2.1.3.min.js"
         type = "text/javascript"></script>
      <script src = "https://cdnjs.cloudflare.com/ajax/libs/underscore.js/1.8.2/underscore-min.js"
         type = "text/javascript"></script>
      <script src = "https://cdnjs.cloudflare.com/ajax/libs/backbone.js/1.1.2/backbone-min.js"
         type = "text/javascript"></script>
   </head>
   <script type = "text/javascript">
      //'RouteMenu' is a name of the view class
      var RouteMenu = Backbone.View.extend ({
         el: '#routemenu',   //'el' defines which element to be used as the view reference
         //defines a click event to be occur on link
         events: {
            'click a' : 'onClick'
         },
         //After clicking on a link, router calls 'navigate' to update URL
         onClick: function( e ) {
            //Uses the navigate() method save the application as URL
            router.navigate('/');
         }
      });
      var Router = Backbone.Router.extend ({
         //The 'routes' maps URLs with parameters to functions on your router
         routes: {
            'route/:id' : 'defaultRoute'
         },
      });
      //'routemenu' is an instance of the view class
      var routemenu = new RouteMenu();
      //It start listening to the routes and manages the history for bookmarkable URL's
      Backbone.
      history.start();
   </script>
   <body>
      <p>It refers to the view class 'RouteMenu' and creates the 3 links
      which changes the url when you click on the links</p>
      <section id = "routemenu">
         <ul>
            <li> <a href = "#/route/1">route 1 </a> </li>
            <li> <a href = "#/route/2">route 2 </a> </li>
            <li> <a href = "#/route/3">route 3 </a> </li>
         </ul>
      </section>
   </body>
</html>
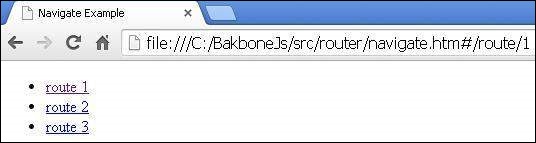
输出 (Output)
让我们执行以下步骤来查看上述代码的工作原理 -
将以上代码保存在navigate.htm文件中。
在浏览器中打开此HTML文件。
NOTE - 以上功能与地址栏有关。 因此,当您在浏览器中打开上述代码时,它将显示如下结果。