Spring MVC - 快速指南
Spring - MVC Framework Overview
Spring Web MVC框架提供了模型 - 视图 - 控制器架构和现成组件,可用于开发灵活且松散耦合的Web应用程序。 MVC模式导致应用程序的不同方面(输入逻辑,业务逻辑和UI逻辑)分离,同时在这些元素之间提供松散耦合。
Model封装了应用程序数据,通常它们由POJO组成。
View负责呈现模型数据,通常,它生成客户端浏览器可以解释的HTML输出。
Controller负责处理User Requests和Building Appropriate Model ,并将其传递给视图进行渲染。
DispatcherServlet
Spring Web模型 - 视图 - 控制器(MVC)框架是围绕处理所有HTTP请求和响应的DispatcherServlet设计的。 Spring Web MVC DispatcherServlet的请求处理工作流程如下图所示。
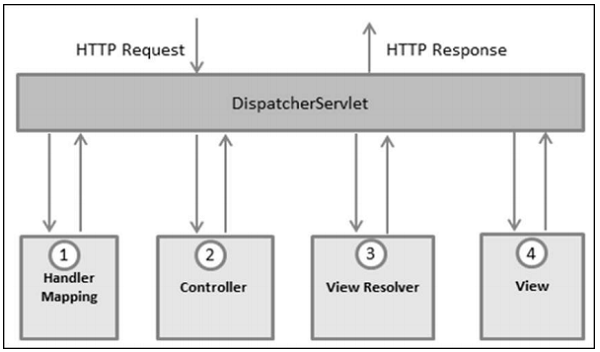
以下是与DispatcherServlet的传入HTTP请求相对应的事件序列 -
收到HTTP请求后,DispatcherServlet会查询HandlerMapping以调用相应的Controller。
Controller接受请求并根据使用的GET或POST method调用适当的服务POST method 。 服务方法将基于定义的业务逻辑设置模型数据,并将视图名称返回给DispatcherServlet。
DispatcherServlet将从ViewResolver获取帮助以获取请求的已定义视图。
一旦完成视图,DispatcherServlet就会将模型数据传递给最终呈现在浏览器上的视图。
所有上述组件,即HandlerMapping,Controller和ViewResolver都是WebApplicationContext ,它是普通ApplicationContext的扩展,具有Web应用程序所需的一些额外功能。
必需的配置
我们需要使用web.xml文件中的URL映射来映射您希望DispatcherServlet处理的请求。 以下是显示HelloWeb DispatcherServlet的声明和映射的示例 -
<web-app id = "WebApp_ID" version = "2.4"
   xmlns = "http://java.sun.com/xml/ns/j2ee"
   xmlns:xsi = "http://www.w3.org/2001/XMLSchema-instance"
   xsi:schemaLocation = "http://java.sun.com/xml/ns/j2ee
   http://java.sun.com/xml/ns/j2ee/web-app_2_4.xsd">
   <display-name>Spring MVC Application</display-name>
   <servlet>
      <servlet-name>HelloWeb</servlet-name>
      <servlet-class>
         org.springframework.web.servlet.DispatcherServlet
      </servlet-class>
      <load-on-startup>1</load-on-startup>
   </servlet>
   <servlet-mapping>
      <servlet-name>HelloWeb</servlet-name>
      <url-pattern>*.jsp</url-pattern>
   </servlet-mapping>
</web-app>
web.xml文件将保存在Web应用程序的WebContent/WEB-INF目录中。 在初始化HelloWeb DispatcherServlet时,框架将尝试从位于应用程序的WebContent/WEB-INF目录中的名为[servlet-name]-servlet.xml的文件加载应用程序上下文。 在这种情况下,我们的文件将是HelloWeb-servlet.xml 。
接下来, 《servlet-mapping》标记指示哪个URL将由哪个DispatcherServlet处理。 这里,所有以.jsp结尾的HTTP请求都将由HelloWeb DispatcherServlet处理。
如果您不想使用默认文件名作为[servlet-name]-servlet.xml并将默认位置作为WebContent/WEB-INF,则可以通过在web.xml中添加servlet侦听器ContextLoaderListener来自定义此文件名和位置文件如下 -
<web-app...>
   <!-------- <i>DispatcherServlet</i> definition goes here----->
   ....
   <context-param>
      <param-name>contextConfigLocation</param-name>
      <param-value>/WEB-INF/HelloWeb-servlet.xml</param-value>
   </context-param>
   <listener>
      <listener-class>
         org.springframework.web.context.ContextLoaderListener
      </listener-class>
   </listener>
</web-app>
现在,让我们检查HelloWeb-servlet.xml文件所需的配置,该文件放在Web应用程序的WebContent/WEB-INF目录中。
<beans xmlns = "http://www.springframework.org/schema/beans"
   xmlns:context = "http://www.springframework.org/schema/context"
   xmlns:xsi = "http://www.w3.org/2001/XMLSchema-instance"
   xsi:schemaLocation = "
   http://www.springframework.org/schema/beans
   http://www.springframework.org/schema/beans/spring-beans-3.0.xsd
   http://www.springframework.org/schema/context
   http://www.springframework.org/schema/context/spring-context-3.0.xsd">
   <context:component-scan base-package = "com.iowiki" />
   <bean class = "org.springframework.web.servlet.view.InternalResourceViewResolver">
      <property name = "prefix" value = "/WEB-INF/jsp/" />
      <property name = "suffix" value = ".jsp" />
   </bean>
</beans>
以下是关于HelloWeb-servlet.xml文件的一些重要观点 -
[servlet-name]-servlet.xml文件将用于创建定义的bean,覆盖在全局范围内使用相同名称定义的任何bean的定义。
《context:component-scan...》标签将用于激活Spring MVC注释扫描功能,该功能允许使用@Controller和@RequestMapping等注释。
InternalResourceViewResolver将定义用于解析视图名称的规则。 根据上面定义的规则,名为hello的逻辑视图被委托给位于/WEB-INF/jsp/hello.jsp的视图实现。
现在让我们了解如何创建实际组件,即Controller,Model和View。
定义控制器
DispatcherServlet将请求委托给控制器以执行特定于它的功能。 @Controller注释指示特定类充当控制器的角色。 @RequestMapping注释用于将URL映射到整个类或特定的处理程序方法。
@Controller
@RequestMapping("/hello")
public class HelloController{
   @RequestMapping(method = RequestMethod.GET)
   public String printHello(ModelMap model) {
      model.addAttribute("message", "Hello Spring MVC Framework!");
      return "hello";
   }
}
@Controller注释将类定义为Spring MVC控制器。 这里,@ @RequestMapping的第一次使用表明该控制器上的所有处理方法都与/hello路径相关。
下一个注释@RequestMapping (method = RequestMethod.GET)用于将printHello()方法声明为控制器处理HTTP GET请求的默认服务方法。 我们可以定义另一种方法来处理同一URL上的任何POST请求。
我们也可以用另一种形式编写上面的控制器,我们可以在@RequestMapping中添加其他属性,如下所示 -
@Controller
public class HelloController{
   @RequestMapping(value = "/hello", method = RequestMethod.GET)
   public String printHello(ModelMap model) {
      model.addAttribute("message", "Hello Spring MVC Framework!");
      return "hello";
   }
}
value属性指示处理程序方法映射到的URL, method属性定义处理HTTP GET请求的服务方法。
以下是关于上面定义的控制器需要注意的一些要点 -
您将在服务方法中定义所需的业务逻辑。 您可以根据要求在此方法中调用另一个方法。
根据定义的业务逻辑,您将在此方法中创建模型。 您可以设置不同的模型属性,视图将访问这些属性以显示结果。 此示例创建一个具有其属性“message”的模型。
定义的服务方法可以返回String,其中包含用于呈现模型的view的名称。 此示例返回“hello”作为逻辑视图名称。
创建JSP视图
Spring MVC支持不同类型的视图,用于不同的表示技术。 这些包括 - JSPs, HTML, PDF, Excel Worksheets, XML, Velocity Templates, XSLT, JSON, Atom和RSS提要, JasperReports等。但是,最常见的是使用JSTL编写的JSP模板。 那么,让我们在/WEB-INF/hello/hello.jsp中编写一个简单的hello视图 -
<html>
   <head>
      <title>Hello Spring MVC</title>
   </head>
   <body>
      <h2>${message}</h2>
   </body>
</html>
这里是${message}这是我们在Controller中设置的属性。 您可以在视图中显示多个属性。
Spring MVC - Environment Setup
本章将指导我们如何准备开发环境以开始使用Spring Framework。 本章还将教您如何在设置Spring Framework之前在您的机器上设置JDK, Tomcat和Eclipse -
第1步 - 安装Java开发工具包(JDK)
您可以从Oracle的Java站点下载最新版本 - Java SE下载 。 您将找到有关在下载文件中安装JDK的说明,请按照给出的说明安装和配置设置。 完成设置后,设置PATH和JAVA_HOME环境变量以引用包含java和javac的目录,通常分别是java_install_dir/bin和java_install_dir 。
如果您运行的是Windows并在C:\jdk1.6.0_15安装了JDK,则必须将以下行放在C:\autoexec.bat file 。
set PATH = C:\jdk1.6.0_15\bin;%PATH%
set JAVA_HOME = C:\jdk1.6.0_15
或者,在Windows NT/2000/XP上,您也可以右键单击“我的电脑”→选择“属性”→“高级”→“环境变量”。 然后,您将更新PATH值并单击“确定”按钮。
在UNIX(Solaris,Linux等)上,如果SDK安装在/usr/local/jdk1.6.0_15并且您使用C shell,则应将以下命令键入到.cshrc文件中。
setenv PATH /usr/local/jdk1.6.0_15/bin:$PATH
setenv JAVA_HOME /usr/local/jdk1.6.0_15
或者,如果您使用Borland JBuilder, Eclipse, IntelliJ IDEA或Sun ONE Studio等集成开发环境(IDE),则编译并运行一个简单的程序以确认IDE知道Java的安装位置,否则请按照IDE的文档。
第2步 - 安装Apache Common Logging API
您可以从https://commons.apache.org/logging/下载最新版本的Apache Commons Logging API。 下载完安装后,将二进制分发包解压到一个方便的位置。
例如 - Windows上的C:\commons-logging-1.1.1,或Linux/Unix上的/usr/local/commons-logging1.1.1。 该目录将包含以下jar文件和其他支持文档等。
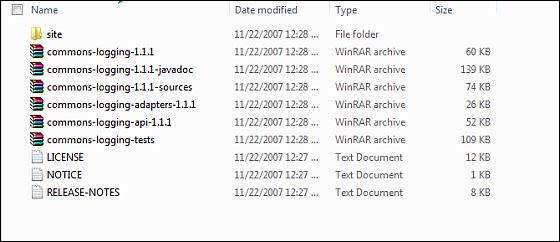
确保正确设置此目录上的CLASSPATH变量,否则在运行应用程序时将遇到问题。
第3步 - 安装Eclipse IDE
本教程中的所有示例都是使用Eclipse IDE编写的。 因此,建议我们在机器上安装最新版本的Eclipse。
要安装Eclipse IDE,请从以下链接https://www.eclipse.org/downloads/下载最新的Eclipse二进制文件。 下载安装后,将二进制分发包解压缩到方便的位置。
例如,在Windows上的C:\eclipse,或Linux/Unix上的/ usr/local/eclipse,最后适当地设置PATH变量。
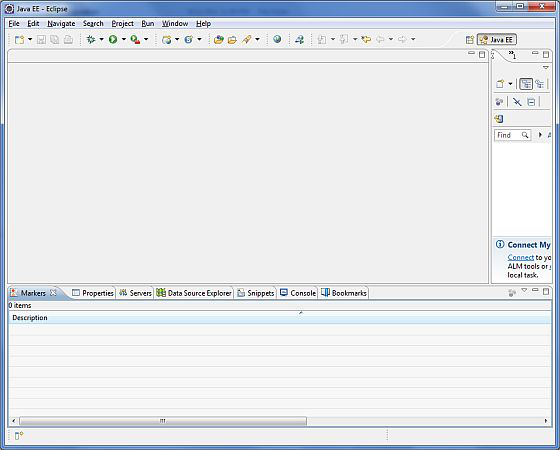
可以通过在Windows机器上执行以下命令来启动Eclipse,或者我们只需双击eclipse.exe即可。
%C:\eclipse\eclipse.exe
可以通过在UNIX(Solaris,Linux等)计算机上执行以下命令来启动Eclipse -
$/usr/local/eclipse/eclipse
成功启动后,如果一切正常,则应显示以下屏幕。
第4步 - 设置Spring Framework库
现在如果一切正常,那么我们可以继续设置Spring Framework。 以下是在计算机上下载和安装框架的步骤。
选择是否要在Windows或UNIX上安装Spring,然后继续下一步下载Windows的.zip file和Unix的.tz文件。
从https://repo.spring.io/release/org/springframework/spring下载最新版本的Spring框架二进制文件。
我们已经在Windows机器上下载了spring-framework-4.3.1.RELEASE-dist.zip ,当我们解压缩下载的文件时,它将在内部给出目录结构 - E:\spring,如下所示。
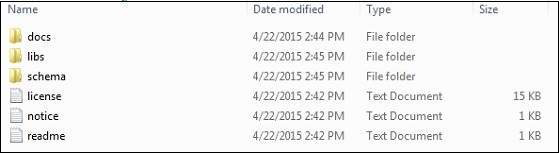
您将在目录E:\spring\libs找到所有Spring库。 确保正确设置此目录上的CLASSPATH变量; 否则,我们将在运行应用程序时遇到问题。 如果我们使用Eclipse,则不需要设置CLASSPATH,因为所有设置都将通过Eclipse完成。
完成最后一步后,您就可以继续学习第一个Spring示例了,您将在下一章中看到它。
Spring MVC - Hello World Example
以下示例说明如何使用Spring MVC Framework编写基于Web的简单Hello World应用程序。 首先,让我们使用一个可用的Eclipse IDE,并按照后续步骤使用Spring Web Framework开发动态Web应用程序。
| 步 | 描述 |
|---|---|
| 1 | 使用名称HelloWeb创建一个动态Web项目,并在创建的项目中的src文件夹下创建一个包com.iowiki。 |
| 2 | 将以下Spring和其他库拖放到WebContent/WEB-INF/lib文件夹中。 |
| 3 | 在com.iowiki包下创建一个Java类HelloController 。 |
| 4 | 在WebContent/WEB-INF文件夹下创建Spring配置files web.xml和HelloWeb-servlet.xml 。 |
| 5 | 在WebContent/WEB-INFfolder下创建一个名为jsp的子文件夹。 在此子文件夹下创建一个视图文件hello.jsp 。 |
| 6 | 最后一步是创建源文件和配置文件的内容并导出应用程序,如下所述。 |
HelloController.java
package com.iowiki;
import org.springframework.stereotype.Controller;
import org.springframework.web.bind.annotation.RequestMapping;
import org.springframework.web.bind.annotation.RequestMethod;
import org.springframework.ui.ModelMap;
@Controller
@RequestMapping("/hello")
public class HelloController{
   @RequestMapping(method = RequestMethod.GET)
   public String printHello(ModelMap model) {
      model.addAttribute("message", "Hello Spring MVC Framework!");
      return "hello";
   }
}
web.xml
<web-app id = "WebApp_ID" version = "2.4"
   xmlns = "http://java.sun.com/xml/ns/j2ee"
   xmlns:xsi = "http://www.w3.org/2001/XMLSchema-instance"
   xsi:schemaLocation = "http://java.sun.com/xml/ns/j2ee
   http://java.sun.com/xml/ns/j2ee/web-app_2_4.xsd">
   <display-name>Spring MVC Application</display-name>
   <servlet>
      <servlet-name>HelloWeb</servlet-name>
      <servlet-class>
         org.springframework.web.servlet.DispatcherServlet
      </servlet-class>
      <load-on-startup>1</load-on-startup>
   </servlet>
   <servlet-mapping>
      <servlet-name>HelloWeb</servlet-name>
      <url-pattern>/</url-pattern>
   </servlet-mapping>
</web-app>
HelloWeb-servlet.xml
<beans xmlns = "http://www.springframework.org/schema/beans"
   xmlns:context = "http://www.springframework.org/schema/context"
   xmlns:xsi = "http://www.w3.org/2001/XMLSchema-instance"
   xsi:schemaLocation = "
   http://www.springframework.org/schema/beans
   http://www.springframework.org/schema/beans/spring-beans-3.0.xsd
   http://www.springframework.org/schema/context
   http://www.springframework.org/schema/context/spring-context-3.0.xsd">
   <context:component-scan base-package = "com.iowiki" />
   <bean class = "org.springframework.web.servlet.view.InternalResourceViewResolver">
      <property name = "prefix" value = "/WEB-INF/jsp/" />
      <property name = "suffix" value = ".jsp" />
   </bean>
</beans>
hello.jsp
<%@ page contentType = "text/html; charset = UTF-8" %>
<html>
   <head>
      <title>Hello World</title>
   </head>
   <body>
      <h2>${message}</h2>
   </body>
</html>
以下是要包含在Web应用程序中的Spring和其他库的列表。 我们可以拖动这些文件并将它们放入WebContent/WEB-INF/lib文件夹中。
servlet-api-x.y.z.jar
commons-logging-x.y.z.jar
spring-aop-x.y.z.jar
spring-beans-x.y.z.jar
spring-context-x.y.z.jar
spring-core-x.y.z.jar
spring-expression-x.y.z.jar
spring-webmvc-x.y.z.jar
spring-web-x.y.z.jar
完成创建源文件和配置文件后,导出应用程序。 右键单击您的应用程序,使用Export → WAR File选项并将您的HelloWeb.war文件保存在Tomcat的webapps文件夹中。
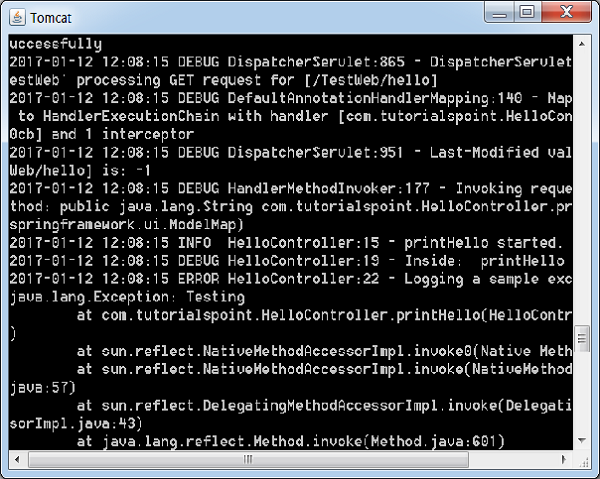
现在启动Tomcat服务器,确保您能够使用标准浏览器从webapps文件夹访问其他网页。 现在,尝试访问URL - http://localhost:8080/HelloWeb/hello 。 如果Spring Web Application的一切正常,我们将看到以下屏幕。
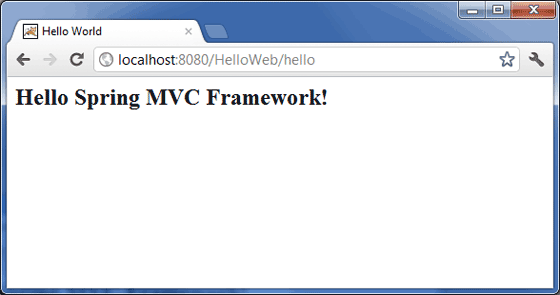
您应该注意,在给定的URL中, HelloWeb是应用程序名称,hello是虚拟子文件夹,我们在控制器中使用@RequestMapping(“/ hello”)提到了它。 使用@RequestMapping("/")映射URL时可以使用直接root,在这种情况下,您可以使用短URL http://localhost:8080/HelloWeb/访问同一页面,但建议在不同的功能下使用不同文件夹。
Spring MVC - Form Handling Example
以下示例说明如何使用Spring MVC Framework编写基于Web的简单Hello World应用程序。 首先,让我们使用一个可用的Eclipse IDE,并按照后续步骤使用Spring Web Framework开发动态Web应用程序。
| 步 | 描述 |
|---|---|
| 1 | 在Spring MVC - Hello World章节中解释,在com.iowiki包下创建一个名为HelloWeb的项目。 |
| 2 | 在com.iowiki包下创建Java类Student,StudentController。 |
| 3 | 在jsp子文件夹下创建视图文件student.jsp,result.jsp。 |
| 4 | 最后一步是创建源文件和配置文件的内容并导出应用程序,如下所述。 |
Student.java
package com.iowiki;
public class Student {
   private Integer age;
   private String name;
   private Integer id;
   public void setAge(Integer age) {
      this.age = age;
   }
   public Integer getAge() {
      return age;
   }
   public void setName(String name) {
      this.name = name;
   }
   public String getName() {
      return name;
   }
   public void setId(Integer id) {
      this.id = id;
   }
   public Integer getId() {
      return id;
   }
}
StudentController.java
package com.iowiki;
import org.springframework.stereotype.Controller;
import org.springframework.web.bind.annotation.ModelAttribute;
import org.springframework.web.bind.annotation.RequestMapping;
import org.springframework.web.bind.annotation.RequestMethod;
import org.springframework.web.servlet.ModelAndView;
import org.springframework.ui.ModelMap;
@Controller
public class StudentController {
   @RequestMapping(value = "/student", method = RequestMethod.GET)
   public ModelAndView student() {
      return new ModelAndView("student", "command", new Student());
   }
   @RequestMapping(value = "/addStudent", method = RequestMethod.POST)
   public String addStudent(@ModelAttribute("SpringWeb")Student student,
   ModelMap model) {
      model.addAttribute("name", student.getName());
      model.addAttribute("age", student.getAge());
      model.addAttribute("id", student.getId());
      return "result";
   }
}
这里是第一个服务方法student() ,我们在ModelAndView对象中传递了一个名为“command”的空白Studentobject。 这样做是因为如果我们在JSP文件中使用“form:form”标记,spring框架需要一个名为“command”的对象。 因此,当调用student()方法时,它返回student.jsp视图。
将针对HelloWeb/addStudent URL上的POST方法调用第二个服务方法addStudent() 。 您将根据提交的信息准备模型对象。 最后,将从service方法返回“result”视图,这将导致呈现result.jsp。
student.jsp
<%@taglib uri="http://www.springframework.org/tags/form" prefix = "form"%>
<html>
   <head>
      <title>Spring MVC Form Handling</title>
   </head>
   <body>
      <h2>Student Information</h2>
      <form:form method = "POST" action = "/HelloWeb/addStudent">
         <table>
            <tr>
               <td><form:label path = "name">Name</form:label></td>
               <td><form:input path = "name" /></td>
            </tr>
            <tr>
               <td><form:label path = "age">Age</form:label></td>
               <td><form:input path = "age" /></td>
            </tr>
            <tr>
               <td><form:label path = "id">id</form:label></td>
               <td><form:input path = "id" /></td>
            </tr>
            <tr>
               <td colspan = "2">
                  <input type = "submit" value = "Submit"/>
               </td>
            </tr>
         </table>
      </form:form>
   </body>
</html>
result.jsp
<%@taglib uri = "http://www.springframework.org/tags/form" prefix = "form"%>
<html>
   <head>
      <title>Spring MVC Form Handling</title>
   </head>
   <body>
      <h2>Submitted Student Information</h2>
      <table>
         <tr>
            <td>Name</td>
            <td>${name}</td>
         </tr>
         <tr>
            <td>Age</td>
            <td>${age}</td>
         </tr>
         <tr>
            <td>ID</td>
            <td>${id}</td>
         </tr>
      </table>
   </body>
</html>
完成创建源文件和配置文件后,导出应用程序。 右键单击您的应用程序,使用Export→WAR File选项并将SpringWeb.war文件保存在Tomcat的webapps文件夹中。
现在,启动Tomcat服务器并确保您可以使用标准浏览器从webapps文件夹访问其他网页。 现在,尝试一个URL-http:// localhost:8080/SpringWeb/student,如果Spring Web Application的一切正常,你应该看到以下屏幕。
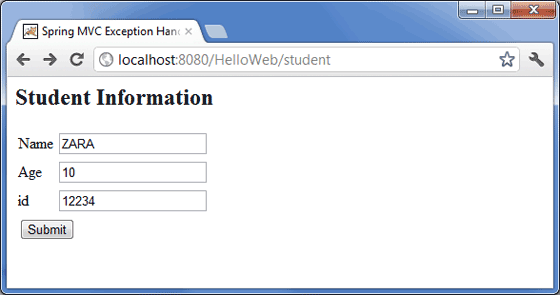
提交所需信息后,单击提交按钮以提交表单。 如果Spring Web Application的一切正常,您应该看到以下屏幕。

Spring MVC - Page Redirection Example
以下示例显示如何编写基于Web的简单应用程序,该应用程序使用重定向将http请求传输到另一个页面。 首先,让我们使用一个有效的Eclipse IDE,并考虑以下步骤使用Spring Web Framework开发基于动态表单的Web应用程序 -
| 步 | 描述 |
|---|---|
| 1 | 在Spring MVC - Hello World章节中解释,在com.iowiki包下创建一个名为HelloWeb的项目。 |
| 2 | 在com.iowiki包下创建一个Java类WebController。 |
| 3 | 在jsp子文件夹下创建视图文件index.jsp,final.jsp。 |
| 4 | 最后一步是创建源文件和配置文件的内容并导出应用程序,如下所述。 |
WebController.java
package com.iowiki;
import org.springframework.stereotype.Controller;
import org.springframework.web.bind.annotation.RequestMapping;
import org.springframework.web.bind.annotation.RequestMethod;
@Controller
public class WebController {
   @RequestMapping(value = "/index", method = RequestMethod.GET)
   public String index() {
	   return "index";
   }
   @RequestMapping(value = "/redirect", method = RequestMethod.GET)
   public String redirect() {
      return "redirect:finalPage";
   }
   @RequestMapping(value = "/finalPage", method = RequestMethod.GET)
   public String finalPage() {
      return "final";
   }
}
以下是Spring视图文件index.jsp的内容。 这将是一个登陆页面,该页面将向access-redirect服务方法发送请求,该方法将此请求重定向到另一个服务方法,最后将显示final.jsp页面。
index.jsp
<%@taglib uri = "http://www.springframework.org/tags/form" prefix = "form"%>
<html>
   <head>
      <title>Spring Page Redirection</title>
   </head>
   <body>
      <h2>Spring Page Redirection</h2>
      <p>Click below button to redirect the result to new page</p>
      <form:form method = "GET" action = "/HelloWeb/redirect">
         <table>
            <tr>
               <td>
                  <input type = "submit" value = "Redirect Page"/>
               </td>
            </tr>
         </table>
      </form:form>
   </body>
</html>
final.jsp
<%@taglib uri = "http://www.springframework.org/tags/form" prefix = "form"%>
<html>
<head>
<title>Spring Page Redirection</title>
</head>
<body>
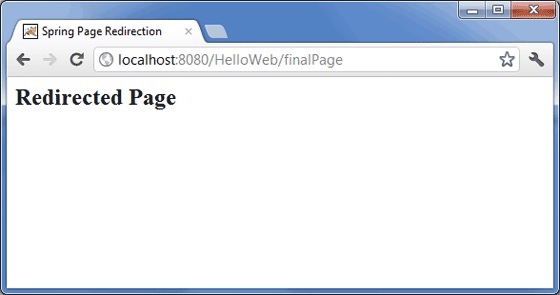
<h2>Redirected Page</h2>
</body>
</html>
完成创建源文件和配置文件后,导出应用程序。 右键单击您的应用程序,使用Export→WAR File选项并将您的HelloWeb.war文件保存在Tomcat的webapps文件夹中。
现在,启动Tomcat服务器并确保您可以使用标准浏览器从webapps文件夹访问其他网页。 尝试使用URL -http:// localhost:8080/HelloWeb/index,如果Spring Web Application的一切正常,您应该看到以下屏幕。
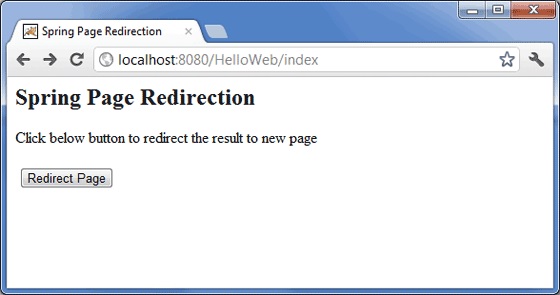
现在点击“重定向页面”按钮提交表单并进入最终的重定向页面。 我们应该看到以下屏幕,如果我们的Spring Web应用程序一切正常 -
Spring MVC - Static Pages Example
以下示例演示如何使用Spring MVC Framework编写基于Web的简单应用程序,该框架可以借助《mvc:resources》标记访问静态页面和动态页面。
首先,让我们使用一个可用的Eclipse IDE,并遵循以下步骤,使用Spring Web Framework开发基于动态表单的Web应用程序。
| 步 | 描述 |
|---|---|
| 1 | 在Spring MVC - Hello World章节中解释,在com.iowiki包下创建一个名为HelloWeb的项目。 |
| 2 | 在com.iowiki包下创建一个Java类WebController。 |
| 3 | 在jsp子文件夹下创建一个静态文件final.htm 。 |
| 4 | 更新WebContent/WEB-INF文件夹下的Spring配置文件HelloWeb-servlet.xml,如下所示。 |
| 5 | 最后一步是创建源文件和配置文件的内容并导出应用程序,如下所述。 |
WebController.java
package com.iowiki;
import org.springframework.stereotype.Controller;
import org.springframework.web.bind.annotation.RequestMapping;
import org.springframework.web.bind.annotation.RequestMethod;
@Controller
public class WebController {
   @RequestMapping(value = "/index", method = RequestMethod.GET)
   public String index() {
	   return "index";
   }
   @RequestMapping(value = "/staticPage", method = RequestMethod.GET)
   public String redirect() {
      return "redirect:/pages/final.htm";
   }
}
HelloWeb-servlet.xml
<?xml version = "1.0" encoding = "UTF-8"?>
<beans xmlns = "http://www.springframework.org/schema/beans"
   xmlns:xsi = "  http://www.w3.org/2001/XMLSchema-instance"
   xmlns:context = "http://www.springframework.org/schema/context"
   xmlns:mvc = "http://www.springframework.org/schema/mvc"
   xsi:schemaLocation = "http://www.springframework.org/schema/beans
   http://www.springframework.org/schema/beans/spring-beans-2.5.xsd
   http://www.springframework.org/schema/mvc
   http://www.springframework.org/schema/mvc/spring-mvc-3.0.xsd
   http://www.springframework.org/schema/context
   http://www.springframework.org/schema/context/spring-context-3.0.xsd">
   <context:component-scan base-package = "com.iowiki" />
   <bean id = "viewResolver" class = "org.springframework.web.servlet.view.InternalResourceViewResolver">
      <property name = "prefix" value = "/WEB-INF/jsp/" />
      <property name = "suffix" value = ".jsp" />
   </bean>
   <mvc:resources mapping = "/pages/**" location = "/WEB-INF/pages/" />
   <mvc:annotation-driven/>
</beans>
这里, 《mvc:resources..../》标签用于映射静态页面。 mapping属性必须是Ant pattern ,用于指定http请求的URL模式。 location属性必须指定一个或多个有效资源目录位置,其中包含静态页面,包括图像,样式表,JavaScript和其他静态内容。 可以使用逗号分隔的值列表指定多个资源位置。
以下是Spring视图文件WEB-INF/jsp/index.jsp 。 这将是一个登陆页面; 此页面将发送访问staticPage service method的请求,该staticPage service method将此请求重定向到WEB-INF/pages文件夹中可用的静态页面。
index.jsp
<%@taglib uri = "http://www.springframework.org/tags/form" prefix = "form"%>
<html>
<head>
<title>Spring Landing Page</title>
</head>
<body>
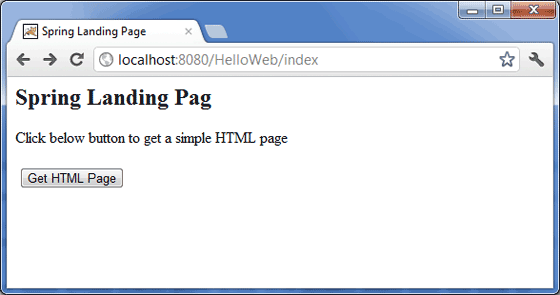
<h2>Spring Landing Pag</h2>
<p>Click below button to get a simple HTML page</p>
<form:form method = "GET" action = "/HelloWeb/staticPage">
<table>
<tr>
<td>
<input type = "submit" value = "Get HTML Page"/>
</td>
</tr>
</table>
</form:form>
</body>
</html>
final.htm
<html>
<head>
<title>Spring Static Page</title>
</head>
<body>
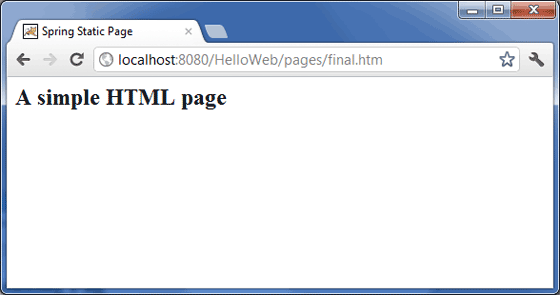
<h2>A simple HTML page</h2>
</body>
</html>
完成创建源文件和配置文件后,导出应用程序。 右键单击您的应用程序,使用Export→WAR File选项并将您的HelloWeb.war文件保存在Tomcat的webapps文件夹中。
现在,启动Tomcat服务器并确保您可以使用标准浏览器从webapps文件夹访问其他网页。 现在尝试访问URL - http:// localhost:8080/HelloWeb/index。 如果Spring Web Application的一切正常,我们将看到以下屏幕。
单击“获取HTML页面”按钮以访问staticPage服务方法中提到的静态页面。 如果您的Spring Web应用程序一切正常,我们将看到以下屏幕。
Spring MVC - Text Box Example
以下示例显示如何使用Spring Web MVC框架在表单中使用文本框。 首先,让我们使用一个有效的Eclipse IDE,并坚持以下步骤使用Spring Web Framework开发基于动态表单的Web应用程序 -
| 步 | 描述 |
|---|---|
| 1 | 在包含com.iowiki的包下创建一个名为HelloWeb的项目,如Spring MVC - Hello World Example一章中所述。 |
| 2 | 在com.iowiki包下创建一个Java类Student,StudentController。 |
| 3 | 在jsp子文件夹下创建一个视图文件student.jsp,result.jsp。 |
| 4 | 最后一步是创建源文件和配置文件的内容并导出应用程序,如下所述。 |
Student.java
package com.iowiki;
public class Student {
   private Integer age;
   private String name;
   private Integer id;
   public void setAge(Integer age) {
      this.age = age;
   }
   public Integer getAge() {
      return age;
   }
   public void setName(String name) {
      this.name = name;
   }
   public String getName() {
      return name;
   }
   public void setId(Integer id) {
      this.id = id;
   }
   public Integer getId() {
      return id;
   }
}
StudentController.java
package com.iowiki;
import org.springframework.stereotype.Controller;
import org.springframework.web.bind.annotation.ModelAttribute;
import org.springframework.web.bind.annotation.RequestMapping;
import org.springframework.web.bind.annotation.RequestMethod;
import org.springframework.web.servlet.ModelAndView;
import org.springframework.ui.ModelMap;
@Controller
public class StudentController {
   @RequestMapping(value = "/student", method = RequestMethod.GET)
   public ModelAndView student() {
      return new ModelAndView("student", "command", new Student());
   }
   @RequestMapping(value = "/addStudent", method = RequestMethod.POST)
   public String addStudent(@ModelAttribute("SpringWeb")Student student,
      ModelMap model) {
      model.addAttribute("name", student.getName());
      model.addAttribute("age", student.getAge());
      model.addAttribute("id", student.getId());
      return "result";
   }
}
这里是第一个服务方法student() ,我们在ModelAndView对象中传递了一个名为“command”的空白Studentobject,因为spring框架需要一个名为“command”的对象,如果你使用的是《form:form》标签你的JSP文件。 因此,当调用student()方法时,它返回student.jsp view 。
将针对HelloWeb/addStudent URL上的POST方法调用第二个服务方法addStudent() 。 您将根据提交的信息准备模型对象。 最后,将从service方法返回“result”视图,这将导致呈现result.jsp
student.jsp
<%@taglib uri = "http://www.springframework.org/tags/form" prefix = "form"%>
<html>
   <head>
      <title>Spring MVC Form Handling</title>
   </head>
   <body>
      <h2>Student Information</h2>
      <form:form method = "POST" action = "/HelloWeb/addStudent">
         <table>
            <tr>
               <td><form:label path = "name">Name</form:label></td>
               <td><form:input path = "name" /></td>
            </tr>
            <tr>
               <td><form:label path = "age">Age</form:label></td>
               <td><form:input path = "age" /></td>
            </tr>
            <tr>
               <td><form:label path = "id">id</form:label></td>
               <td><form:input path = "id" /></td>
            </tr>
            <tr>
               <td colspan = "2">
                  <input type = "submit" value = "Submit"/>
               </td>
            </tr>
         </table>
      </form:form>
   </body>
</html>
在这里,我们使用《form:input /》标签来呈现HTML文本框。 例如 -
<form:input path = "name" />
它将呈现以下HTML内容。
<input id = "name" name = "name" type = "text" value = ""/>
result.jsp
<%@taglib uri = "http://www.springframework.org/tags/form" prefix = "form"%>
<html>
   <head>
      <title>Spring MVC Form Handling</title>
   </head>
   <body>
      <h2>Submitted Student Information</h2>
      <table>
         <tr>
            <td>Name</td>
            <td>${name}</td>
         </tr>
         <tr>
            <td>Age</td>
            <td>${age}</td>
         </tr>
         <tr>
            <td>ID</td>
            <td>${id}</td>
         </tr>
      </table>
   </body>
</html>
完成创建源文件和配置文件后,导出应用程序。 右键单击您的应用程序,使用Export → WAR File选项并将HelloWeb.war文件保存在Tomcat的webapps文件夹中。
现在,启动Tomcat服务器并确保您可以使用标准浏览器从webapps文件夹访问其他网页。 尝试一个URL - http://localhost:8080/HelloWeb/student ,如果Spring Web Application的一切正常,我们将看到以下屏幕。

提交所需信息后,单击提交按钮以提交表单。 如果Spring Web Application的一切正常,我们应该看到以下屏幕。

Spring MVC - Password Example
以下示例描述了如何使用Spring Web MVC框架在表单中使用Password。 首先,让我们使用一个可用的Eclipse IDE,并遵循以下步骤使用Spring Web Framework开发基于动态表单的Web应用程序。
| 步 | 描述 |
|---|---|
| 1 | 在Spring MVC - Hello World章节中解释,在com.iowiki包下创建一个名为HelloWeb的项目。 |
| 2 | 在com.iowikipackage下创建Java类User,UserController。 |
| 3 | 在jsp子文件夹下创建视图文件user.jsp,users.jsp。 |
| 4 | 最后一步是创建源文件和配置文件的内容并导出应用程序,如下所述。 |
User.java
package com.iowiki;
public class User {
   private String username;
   private String password;
   public String getUsername() {
      return username;
   }
   public void setUsername(String username) {
      this.username = username;
   }
   public String getPassword() {
      return password;
   }
   public void setPassword(String password) {
      this.password = password;
   }
}
UserController.java)/h2>
package com.iowiki;
import org.springframework.stereotype.Controller;
import org.springframework.web.bind.annotation.ModelAttribute;
import org.springframework.web.bind.annotation.RequestMapping;
import org.springframework.web.bind.annotation.RequestMethod;
import org.springframework.web.servlet.ModelAndView;
import org.springframework.ui.ModelMap;
@Controller
public class UserController {
   @RequestMapping(value = "/user", method = RequestMethod.GET)
   public ModelAndView user() {
      return new ModelAndView("user", "command", new User());
   }
   @RequestMapping(value = "/addUser", method = RequestMethod.POST)
   public String addUser(@ModelAttribute("SpringWeb")User user,
      ModelMap model) {
      model.addAttribute("username", user.getUsername());
      model.addAttribute("password", user.getPassword());
      return "users";
   }
}
package com.iowiki;
import org.springframework.stereotype.Controller;
import org.springframework.web.bind.annotation.ModelAttribute;
import org.springframework.web.bind.annotation.RequestMapping;
import org.springframework.web.bind.annotation.RequestMethod;
import org.springframework.web.servlet.ModelAndView;
import org.springframework.ui.ModelMap;
@Controller
public class UserController {
@RequestMapping(value = "/user", method = RequestMethod.GET)
public ModelAndView user() {
return new ModelAndView("user", "command", new User());
}
@RequestMapping(value = "/addUser", method = RequestMethod.POST)
public String addUser(@ModelAttribute("SpringWeb")User user,
ModelMap model) {
model.addAttribute("username", user.getUsername());
model.addAttribute("password", user.getPassword());
return "users";
}
}
这里,第一个服务方法user() ,我们在ModelAndView对象中传递了一个名为“command”的空白User对象,因为如果使用“form:form”标签,spring框架需要一个名为“command”的对象在您的JSP文件中。 因此,当调用user()方法时,它返回user.jsp视图。
将针对HelloWeb/addUser URL上的POST方法调用第二个服务方法addUser() 。 您将根据提交的信息准备模型对象。 最后,将从service方法返回“users”视图,这将导致呈现users.jsp。
user.jsp
<%@taglib uri = "http://www.springframework.org/tags/form" prefix = "form"%>
<html>
<head>
<title>Spring MVC Form Handling</title>
</head>
<body>
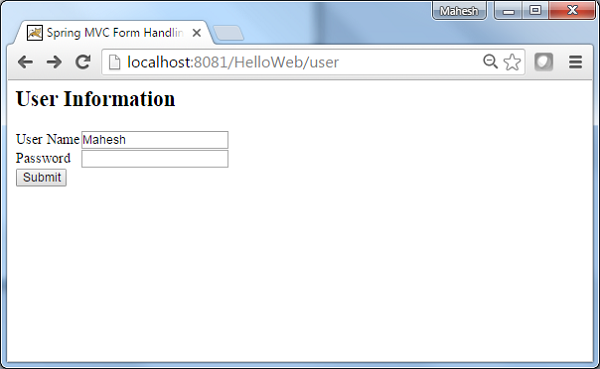
<h2>User Information</h2>
<form:form method = "POST" action = "/HelloWeb/addUser">
<table>
<tr>
<td><form:label path = "username">User Name</form:label></td>
<td><form:input path = "username" /></td>
</tr>
<tr>
<td><form:label path = "password">Age</form:label></td>
<td><form:password path = "password" /></td>
</tr>
<tr>
<td colspan = "2">
<input type = "submit" value = "Submit"/>
</td>
</tr>
</table>
</form:form>
</body>
</html>
在这里,我们使用
标签来呈现HTML密码框。 例如 -<form:password path = "password" />
它将呈现以下HTML内容。
<input id = "password" name = "password" type = "password" value = ""/>
users.jsp
<%@taglib uri = "http://www.springframework.org/tags/form" prefix = "form"%>
<html>
<head>
<title>Spring MVC Form Handling</title>
</head>
<body>
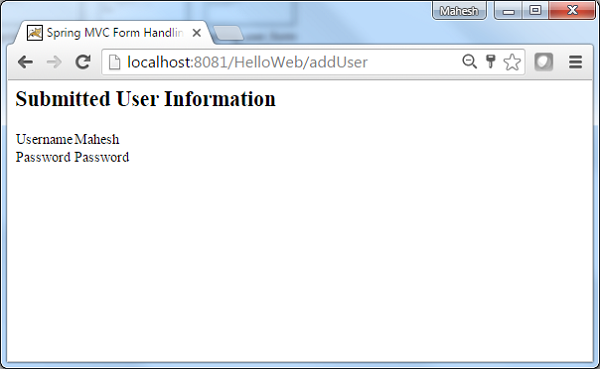
<h2>Submitted User Information</h2>
<table>
<tr>
<td>Username</td>
<td>${username}</td>
</tr>
<tr>
<td>Password</td>
<td>${password}</td>
</tr>
</table>
</body>
</html>
完成创建源文件和配置文件后,导出应用程序。 右键单击您的应用程序,使用Export→WAR File选项并将您的HelloWeb.war文件保存在Tomcat的webapps文件夹中。
现在,启动Tomcat服务器并确保您可以使用标准浏览器从webapps文件夹访问其他网页。 尝试使用URL -http:// localhost:8080/HelloWeb/user,如果Spring Web Application的一切正常,我们将看到以下屏幕。
提交所需信息后,单击提交按钮以提交表单。 如果Spring Web Application的一切正常,我们将看到以下屏幕。
Spring MVC - TextArea Example
以下示例说明如何使用Spring Web MVC框架在表单中使用TextArea。 首先,让我们使用一个可用的Eclipse IDE,并按照后续步骤使用Spring Web Framework开发基于动态表单的Web应用程序。
| 步 | 描述 |
|---|---|
| 1 | 在Spring MVC - Hello World章节中解释,在com.iowiki包下创建一个名为HelloWeb的项目。 |
| 2 | 在com.iowikipackage下创建Java类User,UserController。 |
| 3 | 在jsp子文件夹下创建视图文件user.jsp,users.jsp。 |
| 4 | 最后一步是创建源文件和配置文件的内容并导出应用程序,如下所述。 |
User.java
package com.iowiki;
public class User {
   private String username;
   private String password;
   private String address;
   public String getUsername() {
      return username;
   }
   public void setUsername(String username) {
      this.username = username;
   }
   public String getPassword() {
      return password;
   }
   public void setPassword(String password) {
      this.password = password;
   }
   public String getAddress() {
      return address;
   }
   public void setAddress(String address) {
      this.address = address;
   }
}
UserController.java)/h2>
package com.iowiki;
import org.springframework.stereotype.Controller;
import org.springframework.web.bind.annotation.ModelAttribute;
import org.springframework.web.bind.annotation.RequestMapping;
import org.springframework.web.bind.annotation.RequestMethod;
import org.springframework.web.servlet.ModelAndView;
import org.springframework.ui.ModelMap;
@Controller
public class UserController {
   @RequestMapping(value = "/user", method = RequestMethod.GET)
   public ModelAndView user() {
      return new ModelAndView("user", "command", new User());
   }
   @RequestMapping(value = "/addUser", method = RequestMethod.POST)
   public String addUser(@ModelAttribute("SpringWeb")User user,
      ModelMap model) {
      model.addAttribute("username", user.getUsername());
      model.addAttribute("password", user.getPassword());
      model.addAttribute("address", user.getAddress());
      return "users";
   }
}
package com.iowiki;
import org.springframework.stereotype.Controller;
import org.springframework.web.bind.annotation.ModelAttribute;
import org.springframework.web.bind.annotation.RequestMapping;
import org.springframework.web.bind.annotation.RequestMethod;
import org.springframework.web.servlet.ModelAndView;
import org.springframework.ui.ModelMap;
@Controller
public class UserController {
@RequestMapping(value = "/user", method = RequestMethod.GET)
public ModelAndView user() {
return new ModelAndView("user", "command", new User());
}
@RequestMapping(value = "/addUser", method = RequestMethod.POST)
public String addUser(@ModelAttribute("SpringWeb")User user,
ModelMap model) {
model.addAttribute("username", user.getUsername());
model.addAttribute("password", user.getPassword());
model.addAttribute("address", user.getAddress());
return "users";
}
}
这里,对于第一个服务方法user(),我们在ModelAndView对象中传递了一个名为“command”的空白User对象,因为如果使用
因此,当调用user()方法时,它将返回user.jsp视图。将针对HelloWeb/addUser URL上的POST方法调用第二个服务方法addUser()。 您将根据提交的信息准备模型对象。 最后,将从service方法返回“users”视图,这将导致呈现users.jsp。
user.jsp
<%@taglib uri = "http://www.springframework.org/tags/form" prefix = "form"%>
<html>
   <head>
      <title>Spring MVC Form Handling</title>
   </head>
   <body>
   <h2>User Information</h2>
   <form:form method = "POST" action = "/HelloWeb/addUser">
      <table>
         <tr>
            <td><form:label path = "username">User Name</form:label></td>
            <td><form:input path = "username" /></td>
         </tr>
         <tr>
            <td><form:label path = "password">Age</form:label></td>
            <td><form:password path = "password" /></td>
         </tr>
         <tr>
            <td><form:label path = "address">Address</form:label></td>
            <td><form:textarea path = "address" rows = "5" cols = "30" /></td>
         </tr>
         <tr>
            <td colspan = "2">
               <input type = "submit" value = "Submit"/>
            </td>
         </tr>
      </table>
   </form:form>
   </body>
</html>
在这里,我们使用《form:textarea /》标签来呈现HTML textarea框。 例如 -
<form:textarea path = "address" rows = "5" cols = "30" />
它将呈现以下HTML内容。
<textarea id = "address" name = "address" rows = "5" cols = "30"></textarea>
users.jsp
<%@taglib uri = "http://www.springframework.org/tags/form" prefix = "form"%>
<html>
<head>
<title>Spring MVC Form Handling</title>
</head>
<body>
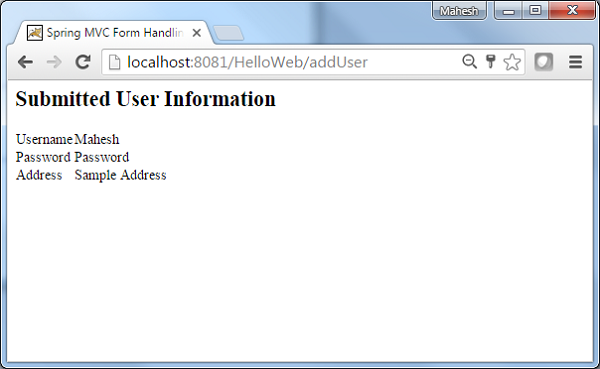
<h2>Submitted User Information</h2>
<table>
<tr>
<td>Username</td>
<td>${username}</td>
</tr>
<tr>
<td>Password</td>
<td>${password}</td>
</tr>
<tr>
<td>Address</td>
<td>${address}</td>
</tr>
</table>
</body>
</html>
完成创建源文件和配置文件后,导出应用程序。 右键单击您的应用程序,使用Export→WAR File选项并将您的HelloWeb.war文件保存在Tomcat的webapps文件夹中。
现在,启动Tomcat服务器并确保您可以使用标准浏览器从webapps文件夹访问其他网页。 尝试使用URL -http:// localhost:8080/HelloWeb/user,如果Spring Web Application的一切正常,我们将看到以下屏幕。

提交所需信息后,单击提交按钮以提交表单。 如果Spring Web Application的一切正常,我们将看到以下屏幕。
Spring MVC - Checkbox Example
以下示例描述如何在使用Spring Web MVC框架的表单中使用单一复选框。 首先,让我们使用一个可用的Eclipse IDE,并考虑使用Spring Web Framework开发基于动态表单的Web应用程序的以下步骤。
| 步 | 描述 |
|---|---|
| 1 | 在Spring MVC - Hello World Example章节中解释的com.iowiki包中创建一个名为HelloWeb的项目。 |
| 2 | 在com.iowikipackage下创建Java类User,UserController。 |
| 3 | 在jsp子文件夹下创建一个视图文件user.jsp,users.jsp。 |
| 4 | 最后一步是创建源文件和配置文件的内容并导出应用程序,如下所述。 |
User.java
package com.iowiki;
public class User {
   private String username;
   private String password;
   private String address;
   private boolean receivePaper;
   public String getUsername() {
      return username;
   }
   public void setUsername(String username) {
      this.username = username;
   }
   public String getPassword() {
      return password;
   }
   public void setPassword(String password) {
      this.password = password;
   }
   public String getAddress() {
      return address;
   }
   public void setAddress(String address) {
      this.address = address;
   }
   public boolean isReceivePaper() {
      return receivePaper;
   }
   public void setReceivePaper(boolean receivePaper) {
      this.receivePaper = receivePaper;
   }
}
UserController.java)/h2>
package com.iowiki;
import org.springframework.stereotype.Controller;
import org.springframework.web.bind.annotation.ModelAttribute;
import org.springframework.web.bind.annotation.RequestMapping;
import org.springframework.web.bind.annotation.RequestMethod;
import org.springframework.web.servlet.ModelAndView;
import org.springframework.ui.ModelMap;
@Controller
public class UserController {
   @RequestMapping(value = "/user", method = RequestMethod.GET)
   public ModelAndView user() {
      return new ModelAndView("user", "command", new User());
   }
   @RequestMapping(value = "/addUser", method = RequestMethod.POST)
   public String addUser(@ModelAttribute("SpringWeb")User user,
      ModelMap model) {
      model.addAttribute("username", user.getUsername());
      model.addAttribute("password", user.getPassword());
      model.addAttribute("address", user.getAddress());
      model.addAttribute("receivePaper", user.isReceivePaper());
      return "users";
   }
}
package com.iowiki;
import org.springframework.stereotype.Controller;
import org.springframework.web.bind.annotation.ModelAttribute;
import org.springframework.web.bind.annotation.RequestMapping;
import org.springframework.web.bind.annotation.RequestMethod;
import org.springframework.web.servlet.ModelAndView;
import org.springframework.ui.ModelMap;
@Controller
public class UserController {
@RequestMapping(value = "/user", method = RequestMethod.GET)
public ModelAndView user() {
return new ModelAndView("user", "command", new User());
}
@RequestMapping(value = "/addUser", method = RequestMethod.POST)
public String addUser(@ModelAttribute("SpringWeb")User user,
ModelMap model) {
model.addAttribute("username", user.getUsername());
model.addAttribute("password", user.getPassword());
model.addAttribute("address", user.getAddress());
model.addAttribute("receivePaper", user.isReceivePaper());
return "users";
}
}
这里,对于第一个服务方法user(),我们在ModelAndView对象中传递了一个名为“command”的空白User对象,因为如果使用
因此,当调用user()方法时,它返回user.jsp视图。将针对HelloWeb/addUser URL上的POST方法调用第二个服务方法addUser()。 您将根据提交的信息准备模型对象。 最后,将从service方法返回“users”视图,这将导致呈现users.jsp。
user.jsp
<%@taglib uri = "http://www.springframework.org/tags/form" prefix = "form"%>
<html>
<head>
<title>Spring MVC Form Handling</title>
</head>
<body>
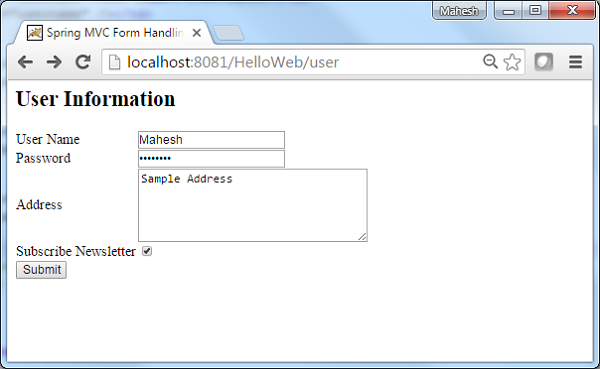
<h2>User Information</h2>
<form:form method = "POST" action = "/HelloWeb/addUser">
<table>
<tr>
<td><form:label path = "username">User Name</form:label></td>
<td><form:input path = "username" /></td>
</tr>
<tr>
<td><form:label path = "password">Age</form:label></td>
<td><form:password path = "password" /></td>
</tr>
<tr>
<td><form:label path = "address">Address</form:label></td>
<td><form:textarea path = "address" rows = "5" cols = "30" /></td>
</tr>
<tr>
<td><form:label path = "receivePaper">Subscribe Newsletter</form:label></td>
<td><form:checkbox path = "receivePaper" /></td>
</tr>
<tr>
<td colspan = "2">
<input type = "submit" value = "Submit"/>
</td>
</tr>
</table>
</form:form>
</body>
</html>
在这里,我们使用《form:checkboxes /》标签来呈现HTML复选框。
例如 -
<form:checkbox path="receivePaper" />
它将呈现以下HTML内容。
<input id="receivePaper1" name = "receivePaper" type = "checkbox" value = "true"/>
<input type = "hidden" name = "_receivePaper" value = "on"/>
users.jsp
<%@taglib uri = "http://www.springframework.org/tags/form" prefix = "form"%>
<html>
<head>
<title>Spring MVC Form Handling</title>
</head>
<body>
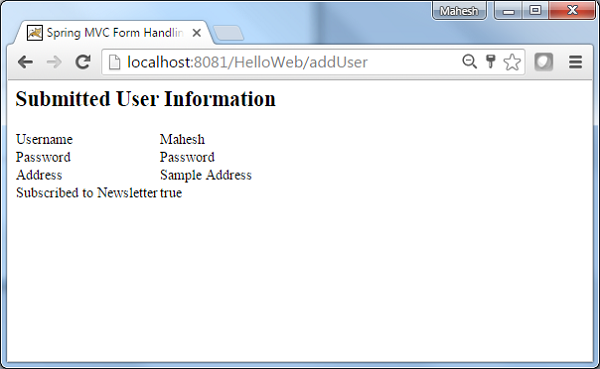
<h2>Submitted User Information</h2>
<table>
<tr>
<td>Username</td>
<td>${username}</td>
</tr>
<tr>
<td>Password</td>
<td>${password}</td>
</tr>
<tr>
<td>Address</td>
<td>${address}</td>
</tr>
<tr>
<td>Subscribed to Newsletter</td>
<td>${receivePaper}</td>
</tr>
</table>
</body>
</html>
完成创建源文件和配置文件后,导出应用程序。 右键单击您的应用程序,使用Export→WAR File选项并将您的HelloWeb.war文件保存在Tomcat的webapps文件夹中。
现在,启动Tomcat服务器并确保您可以使用标准浏览器从webapps文件夹访问其他网页。 尝试使用URL - http:// localhost:8080/HelloWeb/user,如果Spring Web Application的一切正常,我们将看到以下屏幕。
提交所需信息后,单击提交按钮以提交表单。 如果Spring Web Application的一切正常,我们将看到以下屏幕。
Spring MVC - Checkboxes Example
以下示例说明如何使用Spring Web MVC框架在表单中使用多个复选框。 首先,让我们使用一个有效的Eclipse IDE,并坚持以下步骤,使用Spring Web Framework开发基于动态表单的Web应用程序。
| 步 | 描述 |
|---|---|
| 1 | 在Spring MVC - Hello World章节中解释,在com.iowiki包下创建一个名为HelloWeb的项目。 |
| 2 | 在com.iowikipackage下创建Java类User,UserController。 |
| 3 | 在jsp子文件夹下创建视图文件user.jsp,users.jsp。 |
| 4 | 最后一步是创建源文件和配置文件的内容并导出应用程序,如下所述。 |
User.java
package com.iowiki;
public class User {
   private String username;
   private String password;
   private String address;
   private boolean receivePaper;
   private String [] favoriteFrameworks;
   public String getUsername() {
      return username;
   }
   public void setUsername(String username) {
      this.username = username;
   }
   public String getPassword() {
      return password;
   }
   public void setPassword(String password) {
      this.password = password;
   }
   public String getAddress() {
      return address;
   }
   public void setAddress(String address) {
      this.address = address;
   }
   public boolean isReceivePaper() {
      return receivePaper;
   }
   public void setReceivePaper(boolean receivePaper) {
      this.receivePaper = receivePaper;
   }
   public String[] getFavoriteFrameworks() {
      return favoriteFrameworks;
   }
   public void setFavoriteFrameworks(String[] favoriteFrameworks) {
      this.favoriteFrameworks = favoriteFrameworks;
   }
}
UserController.java)/h2>
package com.iowiki;
import java.util.ArrayList;
import java.util.List;
import org.springframework.stereotype.Controller;
import org.springframework.web.bind.annotation.ModelAttribute;
import org.springframework.web.bind.annotation.RequestMapping;
import org.springframework.web.bind.annotation.RequestMethod;
import org.springframework.web.servlet.ModelAndView;
import org.springframework.ui.ModelMap;
@Controller
public class UserController {
   @RequestMapping(value = "/user", method = RequestMethod.GET)
   public ModelAndView user() {
      User user = new User();
	  user.setFavoriteFrameworks((new String []{"Spring MVC","Struts 2"}));
	  ModelAndView modelAndView = new ModelAndView("user", "command", user);
	  return modelAndView;
   }
   @RequestMapping(value = "/addUser", method = RequestMethod.POST)
   public String addUser(@ModelAttribute("SpringWeb")User user,
      ModelMap model) {
      model.addAttribute("username", user.getUsername());
      model.addAttribute("password", user.getPassword());
      model.addAttribute("address", user.getAddress());
      model.addAttribute("receivePaper", user.isReceivePaper());
	  model.addAttribute("favoriteFrameworks", user.getFavoriteFrameworks());
      return "users";
   }
   @ModelAttribute("webFrameworkList")
   public List<String> getWebFrameworkList() {
      List<String> webFrameworkList = new ArrayList<String>();
      webFrameworkList.add("Spring MVC");
      webFrameworkList.add("Struts 1");
      webFrameworkList.add("Struts 2");
      webFrameworkList.add("Apache Wicket");
      return webFrameworkList;
   }
}
package com.iowiki;
import java.util.ArrayList;
import java.util.List;
import org.springframework.stereotype.Controller;
import org.springframework.web.bind.annotation.ModelAttribute;
import org.springframework.web.bind.annotation.RequestMapping;
import org.springframework.web.bind.annotation.RequestMethod;
import org.springframework.web.servlet.ModelAndView;
import org.springframework.ui.ModelMap;
@Controller
public class UserController {
@RequestMapping(value = "/user", method = RequestMethod.GET)
public ModelAndView user() {
User user = new User();
user.setFavoriteFrameworks((new String []{"Spring MVC","Struts 2"}));
ModelAndView modelAndView = new ModelAndView("user", "command", user);
return modelAndView;
}
@RequestMapping(value = "/addUser", method = RequestMethod.POST)
public String addUser(@ModelAttribute("SpringWeb")User user,
ModelMap model) {
model.addAttribute("username", user.getUsername());
model.addAttribute("password", user.getPassword());
model.addAttribute("address", user.getAddress());
model.addAttribute("receivePaper", user.isReceivePaper());
model.addAttribute("favoriteFrameworks", user.getFavoriteFrameworks());
return "users";
}
@ModelAttribute("webFrameworkList")
public List<String> getWebFrameworkList() {
List<String> webFrameworkList = new ArrayList<String>();
webFrameworkList.add("Spring MVC");
webFrameworkList.add("Struts 1");
webFrameworkList.add("Struts 2");
webFrameworkList.add("Apache Wicket");
return webFrameworkList;
}
}
这里,对于第一个服务方法user() ,我们在ModelAndView对象中传递了一个名为“command”的空白User对象,因为如果使用“form:form”,spring框架需要一个名为“command”的对象。 JSP文件中的标记。 因此,当调用user()方法时,它将返回user.jsp视图。
将针对HelloWeb/addUser URL上的POST方法调用第二个服务方法addUser() 。 您将根据提交的信息准备模型对象。 最后,将从service方法返回“users”视图,这将导致呈现users.jsp
user.jsp
<%@taglib uri = "http://www.springframework.org/tags/form" prefix = "form"%>
<html>
   <head>
      <title>Spring MVC Form Handling</title>
   </head>
   <body>
      <h2>User Information</h2>
      <form:form method = "POST" action = "/HelloWeb/addUser">
         <table>
            <tr>
               <td><form:label path = "username">User Name</form:label></td>
               <td><form:input path = "username" /></td>
            </tr>
            <tr>
               <td><form:label path = "password">Age</form:label></td>
               <td><form:password path = "password" /></td>
            </tr>
            <tr>
               <td><form:label path = "address">Address</form:label></td>
               <td><form:textarea path = "address" rows = "5" cols = "30" /></td>
            </tr>
            <tr>
               <td><form:label path = "receivePaper">Subscribe Newsletter</form:label></td>
               <td><form:checkbox path = "receivePaper" /></td>
            </tr>
            <tr>
               <td><form:label path = "favoriteFrameworks">Favorite Web Frameworks</form:label></td>
               <td><form:checkboxes items = "${webFrameworkList}" path = "favoriteFrameworks" /></td>
            </tr>
            <tr>
               <td colspan = "2">
                  <input type = "submit" value = "Submit"/>
               </td>
            </tr>
         </table>
      </form:form>
   </body>
</html>
在这里,我们使用《form:checkboxes /》标签来呈现HTML复选框。
<form:checkboxes items = "${webFrameworkList}" path = "favoriteFrameworks" />
它将呈现以下HTML内容。
<span>
   <input id = "favoriteFrameworks1" name = "favoriteFrameworks" type = "checkbox" value = "Spring MVC" checked = "checked"/>
   <label for = "favoriteFrameworks1">Spring MVC</label>
</span>
<span>
   <input id = "favoriteFrameworks2" name = "favoriteFrameworks" type = "checkbox" value = "Struts 1"/>
   <label for = "favoriteFrameworks2">Struts 1</label>
</span>
<span>
   <input id = "favoriteFrameworks3" name = "favoriteFrameworks" type = "checkbox" value = "Struts 2" checked = "checked"/>
   <label for = "favoriteFrameworks3">Struts 2</label>
</span>
<span>
   <input id = "favoriteFrameworks4" name = "favoriteFrameworks" type = "checkbox" value = "Apache Wicket"/>
   <label for = "favoriteFrameworks4">Apache Wicket</label>
</span>
<input type = "hidden" name = "_favoriteFrameworks" value = "on"/>
users.jsp
<%@taglib uri = "http://www.springframework.org/tags/form" prefix = "form"%>
<html>
   <head>
      <title>Spring MVC Form Handling</title>
   </head>
   <body>
      <h2>Submitted User Information</h2>
      <table>
         <tr>
            <td>Username</td>
            <td>${username}</td>
         </tr>
         <tr>
            <td>Password</td>
            <td>${password}</td>
         </tr>
         <tr>
            <td>Address</td>
            <td>${address}</td>
         </tr>
         <tr>
            <td>Subscribed to Newsletter</td>
            <td>${receivePaper}</td>
         </tr>
         <tr>
            <td>Favorite Web Frameworks</td>
            <td> <% String[] favoriteFrameworks = (String[])request.getAttribute("favoriteFrameworks");
            for(String framework: favoriteFrameworks) {
               out.println(framework);
            }
            %></td>
         </tr>
      </table>
   </body>
</html>
完成创建源文件和配置文件后,导出应用程序。 右键单击您的应用程序,使用Export → WAR File选项并将您的HelloWeb.war文件保存在Tomcat的webapps文件夹中。
现在,启动Tomcat服务器并确保您能够使用标准浏览器从webapps文件夹访问其他网页。 尝试使用URL http://localhost:8080/HelloWeb/user ,如果Spring Web Application的一切正常,我们将看到以下屏幕。
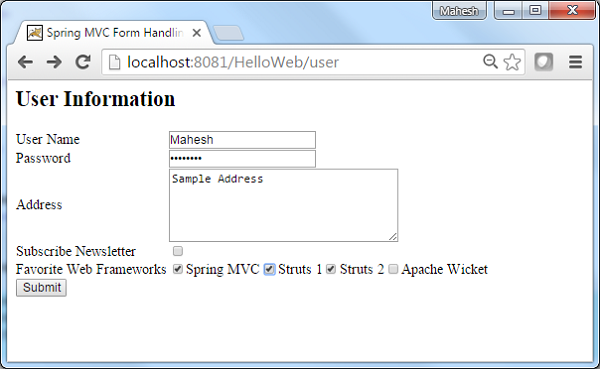
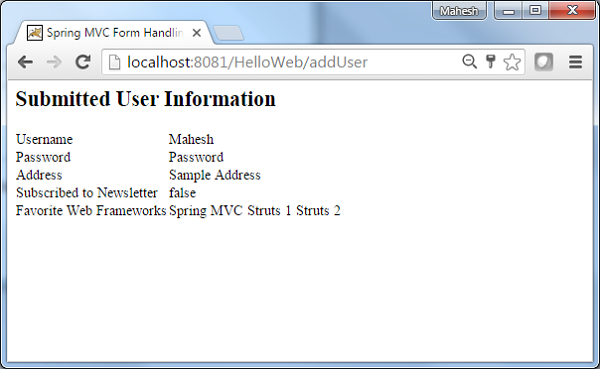
提交所需信息后,单击提交按钮以提交表单。 如果您的Spring Web应用程序一切正常,我们将看到以下屏幕。
Spring MVC - RadioButton Example
以下示例显示如何使用Spring Web MVC框架在表单中使用RadioButton。 首先,让我们使用一个可用的Eclipse IDE,并坚持以下步骤,使用Spring Web Framework开发基于动态表单的Web应用程序 -
| 步 | 描述 |
|---|---|
| 1 | 在Spring MVC - Hello World章节中解释,在com.iowiki包下创建一个名为HelloWeb的项目。 |
| 2 | 在com.iowikipackage下创建Java类User,UserController。 |
| 3 | 在jsp子文件夹下创建视图文件user.jsp,users.jsp。 |
| 4 | 最后一步是创建源文件和配置文件的内容并导出应用程序,如下所述。 |
User.java
package com.iowiki;
public class User {
   private String username;
   private String password;
   private String address;
   private boolean receivePaper;
   private String [] favoriteFrameworks;
   private String gender;
   public String getUsername() {
      return username;
   }
   public void setUsername(String username) {
      this.username = username;
   }
   public String getPassword() {
      return password;
   }
   public void setPassword(String password) {
      this.password = password;
   }
   public String getAddress() {
      return address;
   }
   public void setAddress(String address) {
      this.address = address;
   }
   public boolean isReceivePaper() {
      return receivePaper;
   }
   public void setReceivePaper(boolean receivePaper) {
      this.receivePaper = receivePaper;
   }
   public String[] getFavoriteFrameworks() {
      return favoriteFrameworks;
   }
   public void setFavoriteFrameworks(String[] favoriteFrameworks) {
      this.favoriteFrameworks = favoriteFrameworks;
   }
   public String getGender() {
      return gender;
   }
   public void setGender(String gender) {
      this.gender = gender;
   }
}
UserController.java)/h2>
package com.iowiki;
import java.util.ArrayList;
import java.util.List;
import org.springframework.stereotype.Controller;
import org.springframework.web.bind.annotation.ModelAttribute;
import org.springframework.web.bind.annotation.RequestMapping;
import org.springframework.web.bind.annotation.RequestMethod;
import org.springframework.web.servlet.ModelAndView;
import org.springframework.ui.ModelMap;
@Controller
public class UserController {
   @RequestMapping(value = "/user", method = RequestMethod.GET)
   public ModelAndView user() {
      User user = new User();
	  user.setFavoriteFrameworks((new String []{"Spring MVC","Struts 2"}));
      user.setGender("M");
	  ModelAndView modelAndView = new ModelAndView("user", "command", user);
	  return modelAndView;
   }
   @RequestMapping(value = "/addUser", method = RequestMethod.POST)
   public String addUser(@ModelAttribute("SpringWeb")User user,
      ModelMap model) {
      model.addAttribute("username", user.getUsername());
      model.addAttribute("password", user.getPassword());
      model.addAttribute("address", user.getAddress());
      model.addAttribute("receivePaper", user.isReceivePaper());
	  model.addAttribute("favoriteFrameworks", user.getFavoriteFrameworks());
      model.addAttribute("gender", user.getGender());
      return "users";
   }
   @ModelAttribute("webFrameworkList")
   public List<String> getWebFrameworkList() {
      List<String> webFrameworkList = new ArrayList<String>();
      webFrameworkList.add("Spring MVC");
      webFrameworkList.add("Struts 1");
      webFrameworkList.add("Struts 2");
      webFrameworkList.add("Apache Wicket");
      return webFrameworkList;
   }
}
package com.iowiki;
import java.util.ArrayList;
import java.util.List;
import org.springframework.stereotype.Controller;
import org.springframework.web.bind.annotation.ModelAttribute;
import org.springframework.web.bind.annotation.RequestMapping;
import org.springframework.web.bind.annotation.RequestMethod;
import org.springframework.web.servlet.ModelAndView;
import org.springframework.ui.ModelMap;
@Controller
public class UserController {
@RequestMapping(value = "/user", method = RequestMethod.GET)
public ModelAndView user() {
User user = new User();
user.setFavoriteFrameworks((new String []{"Spring MVC","Struts 2"}));
user.setGender("M");
ModelAndView modelAndView = new ModelAndView("user", "command", user);
return modelAndView;
}
@RequestMapping(value = "/addUser", method = RequestMethod.POST)
public String addUser(@ModelAttribute("SpringWeb")User user,
ModelMap model) {
model.addAttribute("username", user.getUsername());
model.addAttribute("password", user.getPassword());
model.addAttribute("address", user.getAddress());
model.addAttribute("receivePaper", user.isReceivePaper());
model.addAttribute("favoriteFrameworks", user.getFavoriteFrameworks());
model.addAttribute("gender", user.getGender());
return "users";
}
@ModelAttribute("webFrameworkList")
public List<String> getWebFrameworkList() {
List<String> webFrameworkList = new ArrayList<String>();
webFrameworkList.add("Spring MVC");
webFrameworkList.add("Struts 1");
webFrameworkList.add("Struts 2");
webFrameworkList.add("Apache Wicket");
return webFrameworkList;
}
}
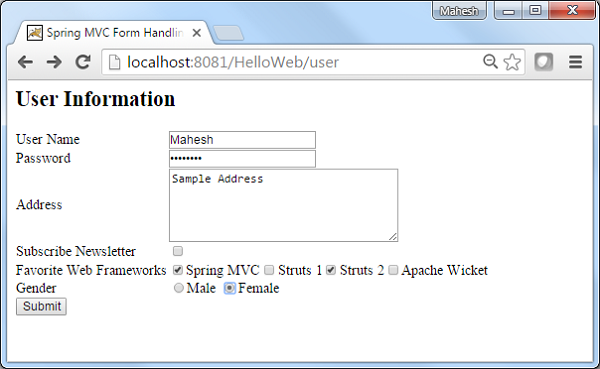
这里,第一个服务方法user() ,我们在ModelAndView对象中传递了一个名为“command”的空白User对象,因为如果使用“form:form”标签,spring框架需要一个名为“command”的对象在您的JSP文件中。 因此,当调用user()方法时,它将返回user.jsp视图。
将针对HelloWeb/addUser URL上的POST方法调用第二个服务方法addUser() 。 您将根据提交的信息准备模型对象。 最后,将从service方法返回“users”视图,这将导致呈现users.jsp。
user.jsp
<%@taglib uri = "http://www.springframework.org/tags/form" prefix = "form"%>
<html>
   <head>
      <title>Spring MVC Form Handling</title>
   </head>
   <body>
      <h2>User Information</h2>
      <form:form method = "POST" action = "/HelloWeb/addUser">
         <table>
            <tr>
               <td><form:label path = "username">User Name</form:label></td>
               <td><form:input path = "username" /></td>
            </tr>
            <tr>
               <td><form:label path = "password">Age</form:label></td>
               <td><form:password path = "password" /></td>
            </tr>
            <tr>
               <td><form:label path = "address">Address</form:label></td>
               <td><form:textarea path = "address" rows = "5" cols = "30" /></td>
            </tr>
            <tr>
               <td><form:label path = "receivePaper">Subscribe Newsletter</form:label></td>
               <td><form:checkbox path = "receivePaper" /></td>
            </tr>
            <tr>
               <td><form:label path = "favoriteFrameworks">Favorite Web Frameworks</form:label></td>
               <td><form:checkboxes items = "${webFrameworkList}" path = "favoriteFrameworks" /></td>
            </tr>
            <tr>
               <td><form:label path = "gender">Gender</form:label></td>
               <td>
                  <form:radiobutton path = "gender" value = "M" label = "Male" />
                  <form:radiobutton path = "gender" value = "F" label = "Female" />
               </td>
            </tr>
            <tr>
               <td colspan = "2">
                  <input type = "submit" value = "Submit"/>
               </td>
            </tr>
         </table>
      </form:form>
   </body>
</html>
在这里,我们使用《form:radiobutton /》标签来呈现HTML radiobutton。
<form:radiobutton path = "gender" value = "M" label = "Male" />
<form:radiobutton path = "gender" value = "F" label = "Female" />
它将呈现以下HTML内容。
<input id = "gender1" name = "gender" type = "radio" value = "M" checked = "checked"/><label for = "gender1">Male</label>
<input id = "gender2" name = "gender" type = "radio" value = "F"/><label for = "gender2">Female</label>
users.jsp
<%@taglib uri="http://www.springframework.org/tags/form" prefix="form"%>
<html>
<head>
    <title>Spring MVC Form Handling</title>
</head>
   <body>
      <h2>Submitted User Information</h2>
      <table>
         <tr>
            <td>Username</td>
            <td>${username}</td>
         </tr>
         <tr>
            <td>Password</td>
            <td>${password}</td>
         </tr>
         <tr>
            <td>Address</td>
            <td>${address}</td>
         </tr>
         <tr>
            <td>Subscribed to Newsletter</td>
            <td>${receivePaper}</td>
         </tr>
         <tr>
            <td>Favorite Web Frameworks</td>
            <td> <% String[] favoriteFrameworks = (String[])request.getAttribute("favoriteFrameworks");
               for(String framework: favoriteFrameworks) {
                  out.println(framework);
               }
            %></td>
         </tr>
         <tr>
            <td>Gender</td>
            <td>${(gender=="M"? "Male" : "Female")}</td>
         </tr>
      </table>
   </body>
</html>
完成创建源文件和配置文件后,导出应用程序。 右键单击您的应用程序,使用Export → WAR File选项并将HelloWeb.war文件保存在Tomcat的webapps文件夹中。
现在,启动Tomcat服务器并确保您可以使用标准浏览器从webapps文件夹访问其他网页。 尝试使用URL - http://localhost:8080/HelloWeb/user ,如果Spring Web Application的一切正常,我们将看到以下屏幕。
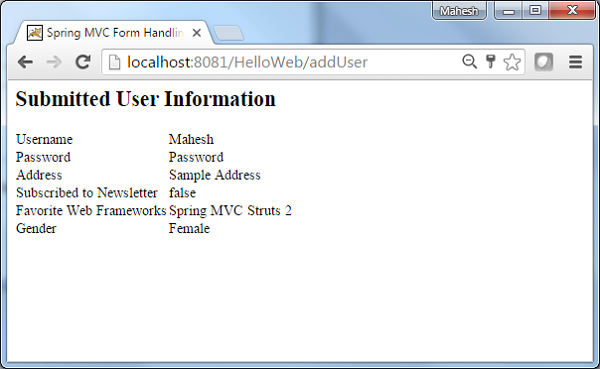
提交所需信息后,单击提交按钮以提交表单。 如果Spring Web Application的一切正常,我们将看到以下屏幕。
Spring MVC - RadioButtons Example
以下示例说明如何使用Spring Web MVC框架在表单中使用RadioButtons。 首先,让我们使用一个可用的Eclipse IDE,并按照后续步骤使用Spring Web Framework开发基于动态表单的Web应用程序。
| 步 | 描述 |
|---|---|
| 1 | 在Spring MVC - Hello World章节中解释,在com.iowiki包下创建一个名为HelloWeb的项目。 |
| 2 | 在com.iowikipackage下创建Java类User,UserController。 |
| 3 | 在jsp子文件夹下创建视图文件user.jsp,users.jsp。 |
| 4 | 最后一步是创建源文件和配置文件的内容并导出应用程序,如下所述。 |
User.java
package com.iowiki;
public class User {
   private String username;
   private String password;
   private String address;
   private boolean receivePaper;
   private String [] favoriteFrameworks;
   private String gender;
   private String favoriteNumber;
   public String getUsername() {
      return username;
   }
   public void setUsername(String username) {
      this.username = username;
   }
   public String getPassword() {
      return password;
   }
   public void setPassword(String password) {
      this.password = password;
   }
   public String getAddress() {
      return address;
   }
   public void setAddress(String address) {
      this.address = address;
   }
   public boolean isReceivePaper() {
      return receivePaper;
   }
   public void setReceivePaper(boolean receivePaper) {
      this.receivePaper = receivePaper;
   }
   public String[] getFavoriteFrameworks() {
      return favoriteFrameworks;
   }
   public void setFavoriteFrameworks(String[] favoriteFrameworks) {
      this.favoriteFrameworks = favoriteFrameworks;
   }
   public String getGender() {
      return gender;
   }
   public void setGender(String gender) {
      this.gender = gender;
   }
   public String getFavoriteNumber() {
      return favoriteNumber;
   }
   public void setFavoriteNumber(String favoriteNumber) {
      this.favoriteNumber = favoriteNumber;
   }
}
UserController.java)/h2>
package com.iowiki;
import java.util.ArrayList;
import java.util.List;
import org.springframework.stereotype.Controller;
import org.springframework.web.bind.annotation.ModelAttribute;
import org.springframework.web.bind.annotation.RequestMapping;
import org.springframework.web.bind.annotation.RequestMethod;
import org.springframework.web.servlet.ModelAndView;
import org.springframework.ui.ModelMap;
@Controller
public class UserController {
   @RequestMapping(value = "/user", method = RequestMethod.GET)
   public ModelAndView user() {
      User user = new User();
	  user.setFavoriteFrameworks((new String []{"Spring MVC","Struts 2"}));
      user.setGender("M");
	  ModelAndView modelAndView = new ModelAndView("user", "command", user);
	  return modelAndView;
   }
   @RequestMapping(value = "/addUser", method = RequestMethod.POST)
   public String addUser(@ModelAttribute("SpringWeb")User user,
      ModelMap model) {
      model.addAttribute("username", user.getUsername());
      model.addAttribute("password", user.getPassword());
      model.addAttribute("address", user.getAddress());
      model.addAttribute("receivePaper", user.isReceivePaper());
      model.addAttribute("favoriteFrameworks", user.getFavoriteFrameworks());
      model.addAttribute("gender", user.getGender());
      model.addAttribute("favoriteNumber", user.getFavoriteNumber());
      return "users";
   }
   @ModelAttribute("webFrameworkList")
   public List<String> getWebFrameworkList() {
      List<String> webFrameworkList = new ArrayList<String>();
      webFrameworkList.add("Spring MVC");
      webFrameworkList.add("Struts 1");
      webFrameworkList.add("Struts 2");
      webFrameworkList.add("Apache Wicket");
      return webFrameworkList;
   }
   @ModelAttribute("numbersList")
   public List<String> getNumbersList() {
      List<String> numbersList = new ArrayList<String>();
      numbersList.add("1");
      numbersList.add("2");
      numbersList.add("3");
      numbersList.add("4");
      return numbersList;
   }
}
package com.iowiki;
import java.util.ArrayList;
import java.util.List;
import org.springframework.stereotype.Controller;
import org.springframework.web.bind.annotation.ModelAttribute;
import org.springframework.web.bind.annotation.RequestMapping;
import org.springframework.web.bind.annotation.RequestMethod;
import org.springframework.web.servlet.ModelAndView;
import org.springframework.ui.ModelMap;
@Controller
public class UserController {
@RequestMapping(value = "/user", method = RequestMethod.GET)
public ModelAndView user() {
User user = new User();
user.setFavoriteFrameworks((new String []{"Spring MVC","Struts 2"}));
user.setGender("M");
ModelAndView modelAndView = new ModelAndView("user", "command", user);
return modelAndView;
}
@RequestMapping(value = "/addUser", method = RequestMethod.POST)
public String addUser(@ModelAttribute("SpringWeb")User user,
ModelMap model) {
model.addAttribute("username", user.getUsername());
model.addAttribute("password", user.getPassword());
model.addAttribute("address", user.getAddress());
model.addAttribute("receivePaper", user.isReceivePaper());
model.addAttribute("favoriteFrameworks", user.getFavoriteFrameworks());
model.addAttribute("gender", user.getGender());
model.addAttribute("favoriteNumber", user.getFavoriteNumber());
return "users";
}
@ModelAttribute("webFrameworkList")
public List<String> getWebFrameworkList() {
List<String> webFrameworkList = new ArrayList<String>();
webFrameworkList.add("Spring MVC");
webFrameworkList.add("Struts 1");
webFrameworkList.add("Struts 2");
webFrameworkList.add("Apache Wicket");
return webFrameworkList;
}
@ModelAttribute("numbersList")
public List<String> getNumbersList() {
List<String> numbersList = new ArrayList<String>();
numbersList.add("1");
numbersList.add("2");
numbersList.add("3");
numbersList.add("4");
return numbersList;
}
}
这里,对于第一个服务方法user(),我们在ModelAndView对象中传递了一个名为“command”的空白User对象,因为如果使用
因此,当调用user()方法时,它返回user.jsp视图。将针对HelloWeb/addUser URL上的POST方法调用第二个服务方法addUser() 。 您将根据提交的信息准备模型对象。 最后,将从service方法返回“users”视图,这将导致呈现users.jsp。
user.jsp
<%@taglib uri = "http://www.springframework.org/tags/form" prefix = "form"%>
<html>
   <head>
      <title>Spring MVC Form Handling</title>
   </head>
   <body>
      <h2>User Information</h2>
      <form:form method = "POST" action = "/HelloWeb/addUser">
         <table>
            <tr>
               <td><form:label path = "username">User Name</form:label></td>
               <td><form:input path = "username" /></td>
            </tr>
            <tr>
               <td><form:label path = "password">Age</form:label></td>
               <td><form:password path = "password" /></td>
            </tr>
            <tr>
               <td><form:label path = "address">Address</form:label></td>
               <td><form:textarea path = "address" rows = "5" cols = "30" /></td>
            </tr>
            <tr>
               <td><form:label path = "receivePaper">Subscribe Newsletter</form:label></td>
               <td><form:checkbox path = "receivePaper" /></td>
            </tr>
            <tr>
               <td><form:label path = "favoriteFrameworks">Favorite Web Frameworks</form:label></td>
               <td><form:checkboxes items = "${webFrameworkList}" path = "favoriteFrameworks" /></td>
            </tr>
            <tr>
               <td><form:label path = "gender">Gender</form:label></td>
               <td>
                  <form:radiobutton path = "gender" value = "M" label = "Male" />
                  <form:radiobutton path = "gender" value = "F" label = "Female" />
               </td>
            </tr>
            <tr>
               <td><form:label path = "favoriteNumber">Favorite Number</form:label></td>
               <td>
                  <form:radiobuttons path = "favoriteNumber" items = "${numbersList}" />
               </td>
            </tr>
            <tr>
               <td colspan = "2">
                  <input type = "submit" value = "Submit"/>
               </td>
            </tr>
         </table>
      </form:form>
   </body>
</html>
在这里,我们使用《form:radiobuttons /》标签来呈现HTML单选按钮。 例如 -
<form:radiobuttons path = "favoriteNumber" items="${numbersList}" />
它将呈现以下HTML内容。
<span>
   <input id = "favoriteNumber1" name = "favoriteNumber" type = "radio" value = "1"/>
   <label for = "favoriteNumber1">1</label>
</span>
<span>
   <input id = "favoriteNumber2" name = "favoriteNumber" type = "radio" value = "2"/>
   <label for = "favoriteNumber2">2</label>
</span>
<span>
   <input id = "favoriteNumber3" name = "favoriteNumber" type = "radio" value = "3"/>
   <label for = "favoriteNumber3">3</label>
</span>
<span>
   <input id = "favoriteNumber4" name = "favoriteNumber" type = "radio" value = "4"/>
   <label for = "favoriteNumber4">4</label>
</span>
users.jsp
<%@taglib uri = "http://www.springframework.org/tags/form" prefix = "form"%>
<html>
   <head>
      <title>Spring MVC Form Handling</title>
   </head>
   <body>
      <h2>Submitted User Information</h2>
      <table>
         <tr>
            <td>Username</td>
            <td>${username}</td>
         </tr>
         <tr>
            <td>Password</td>
            <td>${password}</td>
         </tr>
         <tr>
            <td>Address</td>
            <td>${address}</td>
         </tr>
         <tr>
            <td>Subscribed to Newsletter</td>
            <td>${receivePaper}</td>
         </tr>
         <tr>
            <td>Favorite Web Frameworks</td>
            <td> <% String[] favoriteFrameworks = (String[])request.getAttribute("favoriteFrameworks");
               for(String framework: favoriteFrameworks) {
                  out.println(framework);
               }
            %></td>
         </tr>
         <tr>
            <td>Gender</td>
            <td>${(gender=="M"? "Male" : "Female")}</td>
         </tr>
         <tr>
            <td>Favourite Number</td>
            <td>${favoriteNumber}</td>
         </tr>
      </table>
   </body>
</html>
完成创建源文件和配置文件后,导出应用程序。 右键单击您的应用程序,使用Export → WAR File选项并将HelloWeb.war文件保存在Tomcat的webapps文件夹中。
现在,启动Tomcat服务器并确保您可以使用标准浏览器从webapps文件夹访问其他网页。 尝试使用以下URL - http://localhost:8080/HelloWeb/user ,如果Spring Web Application的一切正常,我们将看到以下屏幕。
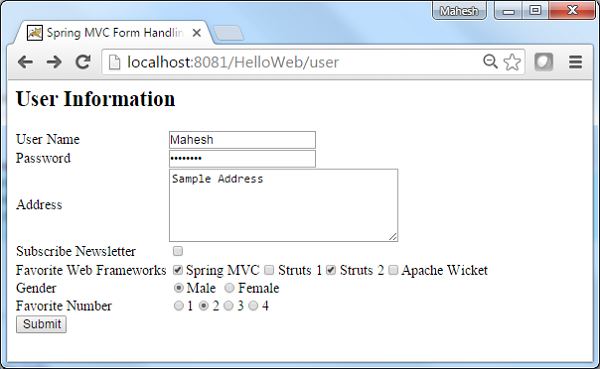
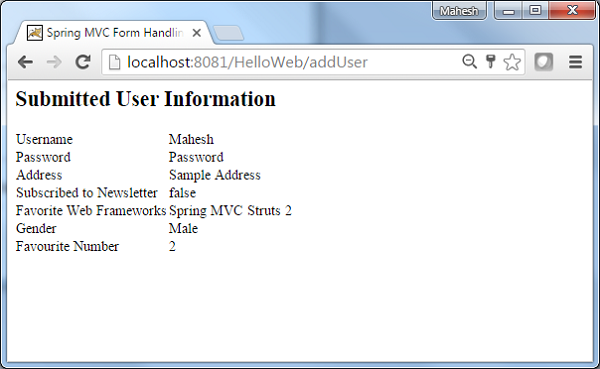
提交所需信息后,单击提交按钮以提交表单。 如果您的Spring Web应用程序一切正常,我们将看到以下屏幕。
Spring MVC - Dropdown Example
以下示例描述了如何使用Spring Web MVC框架在表单中使用Dropdown。 首先,让我们使用一个有效的Eclipse IDE,并坚持以下步骤,使用Spring Web Framework开发基于动态表单的Web应用程序。
| 步 | 描述 |
|---|---|
| 1 | 在Spring MVC - Hello World章节中解释,在com.iowiki包下创建一个名为HelloWeb的项目。 |
| 2 | 在com.iowikipackage下创建Java类User,UserController。 |
| 3 | 在jsp子文件夹下创建视图文件user.jsp,users.jsp。 |
| 4 | 最后一步是创建源文件和配置文件的内容并导出应用程序,如下所述。 |
User.java
package com.iowiki;
public class User {
   private String username;
   private String password;
   private String address;
   private boolean receivePaper;
   private String [] favoriteFrameworks;
   private String gender;
   private String favoriteNumber;
   private String country;
   public String getUsername() {
      return username;
   }
   public void setUsername(String username) {
      this.username = username;
   }
   public String getPassword() {
      return password;
   }
   public void setPassword(String password) {
      this.password = password;
   }
   public String getAddress() {
      return address;
   }
   public void setAddress(String address) {
      this.address = address;
   }
   public boolean isReceivePaper() {
      return receivePaper;
   }
   public void setReceivePaper(boolean receivePaper) {
      this.receivePaper = receivePaper;
   }
   public String[] getFavoriteFrameworks() {
      return favoriteFrameworks;
   }
   public void setFavoriteFrameworks(String[] favoriteFrameworks) {
      this.favoriteFrameworks = favoriteFrameworks;
   }
   public String getGender() {
      return gender;
   }
   public void setGender(String gender) {
      this.gender = gender;
   }
   public String getFavoriteNumber() {
      return favoriteNumber;
   }
   public void setFavoriteNumber(String favoriteNumber) {
      this.favoriteNumber = favoriteNumber;
   }
   public String getCountry() {
      return country;
   }
   public void setCountry(String country) {
      this.country = country;
   }
}
UserController.java)/h2>
package com.iowiki;
import java.util.ArrayList;
import java.util.HashMap;
import java.util.List;
import java.util.Map;
import org.springframework.stereotype.Controller;
import org.springframework.web.bind.annotation.ModelAttribute;
import org.springframework.web.bind.annotation.RequestMapping;
import org.springframework.web.bind.annotation.RequestMethod;
import org.springframework.web.servlet.ModelAndView;
import org.springframework.ui.ModelMap;
@Controller
public class UserController {
   @RequestMapping(value = "/user", method = RequestMethod.GET)
   public ModelAndView user() {
      User user = new User();
	  user.setFavoriteFrameworks((new String []{"Spring MVC","Struts 2"}));
      user.setGender("M");
	  ModelAndView modelAndView = new ModelAndView("user", "command", user);
	  return modelAndView;
   }
   @RequestMapping(value = "/addUser", method = RequestMethod.POST)
   public String addUser(@ModelAttribute("SpringWeb")User user,
      ModelMap model) {
      model.addAttribute("username", user.getUsername());
      model.addAttribute("password", user.getPassword());
      model.addAttribute("address", user.getAddress());
      model.addAttribute("receivePaper", user.isReceivePaper());
	  model.addAttribute("favoriteFrameworks", user.getFavoriteFrameworks());
      model.addAttribute("gender", user.getGender());
      model.addAttribute("favoriteNumber", user.getFavoriteNumber());
      model.addAttribute("country", user.getCountry());
      return "users";
   }
   @ModelAttribute("webFrameworkList")
   public List<String> getWebFrameworkList() {
      List<String> webFrameworkList = new ArrayList<String>();
      webFrameworkList.add("Spring MVC");
      webFrameworkList.add("Struts 1");
      webFrameworkList.add("Struts 2");
      webFrameworkList.add("Apache Wicket");
      return webFrameworkList;
   }
   @ModelAttribute("numbersList")
   public List<String> getNumbersList() {
      List<String> numbersList = new ArrayList<String>();
      numbersList.add("1");
      numbersList.add("2");
      numbersList.add("3");
      numbersList.add("4");
      return numbersList;
   }
   @ModelAttribute("countryList")
   public Map<String, String> getCountryList() {
      Map<String, String> countryList = new HashMap<String, String>();
      countryList.put("US", "United States");
      countryList.put("CH", "China");
      countryList.put("SG", "Singapore");
      countryList.put("MY", "Malaysia");
      return countryList;
   }
}
package com.iowiki;
import java.util.ArrayList;
import java.util.HashMap;
import java.util.List;
import java.util.Map;
import org.springframework.stereotype.Controller;
import org.springframework.web.bind.annotation.ModelAttribute;
import org.springframework.web.bind.annotation.RequestMapping;
import org.springframework.web.bind.annotation.RequestMethod;
import org.springframework.web.servlet.ModelAndView;
import org.springframework.ui.ModelMap;
@Controller
public class UserController {
@RequestMapping(value = "/user", method = RequestMethod.GET)
public ModelAndView user() {
User user = new User();
user.setFavoriteFrameworks((new String []{"Spring MVC","Struts 2"}));
user.setGender("M");
ModelAndView modelAndView = new ModelAndView("user", "command", user);
return modelAndView;
}
@RequestMapping(value = "/addUser", method = RequestMethod.POST)
public String addUser(@ModelAttribute("SpringWeb")User user,
ModelMap model) {
model.addAttribute("username", user.getUsername());
model.addAttribute("password", user.getPassword());
model.addAttribute("address", user.getAddress());
model.addAttribute("receivePaper", user.isReceivePaper());
model.addAttribute("favoriteFrameworks", user.getFavoriteFrameworks());
model.addAttribute("gender", user.getGender());
model.addAttribute("favoriteNumber", user.getFavoriteNumber());
model.addAttribute("country", user.getCountry());
return "users";
}
@ModelAttribute("webFrameworkList")
public List<String> getWebFrameworkList() {
List<String> webFrameworkList = new ArrayList<String>();
webFrameworkList.add("Spring MVC");
webFrameworkList.add("Struts 1");
webFrameworkList.add("Struts 2");
webFrameworkList.add("Apache Wicket");
return webFrameworkList;
}
@ModelAttribute("numbersList")
public List<String> getNumbersList() {
List<String> numbersList = new ArrayList<String>();
numbersList.add("1");
numbersList.add("2");
numbersList.add("3");
numbersList.add("4");
return numbersList;
}
@ModelAttribute("countryList")
public Map<String, String> getCountryList() {
Map<String, String> countryList = new HashMap<String, String>();
countryList.put("US", "United States");
countryList.put("CH", "China");
countryList.put("SG", "Singapore");
countryList.put("MY", "Malaysia");
return countryList;
}
}
这里,对于第一个服务方法user() ,我们在ModelAndView对象中传递了一个名为“command”的空白User对象,因为如果使用“form:form”,spring框架需要一个名为“command”的对象。 JSP文件中的标记。 因此,当调用user()方法时,它返回user.jsp视图。
将针对HelloWeb/addUser URL上的POST方法调用第二个服务方法addUser() 。 您将根据提交的信息准备模型对象。 最后,将从service方法返回“users”视图,这将导致呈现users.jsp。
user.jsp
<%@taglib uri = "http://www.springframework.org/tags/form" prefix = "form"%>
<html>
   <head>
      <title>Spring MVC Form Handling</title>
   </head>
   <body>
   <h2>User Information</h2>
      <form:form method = "POST" action = "/HelloWeb/addUser">
         <table>
            <tr>
               <td><form:label path = "username">User Name</form:label></td>
               <td><form:input path = "username" /></td>
            </tr>
            <tr>
               <td><form:label path = "password">Age</form:label></td>
               <td><form:password path = "password" /></td>
            </tr>
            <tr>
               <td><form:label path = "address">Address</form:label></td>
               <td><form:textarea path = "address" rows = "5" cols = "30" /></td>
            </tr>
            <tr>
               <td><form:label path = "receivePaper">Subscribe Newsletter</form:label></td>
               <td><form:checkbox path = "receivePaper" /></td>
            </tr>
            <tr>
               <td><form:label path = "favoriteFrameworks">Favorite Web Frameworks</form:label></td>
               <td><form:checkboxes items = "${webFrameworkList}" path = "favoriteFrameworks" /></td>
            </tr>
            <tr>
               <td><form:label path = "gender">Gender</form:label></td>
               <td>
                  <form:radiobutton path = "gender" value = "M" label = "Male" />
                  <form:radiobutton path = "gender" value = "F" label = "Female" />
               </td>
            </tr>
            <tr>
               <td><form:label path = "favoriteNumber">Favorite Number</form:label></td>
               <td>
                  <form:radiobuttons path = "favoriteNumber" items = "${numbersList}" />
               </td>
            </tr>
            <tr>
               <td><form:label path = "country">Country</form:label></td>
               <td>
                  <form:select path = "country">
                     <form:option value = "NONE" label = "Select"/>
                     <form:options items = "${countryList}" />
                  </form:select>
               </td>
            </tr>
            <tr>
               <td colspan = "2">
                  <input type = "submit" value = "Submit"/>
               </td>
            </tr>
         </table>
      </form:form>
   </body>
</html>
在这里,我们使用《form:select /》 , 《form:option /》和《form:options /》标签来呈现HTML选择。 例如 -
<form:select path = "country">
   <form:option value = "NONE" label = "Select"/>
   <form:options items = "${countryList}" />
</form:select>
它将呈现以下HTML内容。
<select id = "country" name = "country">
   <option value = "NONE">Select</option>
   <option value = "US">United States</option>
   <option value = "CH">China</option>
   <option value = "MY">Malaysia</option>
   <option value = "SG">Singapore</option>
</select>
users.jsp
<%@taglib uri = "http://www.springframework.org/tags/form" prefix = "form"%>
<html>
   <head>
      <title>Spring MVC Form Handling</title>
   </head>
   <body>
      <h2>Submitted User Information</h2>
      <table>
         <tr>
            <td>Username</td>
            <td>${username}</td>
         </tr>
         <tr>
            <td>Password</td>
            <td>${password}</td>
         </tr>
         <tr>
            <td>Address</td>
            <td>${address}</td>
         </tr>
         <tr>
            <td>Subscribed to Newsletter</td>
            <td>${receivePaper}</td>
         </tr>
         <tr>
            <td>Favorite Web Frameworks</td>
            <td> <% String[] favoriteFrameworks = (String[])request.getAttribute("favoriteFrameworks");
               for(String framework: favoriteFrameworks) {
                  out.println(framework);
               }
            %></td>
         </tr>
         <tr>
            <td>Gender</td>
            <td>${(gender=="M"? "Male" : "Female")}</td>
         </tr>
         <tr>
            <td>Favourite Number</td>
            <td>${favoriteNumber}</td>
         </tr>
         <tr>
            <td>Country</td>
            <td>${country}</td>
         </tr>
      </table>
   </body>
</html>
完成创建源文件和配置文件后,导出应用程序。 右键单击您的应用程序,使用Export → WAR File选项并将HelloWeb.war文件保存在Tomcat的webapps文件夹中。
现在,启动Tomcat服务器并确保您能够使用标准浏览器从webapps文件夹访问其他网页。 尝试使用URL - http://localhost:8080/HelloWeb/user ,如果Spring Web Application的一切正常,我们将看到以下屏幕。
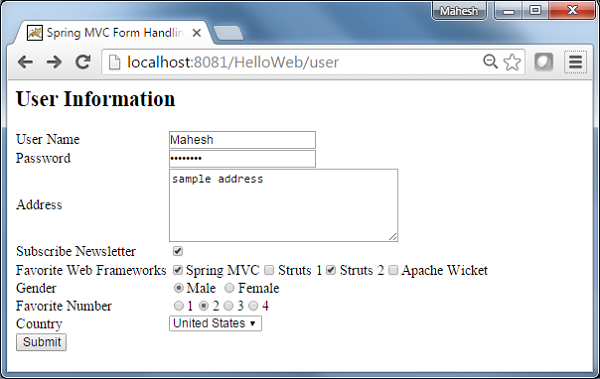
提交所需信息后,单击提交按钮以提交表单。 如果Spring Web Application的一切正常,您应该看到以下屏幕。
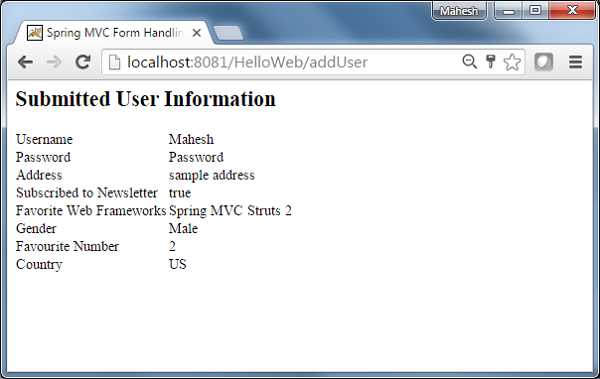
Spring MVC - Listbox Example
以下示例显示如何使用Spring Web MVC框架在表单中使用Listbox。 首先,让我们使用一个可用的Eclipse IDE,并按照后续步骤使用Spring Web Framework开发基于动态表单的Web应用程序。
| 步 | 描述 |
|---|---|
| 1 | 在Spring MVC - Hello World章节中解释,在com.iowiki包下创建一个名为HelloWeb的项目。 |
| 2 | 在com.iowikipackage下创建Java类User,UserController。 |
| 3 | 在jsp子文件夹下创建视图文件user.jsp,users.jsp。 |
| 4 | 最后一步是创建源文件和配置文件的内容并导出应用程序,如下所述。 |
User.java
package com.iowiki;
public class User {
   private String username;
   private String password;
   private String address;
   private boolean receivePaper;
   private String [] favoriteFrameworks;
   private String gender;
   private String favoriteNumber;
   private String country;
   private String [] skills;
   public String getUsername() {
      return username;
   }
   public void setUsername(String username) {
      this.username = username;
   }
   public String getPassword() {
      return password;
   }
   public void setPassword(String password) {
      this.password = password;
   }
   public String getAddress() {
      return address;
   }
   public void setAddress(String address) {
      this.address = address;
   }
   public boolean isReceivePaper() {
      return receivePaper;
   }
   public void setReceivePaper(boolean receivePaper) {
      this.receivePaper = receivePaper;
   }
   public String[] getFavoriteFrameworks() {
      return favoriteFrameworks;
   }
   public void setFavoriteFrameworks(String[] favoriteFrameworks) {
      this.favoriteFrameworks = favoriteFrameworks;
   }
   public String getGender() {
      return gender;
   }
   public void setGender(String gender) {
      this.gender = gender;
   }
   public String getFavoriteNumber() {
      return favoriteNumber;
   }
   public void setFavoriteNumber(String favoriteNumber) {
      this.favoriteNumber = favoriteNumber;
   }
   public String getCountry() {
      return country;
   }
   public void setCountry(String country) {
      this.country = country;
   }
   public String[] getSkills() {
      return skills;
   }
   public void setSkills(String[] skills) {
      this.skills = skills;
   }
}
UserController.java)/h2>
package com.iowiki;
import java.util.ArrayList;
import java.util.HashMap;
import java.util.List;
import java.util.Map;
import org.springframework.stereotype.Controller;
import org.springframework.web.bind.annotation.ModelAttribute;
import org.springframework.web.bind.annotation.RequestMapping;
import org.springframework.web.bind.annotation.RequestMethod;
import org.springframework.web.servlet.ModelAndView;
import org.springframework.ui.ModelMap;
@Controller
public class UserController {
   @RequestMapping(value = "/user", method = RequestMethod.GET)
   public ModelAndView user() {
      User user = new User();
	  user.setFavoriteFrameworks((new String []{"Spring MVC","Struts 2"}));
      user.setGender("M");
	  ModelAndView modelAndView = new ModelAndView("user", "command", user);
	  return modelAndView;
   }
   @RequestMapping(value = "/addUser", method = RequestMethod.POST)
   public String addUser(@ModelAttribute("SpringWeb")User user,
      ModelMap model) {
      model.addAttribute("username", user.getUsername());
      model.addAttribute("password", user.getPassword());
      model.addAttribute("address", user.getAddress());
      model.addAttribute("receivePaper", user.isReceivePaper());
	  model.addAttribute("favoriteFrameworks", user.getFavoriteFrameworks());
      model.addAttribute("gender", user.getGender());
      model.addAttribute("favoriteNumber", user.getFavoriteNumber());
      model.addAttribute("country", user.getCountry());
      model.addAttribute("skills", user.getSkills());
      return "users";
   }
   @ModelAttribute("webFrameworkList")
   public List<String> getWebFrameworkList() {
      List<String> webFrameworkList = new ArrayList<String>();
      webFrameworkList.add("Spring MVC");
      webFrameworkList.add("Struts 1");
      webFrameworkList.add("Struts 2");
      webFrameworkList.add("Apache Wicket");
      return webFrameworkList;
   }
   @ModelAttribute("numbersList")
   public List<String> getNumbersList() {
      List<String> numbersList = new ArrayList<String>();
      numbersList.add("1");
      numbersList.add("2");
      numbersList.add("3");
      numbersList.add("4");
      return numbersList;
   }
   @ModelAttribute("countryList")
   public Map<String, String> getCountryList() {
      Map<String, String> countryList = new HashMap<String, String>();
      countryList.put("US", "United States");
      countryList.put("CH", "China");
      countryList.put("SG", "Singapore");
      countryList.put("MY", "Malaysia");
      return countryList;
   }
   @ModelAttribute("skillsList")
   public Map<String, String> getSkillsList() {
      Map<String, String> skillList = new HashMap<String, String>();
      skillList.put("Hibernate", "Hibernate");
      skillList.put("Spring", "Spring");
      skillList.put("Apache Wicket", "Apache Wicket");
      skillList.put("Struts", "Struts");
      return skillList;
   }
}
package com.iowiki;
import java.util.ArrayList;
import java.util.HashMap;
import java.util.List;
import java.util.Map;
import org.springframework.stereotype.Controller;
import org.springframework.web.bind.annotation.ModelAttribute;
import org.springframework.web.bind.annotation.RequestMapping;
import org.springframework.web.bind.annotation.RequestMethod;
import org.springframework.web.servlet.ModelAndView;
import org.springframework.ui.ModelMap;
@Controller
public class UserController {
@RequestMapping(value = "/user", method = RequestMethod.GET)
public ModelAndView user() {
User user = new User();
user.setFavoriteFrameworks((new String []{"Spring MVC","Struts 2"}));
user.setGender("M");
ModelAndView modelAndView = new ModelAndView("user", "command", user);
return modelAndView;
}
@RequestMapping(value = "/addUser", method = RequestMethod.POST)
public String addUser(@ModelAttribute("SpringWeb")User user,
ModelMap model) {
model.addAttribute("username", user.getUsername());
model.addAttribute("password", user.getPassword());
model.addAttribute("address", user.getAddress());
model.addAttribute("receivePaper", user.isReceivePaper());
model.addAttribute("favoriteFrameworks", user.getFavoriteFrameworks());
model.addAttribute("gender", user.getGender());
model.addAttribute("favoriteNumber", user.getFavoriteNumber());
model.addAttribute("country", user.getCountry());
model.addAttribute("skills", user.getSkills());
return "users";
}
@ModelAttribute("webFrameworkList")
public List<String> getWebFrameworkList() {
List<String> webFrameworkList = new ArrayList<String>();
webFrameworkList.add("Spring MVC");
webFrameworkList.add("Struts 1");
webFrameworkList.add("Struts 2");
webFrameworkList.add("Apache Wicket");
return webFrameworkList;
}
@ModelAttribute("numbersList")
public List<String> getNumbersList() {
List<String> numbersList = new ArrayList<String>();
numbersList.add("1");
numbersList.add("2");
numbersList.add("3");
numbersList.add("4");
return numbersList;
}
@ModelAttribute("countryList")
public Map<String, String> getCountryList() {
Map<String, String> countryList = new HashMap<String, String>();
countryList.put("US", "United States");
countryList.put("CH", "China");
countryList.put("SG", "Singapore");
countryList.put("MY", "Malaysia");
return countryList;
}
@ModelAttribute("skillsList")
public Map<String, String> getSkillsList() {
Map<String, String> skillList = new HashMap<String, String>();
skillList.put("Hibernate", "Hibernate");
skillList.put("Spring", "Spring");
skillList.put("Apache Wicket", "Apache Wicket");
skillList.put("Struts", "Struts");
return skillList;
}
}
这里,对于第一个服务方法user() ,我们在ModelAndView对象中传递了一个名为“command”的空白User对象,因为如果使用“form:form”,spring框架需要一个名为“command”的对象。 JSP文件中的标记。 因此,当调用user()方法时,它将返回user.jsp视图。
将针对HelloWeb/addUser URL上的POST方法调用第二个服务方法addUser() 。 您将根据提交的信息准备模型对象。 最后,将从service方法返回“users”视图,这将导致呈现users.jsp。
user.jsp
<%@taglib uri = "http://www.springframework.org/tags/form" prefix = "form"%>
<html>
   <head>
      <title>Spring MVC Form Handling</title>
   </head>
   <body>
      <h2>User Information</h2>
      <form:form method = "POST" action = "/HelloWeb/addUser">
         <table>
            <tr>
               <td><form:label path = "username">User Name</form:label></td>
               <td><form:input path = "username" /></td>
            </tr>
            <tr>
               <td><form:label path = "password">Age</form:label></td>
               <td><form:password path = "password" /></td>
            </tr>
            <tr>
               <td><form:label path = "address">Address</form:label></td>
               <td><form:textarea path = "address" rows = "5" cols = "30" /></td>
            </tr>
            <tr>
               <td><form:label path = "receivePaper">Subscribe Newsletter</form:label></td>
               <td><form:checkbox path = "receivePaper" /></td>
            </tr>
            <tr>
               <td><form:label path = "favoriteFrameworks">Favorite Web Frameworks</form:label></td>
               <td><form:checkboxes items = "${webFrameworkList}" path = "favoriteFrameworks" /></td>
            </tr>
            <tr>
               <td><form:label path = "gender">Gender</form:label></td>
               <td>
                  <form:radiobutton path = "gender" value = "M" label = "Male" />
                  <form:radiobutton path = "gender" value = "F" label = "Female" />
               </td>
            </tr>
            <tr>
               <td><form:label path = "favoriteNumber">Favorite Number</form:label></td>
               <td>
                  <form:radiobuttons path = "favoriteNumber" items = "${numbersList}" />
               </td>
            </tr>
            <tr>
               <td><form:label path = "country">Country</form:label></td>
               <td>
                  <form:select path = "country">
                     <form:option value = "NONE" label = "Select"/>
                     <form:options items = "${countryList}" />
                  </form:select>
               </td>
            </tr>
            <tr>
               <td><form:label path = "skills">Skills</form:label></td>
               <td>
                  <form:select path = "skills" items = "${skillsList}"
                     multiple = "true" />
               </td>
            </tr>
            <tr>
               <td colspan = "2">
                  <input type = "submit" value = "Submit"/>
               </td>
            </tr>
         </table>
      </form:form>
   </body>
</html>
在这里,我们使用《form:select /》标签,使用属性multiple=true来呈现HTML列表框。 例如 -
<form:select path = "skills" items = "${skillsList}" multiple = "true" />
它将呈现以下HTML内容。
<select id = "skills" name = "skills" multiple = "multiple">
   <option value = "Struts">Struts</option>
   <option value = "Hibernate">Hibernate</option>
   <option value = "Apache Wicket">Apache Wicket</option>
   <option value = "Spring">Spring</option>
</select>
<input type = "hidden" name = "_skills" value = "1"/>
users.jsp
<%@taglib uri = "http://www.springframework.org/tags/form" prefix = "form"%>
<html>
   <head>
      <title>Spring MVC Form Handling</title>
   </head>
   <body>
      <h2>Submitted User Information</h2>
      <table>
         <tr>
            <td>Username</td>
            <td>${username}</td>
         </tr>
         <tr>
            <td>Password</td>
            <td>${password}</td>
         </tr>
         <tr>
            <td>Address</td>
            <td>${address}</td>
         </tr>
         <tr>
            <td>Subscribed to Newsletter</td>
            <td>${receivePaper}</td>
         </tr>
         <tr>
            <td>Favorite Web Frameworks</td>
            <td> <% String[] favoriteFrameworks = (String[])request.getAttribute("favoriteFrameworks");
               for(String framework: favoriteFrameworks) {
                  out.println(framework);
               }
            %></td>
         </tr>
         <tr>
            <td>Gender</td>
            <td>${(gender=="M"? "Male" : "Female")}</td>
         </tr>
         <tr>
            <td>Favourite Number</td>
            <td>${favoriteNumber}</td>
         </tr>
         <tr>
            <td>Country</td>
            <td>${country}</td>
         </tr>
         <tr>
            <td>Skills</td>
            <td> <% String[] skills = (String[])request.getAttribute("skills");
            for(String skill: skills) {
               out.println(skill);
            }
            %></td>
         </tr>
      </table>
   </body>
</html>
完成创建源文件和配置文件后,导出应用程序。 右键单击您的应用程序,使用Export → WAR File选项并将HelloWeb.war文件保存在Tomcat的webapps文件夹中。
现在,启动Tomcat服务器并确保您可以使用标准浏览器从webapps文件夹访问其他网页。 尝试使用URL - http://localhost:8080/HelloWeb/user ,如果Spring Web Application的一切正常,我们将看到以下屏幕。
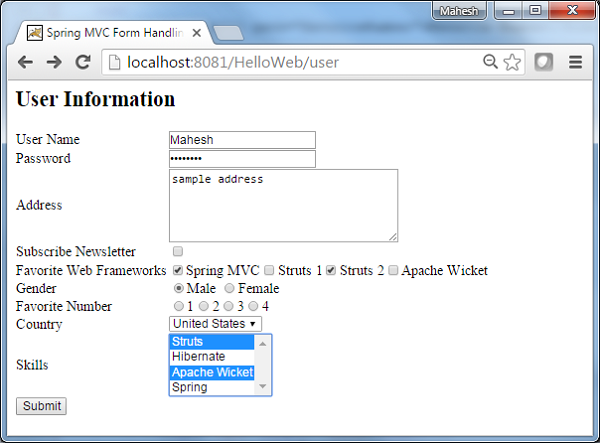
提交所需信息后,单击提交按钮以提交表单。 如果Spring Web Application的一切正常,您应该看到以下屏幕。
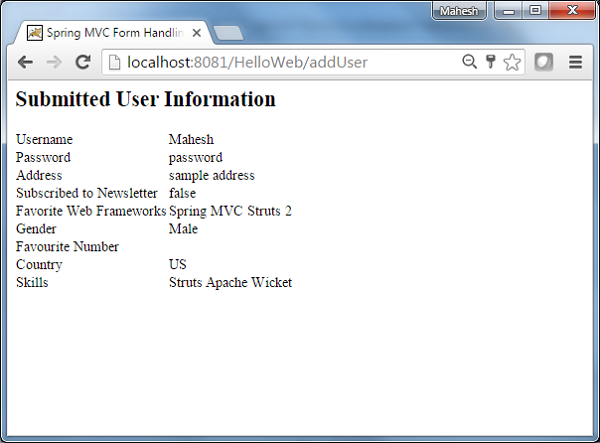
Spring MVC - Hidden Field Example
以下示例描述如何使用Spring Web MVC框架在表单中使用隐藏字段。 首先,让我们使用一个可用的Eclipse IDE,并考虑以下步骤,使用Spring Web Framework开发基于动态表单的Web应用程序。
| 步 | 描述 |
|---|---|
| 1 | 在Spring MVC - Hello World章节中解释,在com.iowiki包下创建一个名为HelloWeb的项目。 |
| 2 | 在com.iowiki包下创建Java类Student,StudentController。 |
| 3 | 在jsp子文件夹下创建视图文件student.jsp,result.jsp。 |
| 4 | 最后一步是创建源文件和配置文件的内容并导出应用程序,如下所述。 |
Student.java
package com.iowiki;
public class Student {
   private Integer age;
   private String name;
   private Integer id;
   public void setAge(Integer age) {
      this.age = age;
   }
   public Integer getAge() {
      return age;
   }
   public void setName(String name) {
      this.name = name;
   }
   public String getName() {
      return name;
   }
   public void setId(Integer id) {
      this.id = id;
   }
   public Integer getId() {
      return id;
   }
}
StudentController.java
package com.iowiki;
import org.springframework.stereotype.Controller;
import org.springframework.web.bind.annotation.ModelAttribute;
import org.springframework.web.bind.annotation.RequestMapping;
import org.springframework.web.bind.annotation.RequestMethod;
import org.springframework.web.servlet.ModelAndView;
import org.springframework.ui.ModelMap;
@Controller
public class StudentController {
   @RequestMapping(value = "/student", method = RequestMethod.GET)
   public ModelAndView student() {
      return new ModelAndView("student", "command", new Student());
   }
   @RequestMapping(value = "/addStudent", method = RequestMethod.POST)
   public String addStudent(@ModelAttribute("SpringWeb")Student student,
      ModelMap model) {
      model.addAttribute("name", student.getName());
      model.addAttribute("age", student.getAge());
      model.addAttribute("id", student.getId());
      return "result";
   }
}
这里,对于第一个服务方法student() ,我们在ModelAndView对象中传递了一个名为“command”的空白Studentobject ,因为如果你使用“form:form”,spring框架需要一个名为“command”的对象。 “JSP文件中的标记。 因此,当调用student()方法时,它返回student.jsp视图。
将针对HelloWeb/addStudent URL上的POST方法调用第二个服务方法addStudent() 。 您将根据提交的信息准备模型对象。 最后,将从service方法返回“result”视图,这将导致呈现result.jsp
student.jsp
<%@taglib uri = "http://www.springframework.org/tags/form" prefix = "form"%>
<html>
   <head>
      <title>Spring MVC Form Handling</title>
   </head>
   <body>
      <h2>Student Information</h2>
      <form:form method = "POST" action = "/HelloWeb/addStudent">
         <table>
            <tr>
              <td><form:label path = "name">Name</form:label></td>
              <td><form:input path = "name" /></td>
            </tr>
            <tr>
              <td><form:label path = "age">Age</form:label></td>
              <td><form:input path = "age" /></td>
            </tr>
            <tr>
              <td>< </td>
              <td><form:hidden path = "id" value = "1" /></td>
            </tr>
            <tr>
              <td colspan = "2">
                  <input type = "submit" value = "Submit"/>
              </td>
            </tr>
         </table>
      </form:form>
   </body>
</html>
在这里,我们使用《form:hidden /》标签来呈现HTML隐藏字段。
例如 -
<form:hidden path = "id" value = "1"/>
它将呈现以下HTML内容。
<input id = "id" name = "id" type = "hidden" value = "1"/>
result.jsp
<%@taglib uri = "http://www.springframework.org/tags/form" prefix = "form"%>
<html>
   <head>
      <title>Spring MVC Form Handling</title>
   </head>
   <body>
      <h2>Submitted Student Information</h2>
      <table>
         <tr>
            <td>Name</td>
            <td>${name}</td>
         </tr>
         <tr>
            <td>Age</td>
            <td>${age}</td>
         </tr>
         <tr>
            <td>ID</td>
            <td>${id}</td>
         </tr>
      </table>
   </body>
</html>
完成创建源文件和配置文件后,导出应用程序。 右键单击您的应用程序并使用Export → WAR File选项并将您的HelloWeb.war文件保存在Tomcat的webapps文件夹中。
现在启动Tomcat服务器,确保您能够使用标准浏览器从webapps文件夹访问其他网页。 尝试一个URL - http://localhost:8080/HelloWeb/student ,如果Spring Web Application的一切正常,我们将看到以下屏幕。
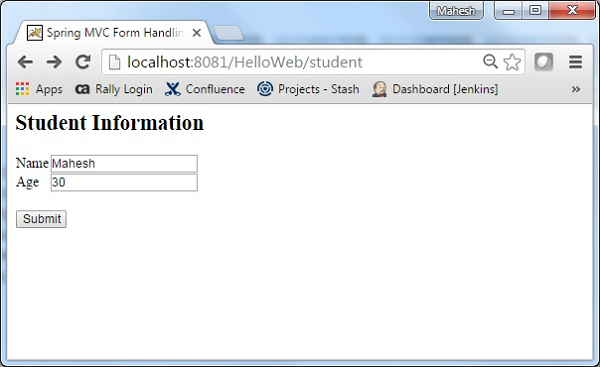
提交所需信息后,单击提交按钮以提交表单。 如果您的Spring Web应用程序一切正常,我们将看到以下屏幕。
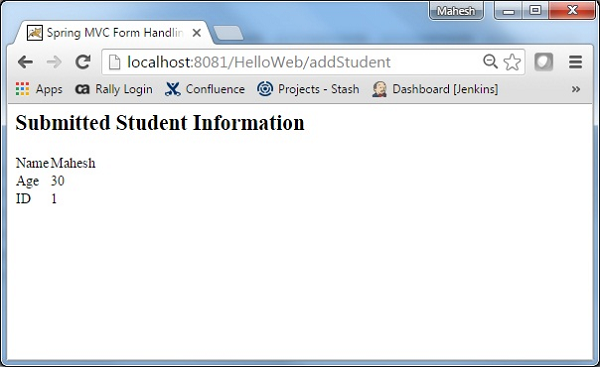
Spring MVC - Error Handling Example
以下示例说明如何使用Spring Web MVC Framework在表单中使用错误处理和验证器。 首先,让我们使用一个可用的Eclipse IDE,并考虑使用Spring Web Framework开发基于动态表单的Web应用程序的以下步骤。
| 步 | 描述 |
|---|---|
| 1 | 在Spring MVC - Hello World章节中解释,在com.iowiki包下创建一个名为HelloWeb的项目。 |
| 2 | 在com.iowiki包下创建Java类Student,StudentController和StudentValidator。 |
| 3 | 在jsp子文件夹下创建视图文件addStudent.jsp,result.jsp。 |
| 4 | 最后一步是创建源文件和配置文件的内容并导出应用程序,如下所述。 |
Student.java
package com.iowiki;
public class Student {
   private Integer age;
   private String name;
   private Integer id;
   public void setAge(Integer age) {
      this.age = age;
   }
   public Integer getAge() {
      return age;
   }
   public void setName(String name) {
      this.name = name;
   }
   public String getName() {
      return name;
   }
   public void setId(Integer id) {
      this.id = id;
   }
   public Integer getId() {
      return id;
   }
}
StudentValidator.java
package com.iowiki;
import org.springframework.validation.Errors;
import org.springframework.validation.ValidationUtils;
import org.springframework.validation.Validator;
public class StudentValidator implements Validator {
   @Override
   public boolean supports(Class<?> clazz) {
      return Student.class.isAssignableFrom(clazz);
   }
   @Override
   public void validate(Object target, Errors errors) {
      ValidationUtils.rejectIfEmptyOrWhitespace(errors,
         "name", "required.name","Field name is required.");
   }
}
StudentController.java
package com.iowiki;
import org.springframework.beans.factory.annotation.Autowired;
import org.springframework.beans.factory.annotation.Qualifier;
import org.springframework.stereotype.Controller;
import org.springframework.ui.Model;
import org.springframework.validation.BindingResult;
import org.springframework.validation.Validator;
import org.springframework.validation.annotation.Validated;
import org.springframework.web.bind.WebDataBinder;
import org.springframework.web.bind.annotation.InitBinder;
import org.springframework.web.bind.annotation.ModelAttribute;
import org.springframework.web.bind.annotation.RequestMapping;
import org.springframework.web.bind.annotation.RequestMethod;
import org.springframework.web.servlet.ModelAndView;
@Controller
public class StudentController {
   @Autowired
   @Qualifier("studentValidator")
   private Validator validator;
   @InitBinder
   private void initBinder(WebDataBinder binder) {
      binder.setValidator(validator);
   }
   @RequestMapping(value = "/addStudent", method = RequestMethod.GET)
   public ModelAndView student() {
      return new ModelAndView("addStudent", "command", new Student());
   }
   @ModelAttribute("student")
   public Student createStudentModel() {
      return new Student();
   }
   @RequestMapping(value = "/addStudent", method = RequestMethod.POST)
   public String addStudent(@ModelAttribute("student") @Validated Student student,
      BindingResult bindingResult, Model model) {
      if (bindingResult.hasErrors()) {
         return "addStudent";
      }
      model.addAttribute("name", student.getName());
      model.addAttribute("age", student.getAge());
      model.addAttribute("id", student.getId());
      return "result";
   }
}
HelloWeb-servlet.xml
<beans xmlns = "http://www.springframework.org/schema/beans"
   xmlns:context = "http://www.springframework.org/schema/context"
   xmlns:xsi = "http://www.w3.org/2001/XMLSchema-instance"
   xsi:schemaLocation = "
   http://www.springframework.org/schema/beans
   http://www.springframework.org/schema/beans/spring-beans-3.0.xsd
   http://www.springframework.org/schema/context
   http://www.springframework.org/schema/context/spring-context-3.0.xsd">
   <context:component-scan base-package = "com.iowiki" />
   <bean class = "org.springframework.web.servlet.view.InternalResourceViewResolver">
      <property name = "prefix" value = "/WEB-INF/jsp/" />
      <property name = "suffix" value = ".jsp" />
   </bean>
   <bean id = "studentValidator" class = "com.iowiki.StudentValidator" />
</beans>
这里,对于第一个服务方法student() ,我们在ModelAndView对象中传递了名为“command”的空白Studentobject,因为如果使用“form:form”标签,spring框架需要一个名为“command”的对象在您的JSP文件中。 因此,当调用student()方法时,它会返回addStudent.jsp视图。
将针对HelloWeb/addStudent URL上的POST方法调用第二个服务方法addStudent() 。 您将根据提交的信息准备模型对象。 最后,将从service方法返回“result”视图,这将导致呈现result.jsp。 如果使用验证器生成错误,则返回相同的视图“addStudent”,Spring会自动从视图中的BindingResult注入错误消息。
addStudent.jsp
<%@taglib uri = "http://www.springframework.org/tags/form" prefix = "form"%>
<html>
   <head>
      <title>Spring MVC Form Handling</title>
   </head>
   <style>
      .error {
         color: #ff0000;
      }
      .errorblock {
         color: #000;
         background-color: #ffEEEE;
         border: 3px solid #ff0000;
         padding: 8px;
         margin: 16px;
      }
   </style>
   <body>
      <h2>Student Information</h2>
      <form:form method = "POST" action = "/HelloWeb/addStudent" commandName = "student">
      <form:errors path = "*" cssClass = "errorblock" element = "div" />
         <table>
            <tr>
               <td><form:label path = "name">Name</form:label></td>
               <td><form:input path = "name" /></td>
               <td><form:errors path = "name" cssClass = "error" /></td>
            </tr>
            <tr>
               <td><form:label path = "age">Age</form:label></td>
               <td><form:input path = "age" /></td>
            </tr>
            <tr>
               <td><form:label path = "id">id</form:label></td>
               <td><form:input path = "id" /></td>
            </tr>
            <tr>
               <td colspan = "2">
               <input type = "submit" value = "Submit"/>
               </td>
            </tr>
         </table>
      </form:form>
   </body>
</html>
这里我们使用带有path =“*”的《form:errors /》标签来呈现错误消息。 例如
<form:errors path = "*" cssClass = "errorblock" element = "div" />
它将呈现所有输入验证的错误消息。
我们使用带有path =“name”的《form:errors /》标签来为name字段呈现错误消息。 例如
<form:errors path = "name" cssClass = "error" />
它将为名称字段验证呈现错误消息。
result.jsp
<%@taglib uri = "http://www.springframework.org/tags/form" prefix = "form"%>
<html>
   <head>
      <title>Spring MVC Form Handling</title>
   </head>
   <body>
      <h2>Submitted Student Information</h2>
      <table>
         <tr>
            <td>Name</td>
            <td>${name}</td>
         </tr>
         <tr>
            <td>Age</td>
            <td>${age}</td>
         </tr>
         <tr>
           <td>ID</td>
           <td>${id}</td>
         </tr>
      </table>
   </body>
</html>
完成创建源文件和配置文件后,导出应用程序。 右键单击您的应用程序,使用Export → WAR File选项并将HelloWeb.war文件保存在Tomcat的webapps文件夹中。
现在,启动Tomcat服务器并确保您可以使用标准浏览器从webapps文件夹访问其他网页。 尝试一个URL - http://localhost:8080/HelloWeb/addStudent ,如果Spring Web Application的一切正常,我们将看到以下屏幕。
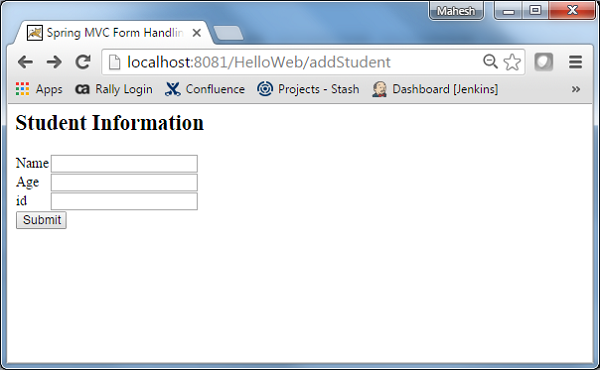
提交所需信息后,单击提交按钮以提交表单。 如果Spring Web Application的一切正常,您应该看到以下屏幕。
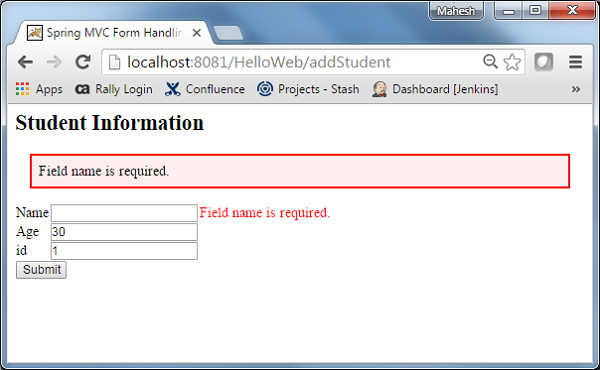
Spring MVC - File Upload Example
以下示例说明如何在使用Spring Web MVC框架的表单中使用文件上载控件。 首先,让我们使用一个可用的Eclipse IDE,并遵循以下步骤使用Spring Web Framework开发基于动态表单的Web应用程序。
| 步 | 描述 |
|---|---|
| 1 | 在Spring MVC - Hello World章节中解释,在com.iowiki包下创建一个名为HelloWeb的项目。 |
| 2 | 在com.iowiki包下创建Java类FileModel,FileUploadController。 |
| 3 | 在jsp子文件夹下创建视图文件fileUpload.jsp,success.jsp。 |
| 4 | 在WebContent子文件夹下创建文件夹temp 。 |
| 5 | 下载Apache Commons FileUpload库commons-fileupload.jar和Apache Commons IO库commons-io.jar。 把它们放在你的CLASSPATH中。 |
| 6 | 最后一步是创建源文件和配置文件的内容并导出应用程序,如下所述。 |
FileModel.java
package com.iowiki;
import org.springframework.web.multipart.MultipartFile;
public class FileModel {
   private MultipartFile file;
   public MultipartFile getFile() {
      return file;
   }
   public void setFile(MultipartFile file) {
      this.file = file;
   }
}
FileUploadController.java
package com.iowiki;
import java.io.File;
import java.io.IOException;
import javax.servlet.ServletContext;
import org.springframework.beans.factory.annotation.Autowired;
import org.springframework.stereotype.Controller;
import org.springframework.ui.ModelMap;
import org.springframework.util.FileCopyUtils;
import org.springframework.validation.BindingResult;
import org.springframework.validation.annotation.Validated;
import org.springframework.web.bind.annotation.RequestMapping;
import org.springframework.web.bind.annotation.RequestMethod;
import org.springframework.web.multipart.MultipartFile;
import org.springframework.web.servlet.ModelAndView;
@Controller
public class FileUploadController {
   @Autowired
   ServletContext context;
   @RequestMapping(value = "/fileUploadPage", method = RequestMethod.GET)
   public ModelAndView fileUploadPage() {
      FileModel file = new FileModel();
      ModelAndView modelAndView = new ModelAndView("fileUpload", "command", file);
      return modelAndView;
   }
   @RequestMapping(value="/fileUploadPage", method = RequestMethod.POST)
   public String fileUpload(@Validated FileModel file, BindingResult result, ModelMap model) throws IOException {
      if (result.hasErrors()) {
         System.out.println("validation errors");
         return "fileUploadPage";
      } else {
         System.out.println("Fetching file");
         MultipartFile multipartFile = file.getFile();
         String uploadPath = context.getRealPath("") + File.separator + "temp" + File.separator;
         //Now do something with file...
         FileCopyUtils.copy(file.getFile().getBytes(), new File(uploadPath+file.getFile().getOriginalFilename()));
         String fileName = multipartFile.getOriginalFilename();
         model.addAttribute("fileName", fileName);
         return "success";
      }
   }
}
HelloWeb-servlet.xml
<beans xmlns = "http://www.springframework.org/schema/beans"
   xmlns:context = "http://www.springframework.org/schema/context"
   xmlns:xsi = "http://www.w3.org/2001/XMLSchema-instance"
   xsi:schemaLocation = "
   http://www.springframework.org/schema/beans
   http://www.springframework.org/schema/beans/spring-beans-3.0.xsd
   http://www.springframework.org/schema/context
   http://www.springframework.org/schema/context/spring-context-3.0.xsd">
   <context:component-scan base-package = "com.iowiki" />
   <bean class = "org.springframework.web.servlet.view.InternalResourceViewResolver">
      <property name = "prefix" value = "/WEB-INF/jsp/" />
      <property name = "suffix" value = ".jsp" />
   </bean>
   <bean id = "multipartResolver"
      class = "org.springframework.web.multipart.commons.CommonsMultipartResolver" />
</beans>
这里,对于第一个服务方法fileUploadPage() ,我们在ModelAndView对象中传递了一个名为“command”的空白FileModel对象,因为如果使用“form:form”,spring框架需要一个名为“command”的对象。 JSP文件中的标记。 因此,当调用fileUploadPage()方法时,它返回fileUpload.jsp视图。
将针对HelloWeb/fileUploadPage URL上的POST方法调用第二个服务方法fileUpload() 。 您将根据提交的信息准备要上载的文件。 最后,将从service方法返回“成功”视图,这将导致呈现success.jsp。
fileUpload.jsp
<%@ page contentType="text/html; charset = UTF-8" %>
<%@ taglib prefix = "form" uri = "http://www.springframework.org/tags/form"%>
<html>
   <head>
      <title>File Upload Example</title>
   </head>
   <body>
      <form:form method = "POST" modelAttribute = "fileUpload"
         enctype = "multipart/form-data">
         Please select a file to upload :
         <input type = "file" name = "file" />
         <input type = "submit" value = "upload" />
      </form:form>
   </body>
</html>
在这里,我们使用带有value =“fileUpload”的modelAttribute属性来将文件上载控件映射到服务器模型。
success.jsp
<%@ page contentType = "text/html; charset = UTF-8" %>
<html>
   <head>
      <title>File Upload Example</title>
   </head>
   <body>
      FileName :
      lt;b> ${fileName} </b> - Uploaded Successfully.
   </body>
</html>
完成创建源文件和配置文件后,导出应用程序。 右键单击您的应用程序,使用Export → WAR File选项并将HelloWeb.war文件保存在Tomcat的webapps文件夹中。
现在,启动Tomcat服务器并确保您可以使用标准浏览器从webapps文件夹访问其他网页。 尝试使用URL- http://localhost:8080/HelloWeb/fileUploadPage ,如果Spring Web Application的一切正常,我们将看到以下屏幕。
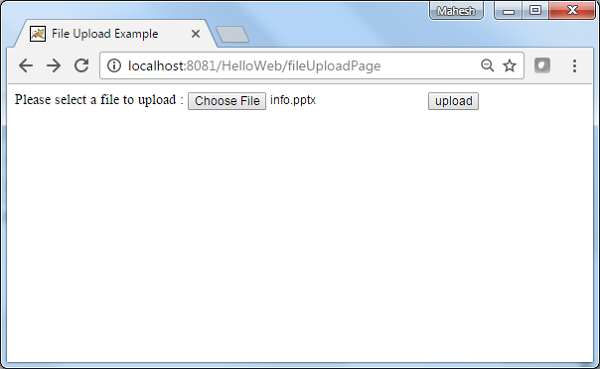
提交所需信息后,单击提交按钮以提交表单。 如果Spring Web Application的一切正常,您应该看到以下屏幕。
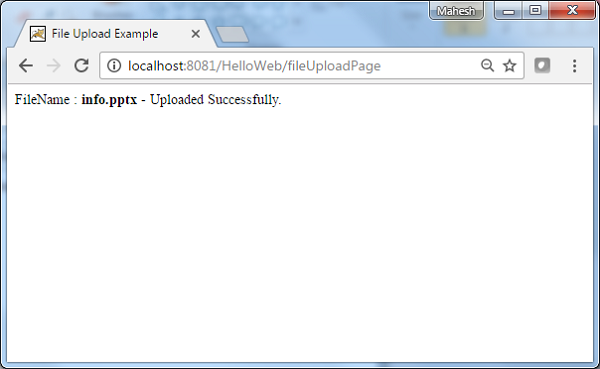
Spring MVC - Bean Name Url Handler Mapping Example
以下示例显示如何使用Spring Web MVC Framework使用Bean Name URL Handler Mapping。 BeanNameUrlHandlerMapping类是默认的处理程序映射类,它将URL请求映射到配置中提到的bean的名称。
<beans>
   <bean class = "org.springframework.web.servlet.view.InternalResourceViewResolver">
      <property name = "prefix" value = "/WEB-INF/jsp/"/>
      <property name = "suffix" value = ".jsp"/>
   </bean>
   <bean class = "org.springframework.web.servlet.handler.BeanNameUrlHandlerMapping"/>
   <bean name = "/helloWorld.htm"
      class = "com.iowiki.HelloController" />
   <bean name = "/hello*"
      class = "com.iowiki.HelloController" />
   <bean name = "/welcome.htm"
      class = "com.iowiki.WelcomeController"/>
</beans>
例如,使用上面的配置,如果是URI
/helloWorld.htm或/ hello {任何字母} .htm被请求,DispatcherServlet会将请求转发给HelloController 。
请求/welcome.htm,DispatcherServlet会将请求转发给WelcomeController 。
请求/welcome1.htm,DispatcherServlet将找不到任何控制器,服务器将抛出404状态错误。
首先,让我们使用一个可用的Eclipse IDE,并考虑使用Spring Web Framework开发基于动态表单的Web应用程序的以下步骤。
| 步 | 描述 |
|---|---|
| 1 | 在Spring MVC - Hello World章节中解释,在com.iowiki包下创建一个名为TestWeb的项目。 |
| 2 | 在com.iowiki包下创建Java类HelloController,WelcomeController。 |
| 3 | 在jsp子文件夹下创建视图文件hello.jsp,welcome.jsp。 |
| 4 | 最后一步是创建所有源文件和配置文件的内容,并导出应用程序,如下所述。 |
HelloController.java
package com.iowiki;
import javax.servlet.http.HttpServletRequest;
import javax.servlet.http.HttpServletResponse;
import org.springframework.web.servlet.ModelAndView;
import org.springframework.web.servlet.mvc.AbstractController;
public class HelloController extends AbstractController{
   @Override
   protected ModelAndView handleRequestInternal(HttpServletRequest request,
      HttpServletResponse response) throws Exception {
      ModelAndView model = new ModelAndView("hello");
      model.addObject("message", "Hello World!");
      return model;
   }
}
WelcomeController.java
package com.iowiki;
import javax.servlet.http.HttpServletRequest;
import javax.servlet.http.HttpServletResponse;
import org.springframework.web.servlet.ModelAndView;
import org.springframework.web.servlet.mvc.AbstractController;
public class WelcomeController extends AbstractController{
   @Override
   protected ModelAndView handleRequestInternal(HttpServletRequest request,
      HttpServletResponse response) throws Exception {
      ModelAndView model = new ModelAndView("welcome");
      model.addObject("message", "Welcome!");
      return model;
   }
}
TestWeb-servlet.xml
<beans xmlns = "http://www.springframework.org/schema/beans"
   xmlns:context = "http://www.springframework.org/schema/context"
   xmlns:xsi = "http://www.w3.org/2001/XMLSchema-instance"
   xsi:schemaLocation = "
   http://www.springframework.org/schema/beans
   http://www.springframework.org/schema/beans/spring-beans-3.0.xsd
   http://www.springframework.org/schema/context
   http://www.springframework.org/schema/context/spring-context-3.0.xsd">
   <bean class = "org.springframework.web.servlet.view.InternalResourceViewResolver">
      <property name = "prefix" value = "/WEB-INF/jsp/"/>
      <property name = "suffix" value = ".jsp"/>
   </bean>
   <bean class = "org.springframework.web.servlet.handler.BeanNameUrlHandlerMapping"/>
   <bean name = "/helloWorld.htm"
      class = "com.iowiki.HelloController" />
   <bean name = "/hello*"
      class = "com.iowiki.HelloController" />
   <bean name = "/welcome.htm"
      class = "com.iowiki.WelcomeController"/>
</beans>
hello.jsp
<%@ page contentType = "text/html; charset = UTF-8" %>
<html>
   <head>
      <title>Hello World</title>
   </head>
   <body>
      <h2>${message}</h2>
   </body>
</html>
welcome.jsp
<%@ page contentType = "text/html; charset = UTF-8" %>
<html>
   <head>
      <title>Welcome</title>
   </head>
   <body>
      <h2>${message}</h2>
   </body>
</html>
完成创建源文件和配置文件后,导出应用程序。 右键单击您的应用程序,使用Export → WAR File选项并将TestWeb.war文件保存在Tomcat的webapps文件夹中。
现在,启动Tomcat服务器并确保您可以使用标准浏览器从webapps文件夹访问其他网页。 尝试一个URL - http://localhost:8080/TestWeb/helloWorld.htm ,如果Spring Web Application的一切正常,我们将看到以下屏幕。
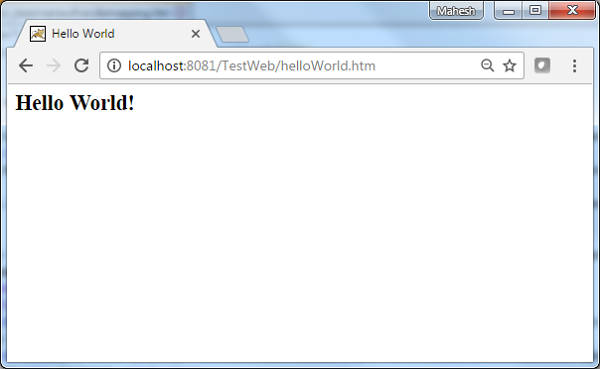
尝试一个URL - http://localhost:8080/TestWeb/hello.htm ,如果Spring Web Application的一切正常,我们将看到以下屏幕。
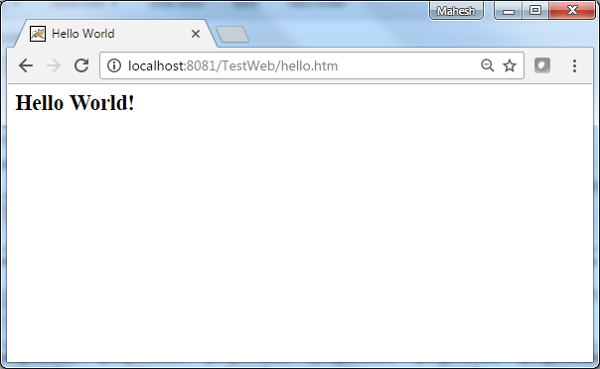
尝试使用URL http://localhost:8080/TestWeb/welcome.htm ,如果Spring Web Application的一切正常,我们将看到以下屏幕。
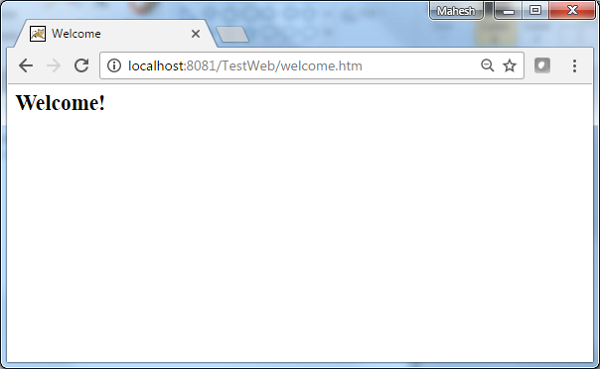
尝试使用URL http://localhost:8080/TestWeb/welcome1.htm ,如果Spring Web Application的一切正常,我们将看到以下屏幕。
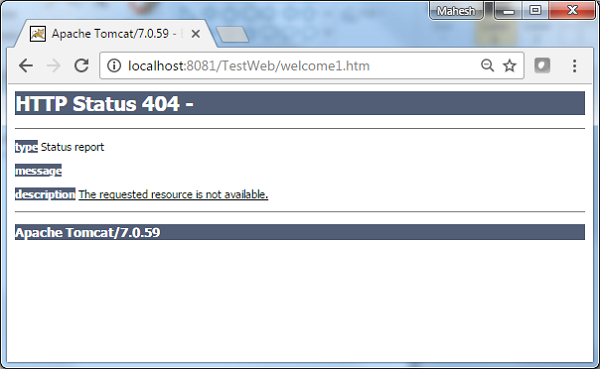
Spring MVC - Controller Class Name Handler Mapping Example
以下示例说明如何使用Spring Web MVC框架使用Controller类名称处理程序映射。 ControllerClassNameHandlerMapping类是基于约定的处理程序映射类,它将URL请求映射到配置中提到的控制器的名称。 此类获取Controller名称并将其转换为带有前导“/”的小写。
例如 - HelloController映射到“/ hello *”URL。
<beans>
   <bean class="org.springframework.web.servlet.view.InternalResourceViewResolver">
      <property name = "prefix" value = "/WEB-INF/jsp/"/>
      <property name = "suffix" value = ".jsp"/>
   </bean>
   <bean class = "org.springframework.web.servlet.mvc.support.ControllerClassNameHandlerMapping"/>
   <bean class = "com.iowiki.HelloController" />
   <bean class = "com.iowiki.WelcomeController"/>
</beans>
例如,使用上面的配置,如果是URI
/helloWorld.htm或/ hello {任何字母} .htm被请求,DispatcherServlet会将请求转发给HelloController 。
请求/welcome.htm,DispatcherServlet会将请求转发给WelcomeController 。
请求/Welcome.htm,其中W是大写的,DispatcherServlet将找不到任何控制器,服务器将抛出404状态错误。
首先,让我们使用一个可用的Eclipse IDE,然后按照后续步骤使用Spring Web Framework开发基于动态表单的Web应用程序。
| 步 | 描述 |
|---|---|
| 1 | 在Spring MVC - Hello World章节中解释,在com.iowiki包下创建一个名为TestWeb的项目。 |
| 2 | 在com.iowiki包下创建Java类HelloController和WelcomeController。 |
| 3 | 在jsp子文件夹下创建视图文件hello.jsp,welcome.jsp。 |
| 4 | 最后一步是创建源文件和配置文件的内容并导出应用程序,如下所述。 |
HelloController.java
package com.iowiki;
import javax.servlet.http.HttpServletRequest;
import javax.servlet.http.HttpServletResponse;
import org.springframework.web.servlet.ModelAndView;
import org.springframework.web.servlet.mvc.AbstractController;
public class HelloController extends AbstractController{
   @Override
   protected ModelAndView handleRequestInternal(HttpServletRequest request,
      HttpServletResponse response) throws Exception {
      ModelAndView model = new ModelAndView("hello");
      model.addObject("message", "Hello World!");
      return model;
   }
}
WelcomeController.java
package com.iowiki;
import javax.servlet.http.HttpServletRequest;
import javax.servlet.http.HttpServletResponse;
import org.springframework.web.servlet.ModelAndView;
import org.springframework.web.servlet.mvc.AbstractController;
public class WelcomeController extends AbstractController{
   @Override
   protected ModelAndView handleRequestInternal(HttpServletRequest request,
      HttpServletResponse response) throws Exception {
      ModelAndView model = new ModelAndView("welcome");
      model.addObject("message", "Welcome!");
      return model;
   }
}
TestWeb-servlet.xml
<beans xmlns = "http://www.springframework.org/schema/beans"
   xmlns:context = "http://www.springframework.org/schema/context"
   xmlns:xsi = "http://www.w3.org/2001/XMLSchema-instance"
   xsi:schemaLocation = "
   http://www.springframework.org/schema/beans
   http://www.springframework.org/schema/beans/spring-beans-3.0.xsd
   http://www.springframework.org/schema/context
   http://www.springframework.org/schema/context/spring-context-3.0.xsd">
   <bean class = "org.springframework.web.servlet.view.InternalResourceViewResolver">
      <property name = "prefix" value = "/WEB-INF/jsp/"/>
      <property name = "suffix" value = ".jsp"/>
   </bean>
   <bean class = "org.springframework.web.servlet.mvc.support.ControllerClassNameHandlerMapping"/>
   <bean class = "com.iowiki.HelloController" />
   <bean class = "com.iowiki.WelcomeController"/>
</beans>
hello.jsp
<%@ page contentType="text/html; charset = UTF-8" %>
<html>
   <head>
      <title>Hello World</title>
   </head>
   <body>
      <h2>${message}</h2>
   </body>
</html>
welcome.jsp
<%@ page contentType = "text/html; charset=UTF-8" %>
<html>
   <head>
      <title>Welcome</title>
   </head>
   <body>
      <h2>${message}</h2>
   </body>
</html>
完成创建源文件和配置文件后,导出应用程序。 右键单击应用程序,使用Export → WAR File选项并将TestWeb.war文件保存在Tomcat的webapps文件夹中。
现在,启动Tomcat服务器并确保您可以使用标准浏览器从webapps文件夹访问其他网页。 尝试一个URL - http://localhost:8080/TestWeb/helloWorld.htm ,如果Spring Web Application的一切正常,我们将看到以下屏幕。
尝试使用URL http://localhost:8080/TestWeb/hello.htm ,如果Spring Web Application的一切正常,我们将看到以下屏幕。
尝试使用URL http://localhost:8080/TestWeb/welcome.htm ,如果Spring Web Application的一切正常,我们将看到以下屏幕。
尝试URL http://localhost:8080/TestWeb/Welcome.htm ,如果Spring Web Application的一切正常,我们将看到以下屏幕。
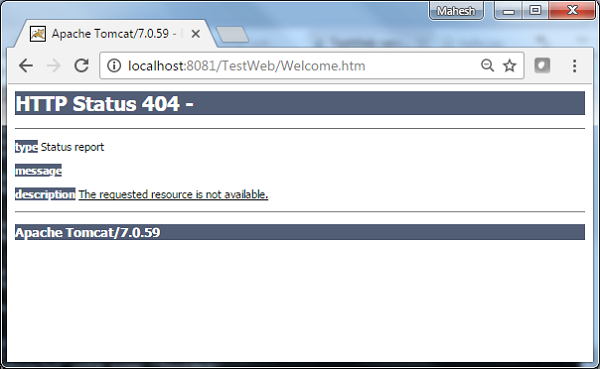
Spring MVC - Simple Url Handler Mapping Example
以下示例说明如何使用Spring Web MVC框架使用简单URL处理程序映射。 SimpleUrlHandlerMapping类有助于分别使用其控制器显式映射URL。
<beans>
   <bean class = "org.springframework.web.servlet.view.InternalResourceViewResolver">
      <property name = "prefix" value = "/WEB-INF/jsp/"/>
      <property name = "suffix" value = ".jsp"/>
   </bean>
   <bean class = "org.springframework.web.servlet.handler.SimpleUrlHandlerMapping">
      <property name = "mappings">
         <props>
            <prop key = "/welcome.htm">welcomeController</prop>
            <prop key = "/helloWorld.htm">helloController</prop>
         </props>
      </property>
   </bean>
   <bean id = "helloController" class = "com.iowiki.HelloController" />
   <bean id = "welcomeController" class = "com.iowiki.WelcomeController"/>
</beans>
例如,使用上面的配置,如果是URI
请求/helloWorld.htm,DispatcherServlet会将请求转发给HelloController 。
请求/welcome.htm,DispatcherServlet会将请求转发给WelcomeController 。
首先,让我们使用一个可用的Eclipse IDE,并考虑使用Spring Web Framework开发基于动态表单的Web应用程序的以下步骤。
| 步 | 描述 |
|---|---|
| 1 | 在Spring MVC - Hello World章节中解释,在com.iowiki包下创建一个名为TestWeb的项目。 |
| 2 | 在com.iowiki包下创建Java类HelloController和WelcomeController。 |
| 3 | 在jsp子文件夹下创建视图文件hello.jsp和welcome.jsp。 |
| 4 | 最后一步是创建源文件和配置文件的内容并导出应用程序,如下所述。 |
HelloController.java
package com.iowiki;
import javax.servlet.http.HttpServletRequest;
import javax.servlet.http.HttpServletResponse;
import org.springframework.web.servlet.ModelAndView;
import org.springframework.web.servlet.mvc.AbstractController;
public class HelloController extends AbstractController{
   @Override
   protected ModelAndView handleRequestInternal(HttpServletRequest request,
      HttpServletResponse response) throws Exception {
      ModelAndView model = new ModelAndView("hello");
      model.addObject("message", "Hello World!");
      return model;
   }
}
WelcomeController.java
package com.iowiki;
import javax.servlet.http.HttpServletRequest;
import javax.servlet.http.HttpServletResponse;
import org.springframework.web.servlet.ModelAndView;
import org.springframework.web.servlet.mvc.AbstractController;
public class WelcomeController extends AbstractController{
   @Override
   protected ModelAndView handleRequestInternal(HttpServletRequest request,
      HttpServletResponse response) throws Exception {
      ModelAndView model = new ModelAndView("welcome");
      model.addObject("message", "Welcome!");
      return model;
   }
}
TestWeb-servlet.xml
<beans xmlns = "http://www.springframework.org/schema/beans"
   xmlns:context = "http://www.springframework.org/schema/context"
   xmlns:xsi = "http://www.w3.org/2001/XMLSchema-instance"
   xsi:schemaLocation = "
   http://www.springframework.org/schema/beans
   http://www.springframework.org/schema/beans/spring-beans-3.0.xsd
   http://www.springframework.org/schema/context
   http://www.springframework.org/schema/context/spring-context-3.0.xsd">
   <bean class = "org.springframework.web.servlet.view.InternalResourceViewResolver">
      <property name = "prefix" value = "/WEB-INF/jsp/"/>
      <property name = "suffix" value = ".jsp"/>
   </bean>
   <bean class = "org.springframework.web.servlet.handler.SimpleUrlHandlerMapping">
      <property name = "mappings">
         <props>
            <prop key = "/welcome.htm">welcomeController</prop>
            <prop key = "/helloWorld.htm">helloController</prop>
         </props>
      </property>
   </bean>
   <bean id = "helloController" class = "com.iowiki.HelloController" />
   <bean id = "welcomeController" class = "com.iowiki.WelcomeController"/>
</beans>
hello.jsp
<%@ page contentType = "text/html; charset = UTF-8" %>
<html>
   <head>
      <title>Hello World</title>
   </head>
   <body>
      <h2>${message}</h2>
   </body>
</html>
welcome.jsp
<%@ page contentType = "text/html; charset = UTF-8" %>
<html>
   <head>
      <title>Welcome</title>
   </head>
   <body>
      <h2>${message}</h2>
   </body>
</html>
完成创建源文件和配置文件后,导出应用程序。 右键单击您的应用程序,使用Export → WAR File选项并将TestWeb.war文件保存在Tomcat的webapps文件夹中。
现在,启动Tomcat服务器并确保您可以使用标准浏览器从webapps文件夹访问其他网页。 尝试一个URL - http://localhost:8080/TestWeb/helloWorld.htm ,如果Spring Web Application的一切正常,我们将看到以下屏幕。
尝试使用URL http://localhost:8080/TestWeb/welcome.htm ,如果Spring Web Application的一切正常,您应该会看到以下结果。
Spring MVC - Multi Action Controller Example
以下示例说明如何使用Spring Web MVC框架使用Multi Action Controller。 MultiActionController类有助于分别在单个控制器中使用其方法映射多个URL。
package com.iowiki;
import javax.servlet.http.HttpServletRequest;
import javax.servlet.http.HttpServletResponse;
import org.springframework.web.servlet.ModelAndView;
import org.springframework.web.servlet.mvc.multiaction.MultiActionController;
public class UserController extends MultiActionController{
   public ModelAndView home(HttpServletRequest request,
      HttpServletResponse response) throws Exception {
      ModelAndView model = new ModelAndView("home");
      model.addObject("message", "Home");
      return model;
   }
   public ModelAndView add(HttpServletRequest request,
      HttpServletResponse response) throws Exception {
      ModelAndView model = new ModelAndView("user");
      model.addObject("message", "Add");
      return model;
   }
   public ModelAndView remove(HttpServletRequest request,
      HttpServletResponse response) throws Exception {
      ModelAndView model = new ModelAndView("user");
      model.addObject("message", "Remove");
      return model;
   }
}
<bean class = "org.springframework.web.servlet.handler.BeanNameUrlHandlerMapping"/>
<bean name = "/home.htm" class = "com.iowiki.UserController" />
<bean name = "/user/*.htm" class = "com.iowiki.UserController" />
例如,使用上面的配置,如果URI -
请求/home.htm,DispatcherServlet会将请求转发给UserController home()方法。
请求user/add.htm,DispatcherServlet会将请求转发给UserController的add()方法。
请求user/remove.htm,DispatcherServlet会将请求转发给UserController的remove()方法。
首先,让我们使用一个可用的Eclipse IDE,并坚持以下步骤,使用Spring Web Framework开发基于动态表单的Web应用程序。
| 步 | 描述 |
|---|---|
| 1 | 在Spring MVC - Hello World章节中解释,在com.iowiki包下创建一个名为TestWeb的项目。 |
| 2 | 在com.iowiki包下创建一个Java类UserController。 |
| 3 | 在jsp子文件夹下创建视图文件home.jsp和user.jsp。 |
| 4 | 最后一步是创建源文件和配置文件的内容并导出应用程序,如下所述。 |
UserController.java)/h2>
package com.iowiki;
import javax.servlet.http.HttpServletRequest;
import javax.servlet.http.HttpServletResponse;
import org.springframework.web.servlet.ModelAndView;
import org.springframework.web.servlet.mvc.multiaction.MultiActionController;
public class UserController extends MultiActionController{
   public ModelAndView home(HttpServletRequest request,
      HttpServletResponse response) throws Exception {
      ModelAndView model = new ModelAndView("home");
      model.addObject("message", "Home");
      return model;
   }
   public ModelAndView add(HttpServletRequest request,
      HttpServletResponse response) throws Exception {
      ModelAndView model = new ModelAndView("user");
      model.addObject("message", "Add");
      return model;
   }
   public ModelAndView remove(HttpServletRequest request,
      HttpServletResponse response) throws Exception {
      ModelAndView model = new ModelAndView("user");
      model.addObject("message", "Remove");
      return model;
   }
}
package com.iowiki;
import javax.servlet.http.HttpServletRequest;
import javax.servlet.http.HttpServletResponse;
import org.springframework.web.servlet.ModelAndView;
import org.springframework.web.servlet.mvc.multiaction.MultiActionController;
public class UserController extends MultiActionController{
public ModelAndView home(HttpServletRequest request,
HttpServletResponse response) throws Exception {
ModelAndView model = new ModelAndView("home");
model.addObject("message", "Home");
return model;
}
public ModelAndView add(HttpServletRequest request,
HttpServletResponse response) throws Exception {
ModelAndView model = new ModelAndView("user");
model.addObject("message", "Add");
return model;
}
public ModelAndView remove(HttpServletRequest request,
HttpServletResponse response) throws Exception {
ModelAndView model = new ModelAndView("user");
model.addObject("message", "Remove");
return model;
}
}
TestWeb-servlet.xml
<beans xmlns = "http://www.springframework.org/schema/beans"
   xmlns:context = "http://www.springframework.org/schema/context"
   xmlns:xsi = "http://www.w3.org/2001/XMLSchema-instance"
   xsi:schemaLocation = "
   http://www.springframework.org/schema/beans
   http://www.springframework.org/schema/beans/spring-beans-3.0.xsd
   http://www.springframework.org/schema/context
   http://www.springframework.org/schema/context/spring-context-3.0.xsd">
   <bean class = "org.springframework.web.servlet.view.InternalResourceViewResolver">
      <property name = "prefix" value = "/WEB-INF/jsp/"/>
      <property name = "suffix" value = ".jsp"/>
   </bean>
   <bean class = "org.springframework.web.servlet.handler.BeanNameUrlHandlerMapping"/>
   <bean name = "/home.htm"
      class = "com.iowiki.UserController" />
   <bean name = "/user/*.htm"
      class = "com.iowiki.UserController" />
</beans>
home.jsp
<%@ page contentType = "text/html; charset = UTF-8" %>
<html>
   <head>
      <meta http-equiv = "Content-Type" content = "text/html; charset = ISO-8859-1">
      <title>Home</title>
   </head>
   <body>
      <a href = "user/add.htm" >Add</a> <br>
      <a href = "user/remove.htm" >Remove</a>
   </body>
</html>
user.jsp
<%@ page contentType = "text/html; charset = UTF-8" %>
<html>
   <head>
      <title>Hello World</title>
   </head>
   <body>
      <h2>${message}</h2>
   </body>
</html>
完成创建源文件和配置文件后,导出应用程序。 右键单击您的应用程序,使用Export → WAR File选项并将TestWeb.war文件保存在Tomcat的webapps文件夹中。
现在,启动Tomcat服务器并确保您可以使用标准浏览器从webapps文件夹访问其他网页。 现在,尝试一个URL - http://localhost:8080/TestWeb/home.htm ,如果Spring Web Application的一切正常,我们将看到以下屏幕。
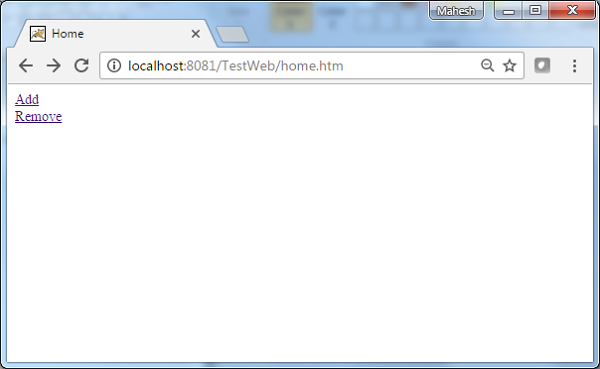
尝试URL http://localhost:8080/TestWeb/user/add.htm ,如果Spring Web Application的一切正常,我们将看到以下屏幕。
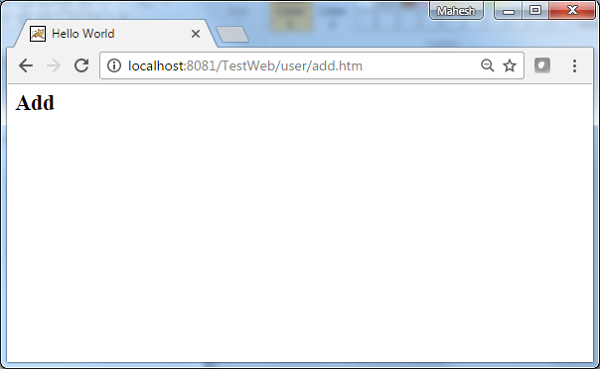
Spring MVC - Properties Method Name Resolver Example
以下示例说明如何使用Spring Web MVC框架使用Multi Action Controller的Properties Method Name Resolver方法。 MultiActionController类有助于分别在单个控制器中使用其方法映射多个URL。
package com.iowiki;
import javax.servlet.http.HttpServletRequest;
import javax.servlet.http.HttpServletResponse;
import org.springframework.web.servlet.ModelAndView;
import org.springframework.web.servlet.mvc.multiaction.MultiActionController;
public class UserController extends MultiActionController{
   public ModelAndView home(HttpServletRequest request,
      HttpServletResponse response) throws Exception {
      ModelAndView model = new ModelAndView("user");
      model.addObject("message", "Home");
      return model;
   }
   public ModelAndView add(HttpServletRequest request,
      HttpServletResponse response) throws Exception {
      ModelAndView model = new ModelAndView("user");
      model.addObject("message", "Add");
      return model;
   }
   public ModelAndView remove(HttpServletRequest request,
      HttpServletResponse response) throws Exception {
      ModelAndView model = new ModelAndView("user");
      model.addObject("message", "Remove");
      return model;
   }
}
<bean class = "com.iowiki.UserController">
   <property name = "methodNameResolver">
      <bean class = "org.springframework.web.servlet.mvc.multiaction.PropertiesMethodNameResolver">
         <property name = "mappings">
            <props>
               <prop key = "/user/home.htm">home</prop>
               <prop key = "/user/add.htm">add</prop>
               <prop key = "/user/remove.htm">update</prop>
            </props>
         </property>
      </bean>
   </property>
</bean>
例如,使用上面的配置,如果URI -
请求/user/home.htm,DispatcherServlet会将请求转发给UserController home()方法。
请求/user/add.htm,DispatcherServlet会将请求转发给UserController的add()方法。
请求/user/remove.htm,DispatcherServlet会将请求转发给UserController的remove()方法。
首先,让我们使用一个可用的Eclipse IDE,并考虑以下步骤,使用Spring Web Framework开发基于动态表单的Web应用程序。
| 步 | 描述 |
|---|---|
| 1 | 在Spring MVC - Hello World章节中解释,在com.iowiki包下创建一个名为TestWeb的项目。 |
| 2 | 在com.iowiki包下创建Java类UserController。 |
| 3 | 在jsp子文件夹下创建一个视图文件user.jsp。 |
| 4 | 最后一步是创建源文件和配置文件的内容并导出应用程序,如下所述。 |
UserController.java)/h2>
package com.iowiki;
import javax.servlet.http.HttpServletRequest;
import javax.servlet.http.HttpServletResponse;
import org.springframework.web.servlet.ModelAndView;
import org.springframework.web.servlet.mvc.multiaction.MultiActionController;
public class UserController extends MultiActionController{
   public ModelAndView home(HttpServletRequest request,
      HttpServletResponse response) throws Exception {
      ModelAndView model = new ModelAndView("user");
      model.addObject("message", "Home");
      return model;
   }
   public ModelAndView add(HttpServletRequest request,
      HttpServletResponse response) throws Exception {
      ModelAndView model = new ModelAndView("user");
      model.addObject("message", "Add");
      return model;
   }
   public ModelAndView remove(HttpServletRequest request,
      HttpServletResponse response) throws Exception {
      ModelAndView model = new ModelAndView("user");
      model.addObject("message", "Remove");
      return model;
   }
}
package com.iowiki;
import javax.servlet.http.HttpServletRequest;
import javax.servlet.http.HttpServletResponse;
import org.springframework.web.servlet.ModelAndView;
import org.springframework.web.servlet.mvc.multiaction.MultiActionController;
public class UserController extends MultiActionController{
public ModelAndView home(HttpServletRequest request,
HttpServletResponse response) throws Exception {
ModelAndView model = new ModelAndView("user");
model.addObject("message", "Home");
return model;
}
public ModelAndView add(HttpServletRequest request,
HttpServletResponse response) throws Exception {
ModelAndView model = new ModelAndView("user");
model.addObject("message", "Add");
return model;
}
public ModelAndView remove(HttpServletRequest request,
HttpServletResponse response) throws Exception {
ModelAndView model = new ModelAndView("user");
model.addObject("message", "Remove");
return model;
}
}
TestWeb-servlet.xml
<beans xmlns = "http://www.springframework.org/schema/beans"
   xmlns:context = "http://www.springframework.org/schema/context"
   xmlns:xsi = "http://www.w3.org/2001/XMLSchema-instance"
   xsi:schemaLocation = "
   http://www.springframework.org/schema/beans
   http://www.springframework.org/schema/beans/spring-beans-3.0.xsd
   http://www.springframework.org/schema/context
   http://www.springframework.org/schema/context/spring-context-3.0.xsd">
   <bean class = "org.springframework.web.servlet.view.InternalResourceViewResolver">
      <property name = "prefix" value = "/WEB-INF/jsp/"/>
      <property name = "suffix" value = ".jsp"/>
   </bean>
   <bean class = "org.springframework.web.servlet.mvc.support.ControllerClassNameHandlerMapping">
      <property name = "caseSensitive" value = "true" />
   </bean>
   <bean class = "com.iowiki.UserController">
      <property name = "methodNameResolver">
          <bean class = "org.springframework.web.servlet.mvc.multiaction.PropertiesMethodNameResolver">
            <property name = "mappings">
               <props>
                  <prop key = "/user/home.htm">home</prop>
                  <prop key = "/user/add.htm">add</prop>
                  <prop key = "/user/remove.htm">update</prop>
               </props>
            </property>
         </bean>
      </property>
   </bean>
</beans>
user.jsp
<%@ page contentType = "text/html; charset = UTF-8" %>
<html>
   <head>
      <title>Hello World</title>
   </head>
   <body>
      <h2>${message}</h2>
   </body>
</html>
完成创建源文件和配置文件后,导出应用程序。 右键单击您的应用程序,使用Export → WAR File选项并将TestWeb.war文件保存在Tomcat的webapps文件夹中。
现在,启动Tomcat服务器并确保您可以使用标准浏览器从webapps文件夹访问其他网页。 现在,尝试一个URL - http://localhost:8080/TestWeb/user/add.htm ,如果Spring Web Application的一切正常,我们将看到以下屏幕。
Spring MVC - Parameter Method Name Resolver Example
以下示例说明如何使用Spring Web MVC框架使用多操作控制器的参数方法名称解析器。 MultiActionController类有助于分别在单个控制器中使用其方法映射多个URL。
package com.iowiki;
import javax.servlet.http.HttpServletRequest;
import javax.servlet.http.HttpServletResponse;
import org.springframework.web.servlet.ModelAndView;
import org.springframework.web.servlet.mvc.multiaction.MultiActionController;
public class UserController extends MultiActionController{
   public ModelAndView home(HttpServletRequest request,
      HttpServletResponse response) throws Exception {
      ModelAndView model = new ModelAndView("user");
      model.addObject("message", "Home");
      return model;
   }
   public ModelAndView add(HttpServletRequest request,
      HttpServletResponse response) throws Exception {
      ModelAndView model = new ModelAndView("user");
      model.addObject("message", "Add");
      return model;
   }
   public ModelAndView remove(HttpServletRequest request,
      HttpServletResponse response) throws Exception {
      ModelAndView model = new ModelAndView("user");
      model.addObject("message", "Remove");
      return model;
   }
}
<bean class = "com.iowiki.UserController">
   <property name = "methodNameResolver">
      <bean class = "org.springframework.web.servlet.mvc.multiaction.ParameterMethodNameResolver">
         <property name = "paramName" value = "action"/>
      </bean>
   </property>
</bean>
例如,使用上面的配置,如果URI -
请求/user/*.htm?action=home,DispatcherServlet会将请求转发给UserController home()方法。
请求/user/*.htm?action=add,DispatcherServlet会将请求转发给UserController的add()方法。
请求/user/*.htm?action=remove,DispatcherServlet会将请求转发给UserController的remove()方法。
首先,让我们使用一个可用的Eclipse IDE,并遵循以下步骤使用Spring Web Framework开发基于动态表单的Web应用程序。
| 步 | 描述 |
|---|---|
| 1 | 在Spring MVC - Hello World章节中解释,在com.iowiki包下创建一个名为TestWeb的项目。 |
| 2 | 在com.iowiki包下创建一个Java类UserController。 |
| 3 | 在jsp子文件夹下创建一个视图文件user.jsp。 |
| 4 | 最后一步是创建源文件和配置文件的内容并导出应用程序,如下所述。 |
UserController.java)/h2>
package com.iowiki;
import javax.servlet.http.HttpServletRequest;
import javax.servlet.http.HttpServletResponse;
import org.springframework.web.servlet.ModelAndView;
import org.springframework.web.servlet.mvc.multiaction.MultiActionController;
public class UserController extends MultiActionController{
   public ModelAndView home(HttpServletRequest request,
      HttpServletResponse response) throws Exception {
      ModelAndView model = new ModelAndView("user");
      model.addObject("message", "Home");
      return model;
   }
   public ModelAndView add(HttpServletRequest request,
      HttpServletResponse response) throws Exception {
      ModelAndView model = new ModelAndView("user");
      model.addObject("message", "Add");
      return model;
   }
   public ModelAndView remove(HttpServletRequest request,
      HttpServletResponse response) throws Exception {
      ModelAndView model = new ModelAndView("user");
      model.addObject("message", "Remove");
      return model;
   }
}
package com.iowiki;
import javax.servlet.http.HttpServletRequest;
import javax.servlet.http.HttpServletResponse;
import org.springframework.web.servlet.ModelAndView;
import org.springframework.web.servlet.mvc.multiaction.MultiActionController;
public class UserController extends MultiActionController{
public ModelAndView home(HttpServletRequest request,
HttpServletResponse response) throws Exception {
ModelAndView model = new ModelAndView("user");
model.addObject("message", "Home");
return model;
}
public ModelAndView add(HttpServletRequest request,
HttpServletResponse response) throws Exception {
ModelAndView model = new ModelAndView("user");
model.addObject("message", "Add");
return model;
}
public ModelAndView remove(HttpServletRequest request,
HttpServletResponse response) throws Exception {
ModelAndView model = new ModelAndView("user");
model.addObject("message", "Remove");
return model;
}
}
TestWeb-servlet.xml
<beans xmlns = "http://www.springframework.org/schema/beans"
   xmlns:context = "http://www.springframework.org/schema/context"
   xmlns:xsi = "http://www.w3.org/2001/XMLSchema-instance"
   xsi:schemaLocation = "
   http://www.springframework.org/schema/beans
   http://www.springframework.org/schema/beans/spring-beans-3.0.xsd
   http://www.springframework.org/schema/context
   http://www.springframework.org/schema/context/spring-context-3.0.xsd">
   <bean class = "org.springframework.web.servlet.view.InternalResourceViewResolver">
      <property name = "prefix" value = "/WEB-INF/jsp/"/>
      <property name = "suffix" value = ".jsp"/>
   </bean>
   <bean class = "org.springframework.web.servlet.mvc.support.ControllerClassNameHandlerMapping">
      <property name = "caseSensitive" value = "true" />
   </bean>
   <bean class = "com.iowiki.UserController">
      <property name = "methodNameResolver">
         <bean class = "org.springframework.web.servlet.mvc.multiaction.ParameterMethodNameResolver">
            <property name = "paramName" value = "action"/>
         </bean>
      </property>
   </bean>
</beans>
user.jsp
<%@ page contentType="text/html; charset=UTF-8" %>
<html>
   <head>
      <title>Hello World</title>
   </head>
   <body>
      <h2>${message}</h2>
   </body>
</html>
完成创建源文件和配置文件后,导出应用程序。 右键单击您的应用程序,使用Export → WAR File选项并将TestWeb.war文件保存在Tomcat的webapps文件夹中。
现在,启动Tomcat服务器并确保您可以使用标准浏览器从webapps文件夹访问其他网页。 现在,尝试一个URL - http://localhost:8080/TestWeb/user/test.htm?action=home ,如果Spring Web Application的一切正常,我们将看到以下屏幕。
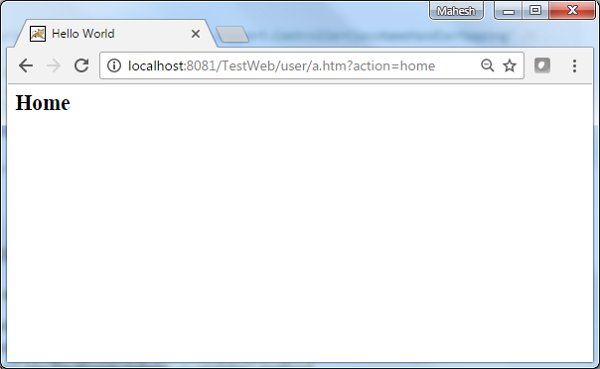
Spring MVC - Parameterizable View Controller Example
以下示例说明如何使用Spring Web MVC框架使用Multi Action Controller的Parameterizable View Controller方法。 可参数化视图允许使用请求映射网页。
package com.iowiki;
import javax.servlet.http.HttpServletRequest;
import javax.servlet.http.HttpServletResponse;
import org.springframework.web.servlet.ModelAndView;
import org.springframework.web.servlet.mvc.multiaction.MultiActionController;
public class UserController extends MultiActionController{
   public ModelAndView home(HttpServletRequest request,
      HttpServletResponse response) throws Exception {
      ModelAndView model = new ModelAndView("user");
      model.addObject("message", "Home");
      return model;
   }
}
<bean class="org.springframework.web.servlet.handler.SimpleUrlHandlerMapping">
   <property name="mappings">
      <value>
         index.htm=userController
      </value>
   </property>
</bean>
<bean id="userController" class="org.springframework.web.servlet.mvc.ParameterizableViewController">
   <property name="viewName" value="user"/>
</bean>
例如,使用上面的配置,如果是URI。
请求/index.htm,DispatcherServlet将请求转发给UserController控制器,并将viewName设置为user.jsp。
首先,让我们使用一个可用的Eclipse IDE,并坚持以下步骤,使用Spring Web Framework开发基于动态表单的Web应用程序。
| 步 | 描述 |
|---|---|
| 1 | 在Spring MVC - Hello World章节中解释,在com.iowiki包下创建一个名为TestWeb的项目。 |
| 2 | 在com.iowiki包下创建一个Java类UserController。 |
| 3 | 在jsp子文件夹下创建一个视图文件user.jsp。 |
| 4 | 最后一步是创建源文件和配置文件的内容并导出应用程序,如下所述。 |
UserController.java)/h2>
package com.iowiki;
import javax.servlet.http.HttpServletRequest;
import javax.servlet.http.HttpServletResponse;
import org.springframework.web.servlet.ModelAndView;
import org.springframework.web.servlet.mvc.multiaction.MultiActionController;
public class UserController extends MultiActionController{
   public ModelAndView home(HttpServletRequest request,
      HttpServletResponse response) throws Exception {
      ModelAndView model = new ModelAndView("user");
      model.addObject("message", "Home");
      return model;
   }
}
package com.iowiki;
import javax.servlet.http.HttpServletRequest;
import javax.servlet.http.HttpServletResponse;
import org.springframework.web.servlet.ModelAndView;
import org.springframework.web.servlet.mvc.multiaction.MultiActionController;
public class UserController extends MultiActionController{
public ModelAndView home(HttpServletRequest request,
HttpServletResponse response) throws Exception {
ModelAndView model = new ModelAndView("user");
model.addObject("message", "Home");
return model;
}
}
TestWeb-servlet.xml
<beans xmlns = "http://www.springframework.org/schema/beans"
   xmlns:context = "http://www.springframework.org/schema/context"
   xmlns:xsi = "http://www.w3.org/2001/XMLSchema-instance"
   xsi:schemaLocation = "
   http://www.springframework.org/schema/beans
   http://www.springframework.org/schema/beans/spring-beans-3.0.xsd
   http://www.springframework.org/schema/context
   http://www.springframework.org/schema/context/spring-context-3.0.xsd">
   <bean class = "org.springframework.web.servlet.view.InternalResourceViewResolver">
      <property name = "prefix" value = "/WEB-INF/jsp/"/>
      <property name = "suffix" value = ".jsp"/>
   </bean>
   <bean class = "org.springframework.web.servlet.handler.SimpleUrlHandlerMapping">
      <property name = "mappings">
         <value>
            index.htm = userController
         </value>
      </property>
   </bean>
   <bean id = "userController" class = "org.springframework.web.servlet.mvc.ParameterizableViewController">
      <property name = "viewName" value="user"/>
   </bean>
</beans>
user.jsp
<%@ page contentType="text/html; charset=UTF-8" %>
<html>
   <head>
      <title>Hello World</title>
   </head>
   <body>
      <h2>Hello World</h2>
   </body>
</html>
完成创建源文件和配置文件后,导出应用程序。 右键单击您的应用程序,使用Export → WAR File选项并将TestWeb.war文件保存在Tomcat的webapps文件夹中。
现在,启动Tomcat服务器并确保您可以使用标准浏览器从webapps文件夹访问其他网页。 现在,尝试一个URL - http://localhost:8080/TestWeb/index.htm ,如果Spring Web Application的一切正常,您将看到以下屏幕。
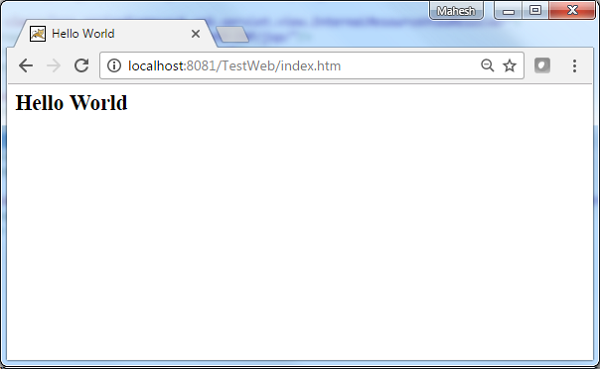
Spring MVC - Internal Resource View Resolver Example
InternalResourceViewResolver用于将提供的URI解析为实际的URI。 以下示例显示如何使用Spring Web MVC Framework使用InternalResourceViewResolver。 InternalResourceViewResolver允许将网页映射到请求。
package com.iowiki;
import org.springframework.stereotype.Controller;
import org.springframework.web.bind.annotation.RequestMapping;
import org.springframework.web.bind.annotation.RequestMethod;
import org.springframework.ui.ModelMap;
@Controller
@RequestMapping("/hello")
public class HelloController{
   @RequestMapping(method = RequestMethod.GET)
   public String printHello(ModelMap model) {
      model.addAttribute("message", "Hello Spring MVC Framework!");
      return "hello";
   }
}
<bean class = "org.springframework.web.servlet.view.InternalResourceViewResolver">
   <property name = "prefix" value = "/WEB-INF/jsp/"/>
   <property name = "suffix" value = ".jsp"/>
</bean>
例如,使用上面的配置,如果是URI
请求/ hello,DispatcherServlet将请求转发到前缀+ viewname + suffix = /WEB-INF/jsp/hello.jsp。
首先,让我们使用一个可用的Eclipse IDE,然后考虑以下步骤,使用Spring Web Framework开发基于动态表单的Web应用程序。
| 步 | 描述 |
|---|---|
| 1 | 在Spring MVC - Hello World Example章节中解释的com.iowiki包中创建一个名为TestWeb的项目。 |
| 2 | 在com.iowikipackage下创建一个Java类HelloController。 |
| 3 | 在jsp子文件夹下创建一个视图文件hello.jsp。 |
| 4 | 最后一步是创建源文件和配置文件的内容并导出应用程序,如下所述。 |
HelloController.java
package com.iowiki;
import org.springframework.stereotype.Controller;
import org.springframework.web.bind.annotation.RequestMapping;
import org.springframework.web.bind.annotation.RequestMethod;
import org.springframework.ui.ModelMap;
@Controller
@RequestMapping("/hello")
public class HelloController{
   @RequestMapping(method = RequestMethod.GET)
   public String printHello(ModelMap model) {
      model.addAttribute("message", "Hello Spring MVC Framework!");
      return "hello";
   }
}
TestWeb-servlet.xml
<beans xmlns = "http://www.springframework.org/schema/beans"
   xmlns:context = "http://www.springframework.org/schema/context"
   xmlns:xsi = "http://www.w3.org/2001/XMLSchema-instance"
   xsi:schemaLocation = "
   http://www.springframework.org/schema/beans
   http://www.springframework.org/schema/beans/spring-beans-3.0.xsd
   http://www.springframework.org/schema/context
   http://www.springframework.org/schema/context/spring-context-3.0.xsd">
   <context:component-scan base-package = "com.iowiki" />
   <bean class = "org.springframework.web.servlet.view.InternalResourceViewResolver">
      <property name = "prefix" value = "/WEB-INF/jsp/" />
      <property name = "suffix" value = ".jsp" />
   </bean>
</beans>
hello.jsp
<%@ page contentType = "text/html; charset = UTF-8" %>
<html>
   <head>
      <title>Hello World</title>
   </head>
   <body>
      <h2>${message}</h2>
   </body>
</html>
完成创建源文件和配置文件后,导出应用程序。 右键单击您的应用程序,使用Export → WAR File选项并将TestWeb.war文件保存在Tomcat的webapps文件夹中。
现在,启动Tomcat服务器并确保您可以使用标准浏览器从webapps文件夹访问其他网页。 尝试访问URL - http://localhost:8080/TestWeb/hello ,如果Spring Web Application的一切正常,我们将看到以下屏幕。
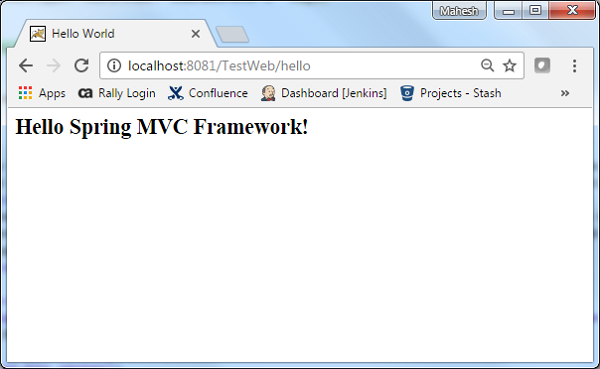
Spring MVC - Xml View Resolver Example
XmlViewResolver用于使用xml文件中定义的视图bean来解析视图名称。 以下示例显示如何使用Spring Web MVC框架使用XmlViewResolver。
TestWeb-servlet.xml
<bean class = "org.springframework.web.servlet.view.XmlViewResolver">
   <property name = "location">
      <value>/WEB-INF/views.xml</value>
   </property>
</bean>
views.xml
<bean id = "hello"
   class = "org.springframework.web.servlet.view.JstlView">
   <property name = "url" value = "/WEB-INF/jsp/hello.jsp" />
</bean>
例如,使用上面的配置,如果URI -
请求/ hello,DispatcherServlet会将请求转发到view.xml中由bean hello定义的hello.jsp。
首先,让我们使用一个有效的Eclipse IDE,并坚持以下步骤,使用Spring Web Framework开发基于动态表单的Web应用程序。
| 步 | 描述 |
|---|---|
| 1 | 在Spring MVC - Hello World章节中解释,在com.iowiki包下创建一个名为TestWeb的项目。 |
| 2 | 在com.iowikipackage下创建一个Java类HelloController。 |
| 3 | 在jsp子文件夹下创建一个视图文件hello.jsp。 |
| 4 | 下载JSTL库jstl.jar 。 把它放在你的CLASSPATH中。 |
| 5 | 最后一步是创建源文件和配置文件的内容并导出应用程序,如下所述。 |
HelloController.java
package com.iowiki;
import org.springframework.stereotype.Controller;
import org.springframework.web.bind.annotation.RequestMapping;
import org.springframework.web.bind.annotation.RequestMethod;
import org.springframework.ui.ModelMap;
@Controller
@RequestMapping("/hello")
public class HelloController{
   @RequestMapping(method = RequestMethod.GET)
   public String printHello(ModelMap model) {
      model.addAttribute("message", "Hello Spring MVC Framework!");
      return "hello";
   }
}
TestWeb-servlet.xml
<beans xmlns = "http://www.springframework.org/schema/beans"
   xmlns:context = "http://www.springframework.org/schema/context"
   xmlns:xsi = "http://www.w3.org/2001/XMLSchema-instance"
   xsi:schemaLocation = "
   http://www.springframework.org/schema/beans
   http://www.springframework.org/schema/beans/spring-beans-3.0.xsd
   http://www.springframework.org/schema/context
   http://www.springframework.org/schema/context/spring-context-3.0.xsd">
   <context:component-scan base-package = "com.iowiki" />
   <bean class = "org.springframework.web.servlet.view.XmlViewResolver">
      <property name = "location">
         <value>/WEB-INF/views.xml</value>
      </property>
   </bean>
</beans>
views.xml
<beans xmlns = "http://www.springframework.org/schema/beans"
   xmlns:context = "http://www.springframework.org/schema/context"
   xmlns:xsi = "http://www.w3.org/2001/XMLSchema-instance"
   xsi:schemaLocation = "
   http://www.springframework.org/schema/beans
   http://www.springframework.org/schema/beans/spring-beans-3.0.xsd
   http://www.springframework.org/schema/context
   http://www.springframework.org/schema/context/spring-context-3.0.xsd">
   <bean id = "hello"
      class = "org.springframework.web.servlet.view.JstlView">
      <property name = "url" value = "/WEB-INF/jsp/hello.jsp" />
   </bean>
</beans>
hello.jsp
<%@ page contentType = "text/html; charset = UTF-8" %>
<html>
   <head>
      <title>Hello World</title>
   </head>
   <body>
      <h2>${message}</h2>
   </body>
</html>
完成创建源文件和配置文件后,导出应用程序。 右键单击您的应用程序,使用Export → WAR File选项并将HelloWeb.war文件保存在Tomcat的webapps文件夹中。
现在,启动Tomcat服务器并确保您可以使用标准浏览器从webapps文件夹访问其他网页。 尝试访问URL - http://localhost:8080/HelloWeb/hello ,如果Spring Web Application的一切正常,我们将看到以下屏幕。
Spring MVC - Resource Bundle View Resolver Example
ResourceBundleViewResolver用于使用属性文件中定义的视图bean来解析视图名称。 以下示例显示如何使用Spring Web MVC Framework来使用ResourceBundleViewResolver。
TestWeb-servlet.xml
<bean class = "org.springframework.web.servlet.view.ResourceBundleViewResolver">
   <property name = "basename" value = "views" />
</bean>
这里, basename是指包含视图的资源包的名称。 资源包的默认名称是views.properties ,可以使用basename属性覆盖它们。
views.properties
hello.(class) = org.springframework.web.servlet.view.JstlView
hello.url = /WEB-INF/jsp/hello.jsp
例如,使用上面的配置,如果URI -
请求/ hello,DispatcherServlet将请求转发到views.properties中由bean hello定义的hello.jsp。
这里,“hello”是要匹配的视图名称。 而class指的是视图类型,URL指的是视图的位置。
首先,让我们使用一个可用的Eclipse IDE,并考虑以下步骤,使用Spring Web Framework开发基于动态表单的Web应用程序。
| 步 | 描述 |
|---|---|
| 1 | 在Spring MVC - Hello World章节中解释,在com.iowiki包下创建一个名为TestWeb的项目。 |
| 2 | 在com.iowikipackage下创建一个Java类HelloController。 |
| 3 | 在jsp子文件夹下创建一个视图文件hello.jsp。 |
| 4 | 在src文件夹下创建属性文件views.properties。 |
| 5 | 下载JSTL库jstl.jar 。 把它放在你的CLASSPATH中。 |
| 6 | 最后一步是创建源文件和配置文件的内容并导出应用程序,如下所述。 |
HelloController.java
package com.iowiki;
import org.springframework.stereotype.Controller;
import org.springframework.web.bind.annotation.RequestMapping;
import org.springframework.web.bind.annotation.RequestMethod;
import org.springframework.ui.ModelMap;
@Controller
@RequestMapping("/hello")
public class HelloController{
   @RequestMapping(method = RequestMethod.GET)
   public String printHello(ModelMap model) {
      model.addAttribute("message", "Hello Spring MVC Framework!");
      return "hello";
   }
}
TestWeb-servlet.xml
<beans xmlns = "http://www.springframework.org/schema/beans"
   xmlns:context = "http://www.springframework.org/schema/context"
   xmlns:xsi = "http://www.w3.org/2001/XMLSchema-instance"
   xsi:schemaLocation = "
   http://www.springframework.org/schema/beans
   http://www.springframework.org/schema/beans/spring-beans-3.0.xsd
   http://www.springframework.org/schema/context
   http://www.springframework.org/schema/context/spring-context-3.0.xsd">
   <context:component-scan base-package = "com.iowiki" />
   <bean class = "org.springframework.web.servlet.view.ResourceBundleViewResolver">
      <property name = "basename" value = "views" />
   </bean>
</beans>
views.properties
hello.(class) = org.springframework.web.servlet.view.JstlView
hello.url = /WEB-INF/jsp/hello.jsp
hello.jsp
<%@ page contentType="text/html; charset=UTF-8" %>
<html>
   <head>
      <title>Hello World</title>
   </head>
   <body>
      <h2>${message}</h2>
   </body>
</html>
完成创建源文件和配置文件后,导出应用程序。 右键单击您的应用程序,使用Export → WAR File选项并将您的HelloWeb.war文件保存在Tomcat的webapps文件夹中。
现在,启动Tomcat服务器并确保您可以使用标准浏览器从webapps文件夹访问其他网页。 尝试访问URL - http://localhost:8080/HelloWeb/hello ,如果Spring Web Application的一切正常,我们将看到以下屏幕。
Spring MVC - Multiple Resolver Mapping Example
如果要在Spring MVC应用程序中使用多视图解析程序,则可以使用order属性设置优先级顺序。 以下示例显示如何在Spring Web MVC框架中使用ResourceBundleViewResolver和InternalResourceViewResolver 。
TestWeb-servlet.xml
<bean class = "org.springframework.web.servlet.view.ResourceBundleViewResolver">
   <property name = "basename" value = "views" />
   <property name = "order" value = "0" />
</bean>
<bean class = "org.springframework.web.servlet.view.InternalResourceViewResolver">
   <property name = "prefix" value = "/WEB-INF/jsp/" />
   <property name = "suffix" value = ".jsp" />
   <property name = "order" value = "1" />
</bean>
这里,order属性定义了视图解析器的排名。 在这里,0是第一个解析器,1是下一个解析器,依此类推。
views.properties
hello.(class) = org.springframework.web.servlet.view.JstlView
hello.url = /WEB-INF/jsp/hello.jsp
例如,使用上面的配置,如果URI -
请求/ hello,DispatcherServlet将请求转发到views.properties中由bean hello定义的hello.jsp。
首先,让我们使用一个可用的Eclipse IDE,并考虑使用Spring Web Framework开发基于动态表单的Web应用程序的以下步骤。
| 步 | 描述 |
|---|---|
| 1 | 在Spring MVC - Hello World章节中解释,在com.iowiki包下创建一个名为TestWeb的项目。 |
| 2 | 在com.iowikipackage下创建一个Java类HelloController。 |
| 3 | 在jsp子文件夹下创建一个视图文件hello.jsp。 |
| 4 | 在SRC文件夹下创建属性文件views.properties。 |
| 5 | 下载JSTL库jstl.jar 。 把它放在你的CLASSPATH中。 |
| 6 | 最后一步是创建源文件和配置文件的内容并导出应用程序,如下所述。 |
HelloController.java
package com.iowiki;
import org.springframework.stereotype.Controller;
import org.springframework.web.bind.annotation.RequestMapping;
import org.springframework.web.bind.annotation.RequestMethod;
import org.springframework.ui.ModelMap;
@Controller
@RequestMapping("/hello")
public class HelloController{
   @RequestMapping(method = RequestMethod.GET)
   public String printHello(ModelMap model) {
      model.addAttribute("message", "Hello Spring MVC Framework!");
      return "hello";
   }
}
TestWeb-servlet.xml
<beans xmlns = "http://www.springframework.org/schema/beans"
   xmlns:context = "http://www.springframework.org/schema/context"
   xmlns:xsi = "http://www.w3.org/2001/XMLSchema-instance"
   xsi:schemaLocation = "
   http://www.springframework.org/schema/beans
   http://www.springframework.org/schema/beans/spring-beans-3.0.xsd
   http://www.springframework.org/schema/context
   http://www.springframework.org/schema/context/spring-context-3.0.xsd">
   <context:component-scan base-package = "com.iowiki" />
   <bean class = "org.springframework.web.servlet.view.ResourceBundleViewResolver">
      <property name = "basename" value = "views" />
      <property name = "order" value = "0" />
   </bean>
   <bean class = "org.springframework.web.servlet.view.InternalResourceViewResolver">
      <property name = "prefix" value = "/WEB-INF/jsp/" />
      <property name = "suffix" value = ".jsp" />
      <property name = "order" value = "1" />
   </bean>
</beans>
views.properties
hello.(class) = org.springframework.web.servlet.view.JstlView
hello.url = /WEB-INF/jsp/hello.jsp
hello.jsp
<%@ page contentType = "text/html; charset = UTF-8" %>
<html>
   <head>
      <title>Hello World</title>
   </head>
   <body>
      <h2>${message}</h2>
   </body>
</html>
完成创建源文件和配置文件后,导出应用程序。 右键单击您的应用程序,使用Export → WAR File选项并将您的HelloWeb.war文件保存在Tomcat的webapps文件夹中。
现在,启动Tomcat服务器并确保您可以使用标准浏览器从webapps文件夹访问其他网页。 尝试访问URL - http://localhost:8080/HelloWeb/hello ,如果Spring Web Application一切正常,我们将看到以下屏幕。
Spring MVC - Hibernate Validator Example
以下示例说明如何使用Spring Web MVC框架在表单中使用错误处理和验证器。 首先,让我们使用一个可用的Eclipse IDE,并遵循以下步骤,使用Spring Web Framework开发基于动态表单的Web应用程序。
| 步 | 描述 |
|---|---|
| 1 | 在Spring MVC - Hello World章节中解释,在com.iowiki包下创建一个名为TestWeb的项目。 |
| 2 | 在com.iowiki包下创建Java类Student,StudentController和StudentValidator。 |
| 3 | 在jsp子文件夹下创建视图文件addStudent.jsp和result.jsp。 |
| 4 | 下载Hibernate Validator库Hibernate Validator 。 解压缩hibernate-validator-5.3.4.Final.jar以及下载的zip文件所需文件夹下的必需依赖项。 把它们放在你的CLASSPATH中。 |
| 5 | 在SRC文件夹下创建属性文件messages.properties。 |
| 6 | 最后一步是创建源文件和配置文件的内容并导出应用程序,如下所述。 |
Student.java
package com.iowiki;
import org.hibernate.validator.constraints.NotEmpty;
import org.hibernate.validator.constraints.Range;
public class Student {
   @Range(min = 1, max = 150)
   private Integer age;
   @NotEmpty
   private String name;
   private Integer id;
   public void setAge(Integer age) {
      this.age = age;
   }
   public Integer getAge() {
      return age;
   }
   public void setName(String name) {
      this.name = name;
   }
   public String getName() {
      return name;
   }
   public void setId(Integer id) {
      this.id = id;
   }
   public Integer getId() {
      return id;
   }
}
StudentController.java
package com.iowiki;
import org.springframework.stereotype.Controller;
import org.springframework.ui.Model;
import org.springframework.validation.BindingResult;
import org.springframework.validation.annotation.Validated;
import org.springframework.web.bind.annotation.ModelAttribute;
import org.springframework.web.bind.annotation.RequestMapping;
import org.springframework.web.bind.annotation.RequestMethod;
import org.springframework.web.servlet.ModelAndView;
@Controller
public class StudentController {
   @RequestMapping(value = "/addStudent", method = RequestMethod.GET)
   public ModelAndView student() {
      return new ModelAndView("addStudent", "command", new Student());
   }
   @ModelAttribute("student")
   public Student createStudentModel() {
      return new Student();
   }
   @RequestMapping(value = "/addStudent", method = RequestMethod.POST)
   public String addStudent(@ModelAttribute("student") @Validated Student student,
      BindingResult bindingResult, Model model) {
      if (bindingResult.hasErrors()) {
         return "addStudent";
      }
      model.addAttribute("name", student.getName());
      model.addAttribute("age", student.getAge());
      model.addAttribute("id", student.getId());
      return "result";
   }
}
messages.properties
NotEmpty.student.name = Name is required!
Range.student.age = Age value must be between 1 and 150!
这里的关键是
TestWeb-servlet.xml
<beans xmlns = "http://www.springframework.org/schema/beans"
   xmlns:context = "http://www.springframework.org/schema/context"
   xmlns:mvc = "http://www.springframework.org/schema/mvc"
   xmlns:xsi = "http://www.w3.org/2001/XMLSchema-instance"
   xsi:schemaLocation = "
   http://www.springframework.org/schema/beans
   http://www.springframework.org/schema/beans/spring-beans-3.0.xsd
   http://www.springframework.org/schema/context
   http://www.springframework.org/schema/context/spring-context-3.0.xsd
   http://www.springframework.org/schema/mvc
   http://www.springframework.org/schema/mvc/spring-mvc-3.0.xsd">
   <context:component-scan base-package = "com.iowiki" />
   <mvc:annotation-driven />
   <bean class = "org.springframework.context.support.ResourceBundleMessageSource"
      id = "messageSource">
      <property name = "basename" value = "messages" />
   </bean>
   <bean class = "org.springframework.web.servlet.view.InternalResourceViewResolver">
      <property name = "prefix" value = "/WEB-INF/jsp/" />
      <property name = "suffix" value = ".jsp" />
   </bean>
</beans>
这里,对于第一个服务方法student() ,我们在名为“command”的ModelAndView对象中传递了一个空白的Studentobject》 ,因为如果使用“form:form”,spring框架需要一个名为“command”的对象。 JSP文件中的标记。 因此,当调用student()方法时,它返回addStudent.jsp视图。
将针对HelloWeb/addStudent URL上的POST方法调用第二个服务方法addStudent() 。 您将根据提交的信息准备模型对象。 最后,将从service方法返回“result”视图,这将导致呈现result.jsp。 如果使用验证器生成错误,则返回相同的视图“addStudent”,Spring会自动从视图中的BindingResult注入错误消息。
addStudent.jsp
<%@taglib uri = "http://www.springframework.org/tags/form" prefix = "form"%>
<html>
   <head>
      <title>Spring MVC Form Handling</title>
   </head>
   <style>
      .error {
         color: #ff0000;
      }
      .errorblock {
         color: #000;
         background-color: #ffEEEE;
         border: 3px solid #ff0000;
         padding: 8px;
         margin: 16px;
      }
   </style>
   <body>
      <h2>Student Information</h2>
      <form:form method = "POST" action = "/TestWeb/addStudent" commandName = "student">
      <form:errors path = "*" cssClass = "errorblock" element = "div" />
         <table>
            <tr>
               <td><form:label path = "name">Name</form:label></td>
               <td><form:input path = "name" /></td>
               <td><form:errors path = "name" cssClass = "error" /></td>
            </tr>
            <tr>
               <td><form:label path = "age">Age</form:label></td>
               <td><form:input path = "age" /></td>
               <td><form:errors path = "age" cssClass = "error" /></td>
            </tr>
            <tr>
               <td><form:label path = "id">id</form:label></td>
               <td><form:input path = "id" /></td>
               </tr>
            <tr>
               <td colspan = "2">
               <input type = "submit" value = "Submit"/>
               </td>
            </tr>
         </table>
      </form:form>
   </body>
</html>
在这里,我们使用带有path =“*”的
标记来呈现错误消息。 例如 -<form:errors path = "*" cssClass = "errorblock" element = "div" />
它将为所有输入验证呈现错误消息。 我们使用带有path =“name”的
标记来呈现name字段的错误消息。例如 -
<form:errors path = "name" cssClass = "error" />
<form:errors path = "age" cssClass = "error" />
它将呈现名称和年龄字段验证的错误消息。
result.jsp
<%@taglib uri = "http://www.springframework.org/tags/form" prefix = "form"%>
<html>
   <head>
      <title>Spring MVC Form Handling</title>
   </head>
   <body>
      <h2>Submitted Student Information</h2>
      <table>
         <tr>
            <td>Name</td>
            <td>${name}</td>
         </tr>
         <tr>
            <td>Age</td>
            <td>${age}</td>
         </tr>
         <tr>
            <td>ID</td>
            <td>${id}</td>
         </tr>
      </table>
   </body>
</html>
完成创建源文件和配置文件后,导出应用程序。 右键单击您的应用程序,使用Export → WAR File选项并将HelloWeb.war文件保存在Tomcat的webapps文件夹中。
现在,启动Tomcat服务器并确保您可以使用标准浏览器从webapps文件夹访问其他网页。 尝试使用URL - http://localhost:8080/TestWeb/addStudent ,如果输入了无效值,我们将看到以下屏幕。

Spring MVC - Generate RSS Feed Example
以下示例说明如何使用Spring Web MVC Framework生成RSS Feed。 首先,让我们使用一个可用的Eclipse IDE,然后考虑以下步骤,使用Spring Web Framework开发基于动态表单的Web应用程序。
| 步 | 描述 |
|---|---|
| 1 | 在Spring MVC - Hello World章节中解释,在com.iowiki包下创建一个名为TestWeb的项目。 |
| 2 | 在com.iowiki包下创建Java类RSSMessage,RSSFeedViewer和RSSController。 |
| 3 | 从同一个maven存储库页面下载罗马图书馆Rome及其依赖项rome-utils,jdom和slf4j。 把它们放在你的CLASSPATH中。 |
| 4 | 在SRC文件夹下创建属性文件messages.properties。 |
| 5 | 最后一步是创建源文件和配置文件的内容并导出应用程序,如下所述。 |
RSSMessage.java
package com.iowiki;
import java.util.Date;
public class RSSMessage {
   String title;
   String url;
   String summary;
   Date createdDate;
   public String getTitle() {
      return title;
   }
   public void setTitle(String title) {
      this.title = title;
   }
   public String getUrl() {
      return url;
   }
   public void setUrl(String url) {
      this.url = url;
   }
   public String getSummary() {
      return summary;
   }
   public void setSummary(String summary) {
      this.summary = summary;
   }
   public Date getCreatedDate() {
      return createdDate;
   }
   public void setCreatedDate(Date createdDate) {
      this.createdDate = createdDate;
   }
}
RSSFeedViewer.java
package com.iowiki;
import java.util.ArrayList;
import java.util.List;
import java.util.Map;
import javax.servlet.http.HttpServletRequest;
import javax.servlet.http.HttpServletResponse;
import org.springframework.web.servlet.view.feed.AbstractRssFeedView;
import com.rometools.rome.feed.rss.Channel;
import com.rometools.rome.feed.rss.Content;
import com.rometools.rome.feed.rss.Item;
public class RSSFeedViewer extends AbstractRssFeedView {
   @Override
   protected void buildFeedMetadata(Map<String, Object> model, Channel feed,
      HttpServletRequest request) {
      feed.setTitle("IoWiki Dot Com");
      feed.setDescription("Java Tutorials and Examples");
      feed.setLink("http://www.iowiki.com");
      super.buildFeedMetadata(model, feed, request);
   }
   @Override
   protected List<Item> buildFeedItems(Map<String, Object> model,
      HttpServletRequest request, HttpServletResponse response) throws Exception {
      List<RSSMessage> listContent = (List<RSSMessage>) model.get("feedContent");
      List<Item> items = new ArrayList<Item>(listContent.size());
      for(RSSMessage tempContent : listContent ){
         Item item = new Item();
         Content content = new Content();
         content.setValue(tempContent.getSummary());
         item.setContent(content);
         item.setTitle(tempContent.getTitle());
         item.setLink(tempContent.getUrl());
         item.setPubDate(tempContent.getCreatedDate());
         items.add(item);
      }
      return items;
   }
}
RSSController.java
package com.iowiki;
import java.util.ArrayList;
import java.util.Date;
import java.util.List;
import org.springframework.stereotype.Controller;
import org.springframework.web.bind.annotation.RequestMapping;
import org.springframework.web.bind.annotation.RequestMethod;
import org.springframework.web.servlet.ModelAndView;
@Controller
public class RSSController {
   @RequestMapping(value="/rssfeed", method = RequestMethod.GET)
   public ModelAndView getFeedInRss() {
      List<RSSMessage> items = new ArrayList<RSSMessage>();
      RSSMessage content  = new RSSMessage();
      content.setTitle("Spring Tutorial");
      content.setUrl("http://www.iowiki/spring");
      content.setSummary("Spring tutorial summary...");
      content.setCreatedDate(new Date());
      items.add(content);
      RSSMessage content2  = new RSSMessage();
      content2.setTitle("Spring MVC");
      content2.setUrl("http://www.iowiki/springmvc");
      content2.setSummary("Spring MVC tutorial summary...");
      content2.setCreatedDate(new Date());
      items.add(content2);
      ModelAndView mav = new ModelAndView();
      mav.setViewName("rssViewer");
      mav.addObject("feedContent", items);
      return mav;
   }
}
TestWeb-servlet.xml
<beans xmlns = "http://www.springframework.org/schema/beans"
   xmlns:context = "http://www.springframework.org/schema/context"
   xmlns:xsi = "http://www.w3.org/2001/XMLSchema-instance"
   xsi:schemaLocation = "
   http://www.springframework.org/schema/beans
   http://www.springframework.org/schema/beans/spring-beans-3.0.xsd
   http://www.springframework.org/schema/context
   http://www.springframework.org/schema/context/spring-context-3.0.xsd">
   <context:component-scan base-package = "com.iowiki" />
   <bean class = "org.springframework.web.servlet.view.BeanNameViewResolver" />
   <bean id = "rssViewer" class = "com.iowiki.RSSFeedViewer" />
</beans>
在这里,我们创建了一个RSS提要POJO RSSMessage和一个RSS消息查看器,它扩展了AbstractRssFeedView并覆盖了它的方法。 在RSSController中,我们生成了一个示例RSS Feed。
完成创建源文件和配置文件后,导出应用程序。 右键单击您的应用程序,使用Export → WAR File选项并将TestWeb.war文件保存在Tomcat的webapps文件夹中。
现在,启动Tomcat服务器并确保您可以使用标准浏览器从webapps文件夹访问其他网页。 尝试一个URL - http://localhost:8080/TestWeb/rssfeed ,我们将看到以下屏幕。
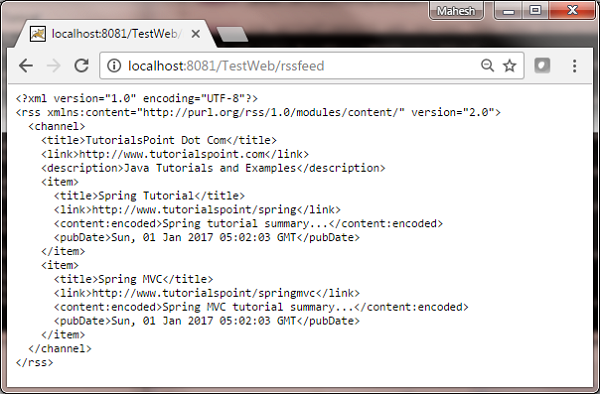
Spring MVC - Generate XML Example
以下示例说明如何使用Spring Web MVC Framework生成XML。 首先,让我们使用一个可用的Eclipse IDE,并坚持以下步骤,使用Spring Web Framework开发基于动态表单的Web应用程序。
| 步 | 描述 |
|---|---|
| 1 | 在Spring MVC - Hello World章节中解释,在com.iowiki包下创建一个名为TestWeb的项目。 |
| 2 | 在com.iowikipackage下创建Java类User和UserController。 |
| 3 | 最后一步是创建源文件和配置文件的内容并导出应用程序,如下所述。 |
User.java
package com.iowiki;
import javax.xml.bind.annotation.XmlElement;
import javax.xml.bind.annotation.XmlRootElement;
@XmlRootElement(name = "user")
public class User {
   private String name;
   private int id;
   public String getName() {
      return name;
   }
   @XmlElement
   public void setName(String name) {
      this.name = name;
   }
   public int getId() {
      return id;
   }
   @XmlElement
   public void setId(int id) {
      this.id = id;
   }
}
UserController.java)/h2>
package com.iowiki;
import org.springframework.stereotype.Controller;
import org.springframework.web.bind.annotation.PathVariable;
import org.springframework.web.bind.annotation.RequestMapping;
import org.springframework.web.bind.annotation.RequestMethod;
import org.springframework.web.bind.annotation.ResponseBody;
@Controller
@RequestMapping("/user")
public class UserController {
   @RequestMapping(value="{name}", method = RequestMethod.GET)
   public @ResponseBody User getUser(@PathVariable String name) {
      User user = new User();
      user.setName(name);
      user.setId(1);
      return user;
   }
}
package com.iowiki;
import org.springframework.stereotype.Controller;
import org.springframework.web.bind.annotation.PathVariable;
import org.springframework.web.bind.annotation.RequestMapping;
import org.springframework.web.bind.annotation.RequestMethod;
import org.springframework.web.bind.annotation.ResponseBody;
@Controller
@RequestMapping("/user")
public class UserController {
@RequestMapping(value="{name}", method = RequestMethod.GET)
public @ResponseBody User getUser(@PathVariable String name) {
User user = new User();
user.setName(name);
user.setId(1);
return user;
}
}
TestWeb-servlet.xml
<beans xmlns = "http://www.springframework.org/schema/beans"
   xmlns:context = "http://www.springframework.org/schema/context"
   xmlns:xsi = "http://www.w3.org/2001/XMLSchema-instance"
   xmlns:mvc = "http://www.springframework.org/schema/mvc"
   xsi:schemaLocation = "
   http://www.springframework.org/schema/beans
   http://www.springframework.org/schema/beans/spring-beans-3.0.xsd
   http://www.springframework.org/schema/context
   http://www.springframework.org/schema/context/spring-context-3.0.xsd
   http://www.springframework.org/schema/mvc
   http://www.springframework.org/schema/mvc/spring-mvc-3.0.xsd">
   <context:component-scan base-package = "com.iowiki" />
   <mvc:annotation-driven />
</beans>
在这里,我们创建了一个XML Mapped POJO User,在UserController中,我们返回了User。 Spring自动处理基于RequestMapping的XML转换。
完成创建源文件和配置文件后,导出应用程序。 右键单击您的应用程序,使用Export → WAR File选项并将TestWeb.war文件保存在Tomcat的webapps文件夹中。
现在,启动Tomcat服务器并确保您可以使用标准浏览器从webapps文件夹访问其他网页。 尝试一个URL - http://localhost:8080/TestWeb/mahesh ,我们将看到以下屏幕。

Spring MVC - Generate JSON Example
以下示例说明如何使用Spring Web MVC Framework生成JSON。 首先,让我们使用一个有效的Eclipse IDE,并考虑以下步骤使用Spring Web Framework开发基于动态表单的Web应用程序 -
| 步 | 描述 |
|---|---|
| 1 | 在Spring MVC - Hello World章节中解释,在com.iowiki包下创建一个名为TestWeb的项目。 |
| 2 | 在com.iowiki包下创建一个Java类User , UserController 。 |
| 3 | 从maven存储库页面下载Jackson库Jackson Core,Jackson Databind和Jackson Annotations 。 把它们放在你的CLASSPATH中。 |
| 4 | 最后一步是创建所有源文件和配置文件的内容,并导出应用程序,如下所述。 |
User.java
package com.iowiki;
public class User {
   private String name;
   private int id;
   public String getName() {
      return name;
   }
   public void setName(String name) {
      this.name = name;
   }
   public int getId() {
      return id;
   }
   public void setId(int id) {
      this.id = id;
   }
}
UserController.java)/h2>
package com.iowiki;
import org.springframework.stereotype.Controller;
import org.springframework.web.bind.annotation.PathVariable;
import org.springframework.web.bind.annotation.RequestMapping;
import org.springframework.web.bind.annotation.RequestMethod;
import org.springframework.web.bind.annotation.ResponseBody;
@Controller
@RequestMapping("/user")
public class UserController {
   @RequestMapping(value="{name}", method = RequestMethod.GET)
   public @ResponseBody User getUser(@PathVariable String name) {
      User user = new User();
      user.setName(name);
      user.setId(1);
      return user;
   }
}
package com.iowiki;
import org.springframework.stereotype.Controller;
import org.springframework.web.bind.annotation.PathVariable;
import org.springframework.web.bind.annotation.RequestMapping;
import org.springframework.web.bind.annotation.RequestMethod;
import org.springframework.web.bind.annotation.ResponseBody;
@Controller
@RequestMapping("/user")
public class UserController {
@RequestMapping(value="{name}", method = RequestMethod.GET)
public @ResponseBody User getUser(@PathVariable String name) {
User user = new User();
user.setName(name);
user.setId(1);
return user;
}
}
TestWeb-servlet.xml
<beans xmlns = http://www.springframework.org/schema/beans"
   xmlns:context = http://www.springframework.org/schema/context"
   xmlns:xsi = http://www.w3.org/2001/XMLSchema-instance"
   xmlns:mvc = http://www.springframework.org/schema/mvc"
   xsi:schemaLocation =
   http://www.springframework.org/schema/beans
   http://www.springframework.org/schema/beans/spring-beans-3.0.xsd
   http://www.springframework.org/schema/context
   http://www.springframework.org/schema/context/spring-context-3.0.xsd
   http://www.springframework.org/schema/mvc
   http://www.springframework.org/schema/mvc/spring-mvc-3.0.xsd">
   <context:component-scan base-package = com.iowiki" />
   <mvc:annotation-driven />
</beans>
在这里,我们创建了一个简单的POJO用户,在UserController中我们已经返回了User。 Spring自动处理基于类路径中存在的RequestMapping和Jackson jar的JSON转换。
完成创建源文件和配置文件后,导出应用程序。 右键单击您的应用程序,使用Export → WAR File选项并将TestWeb.war文件保存在Tomcat的webapps文件夹中。
现在,启动Tomcat服务器并确保您可以使用标准浏览器从webapps文件夹访问其他网页。 尝试一个URL - http://localhost:8080/TestWeb/mahesh ,我们将看到以下屏幕。
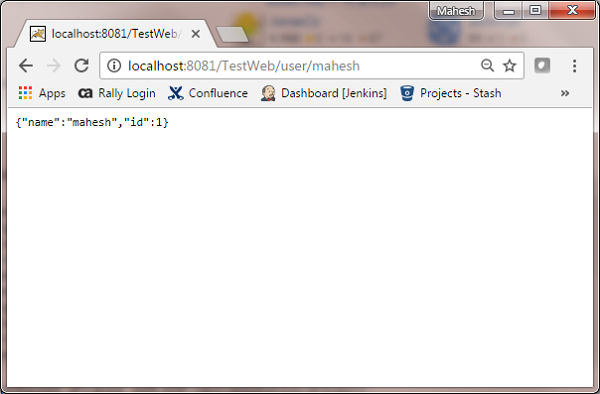
Spring MVC - Generate Excel Example
以下示例说明如何使用Spring Web MVC Framework生成Excel。 首先,让我们使用一个可用的Eclipse IDE,并坚持以下步骤,使用Spring Web Framework开发基于动态表单的Web应用程序。
| 步 | 描述 |
|---|---|
| 1 | 在Spring MVC - Hello World章节中解释,在com.iowiki包下创建一个名为TestWeb的项目。 |
| 2 | 在com.iowiki包下创建Java类UserExcelView和ExcelController。 |
| 3 | 从maven存储库页面下载Apache POI库Apache POI 。 把它放在你的CLASSPATH中。 |
| 4 | 最后一步是创建源文件和配置文件的内容并导出应用程序,如下所述。 |
ExcelController.java
package com.iowiki;
import java.util.HashMap;
import java.util.Map;
import javax.servlet.http.HttpServletRequest;
import javax.servlet.http.HttpServletResponse;
import org.springframework.web.servlet.ModelAndView;
import org.springframework.web.servlet.mvc.AbstractController;
public class ExcelController extends AbstractController {
   @Override
   protected ModelAndView handleRequestInternal(HttpServletRequest request,
      HttpServletResponse response) throws Exception {
      //user data
      Map<String,String> userData = new HashMap<String,String>();
      userData.put("1", "Mahesh");
      userData.put("2", "Suresh");
      userData.put("3", "Ramesh");
      userData.put("4", "Naresh");
      return new ModelAndView("UserSummary","userData",userData);
   }
}
UserExcelView.java
package com.iowiki;
import java.util.Map;
import javax.servlet.http.HttpServletRequest;
import javax.servlet.http.HttpServletResponse;
import org.apache.poi.hssf.usermodel.HSSFRow;
import org.apache.poi.hssf.usermodel.HSSFSheet;
import org.apache.poi.hssf.usermodel.HSSFWorkbook;
import org.springframework.web.servlet.view.document.AbstractExcelView;
public class UserExcelView extends AbstractExcelView {
   @Override
   protected void buildExcelDocument(Map<String, Object> model,
      HSSFWorkbook workbook, HttpServletRequest request, HttpServletResponse response)
      throws Exception {
      Map<String,String> userData = (Map<String,String>) model.get("userData");
      //create a wordsheet
      HSSFSheet sheet = workbook.createSheet("User Report");
      HSSFRow header = sheet.createRow(0);
      header.createCell(0).setCellValue("Roll No");
      header.createCell(1).setCellValue("Name");
      int rowNum = 1;
      for (Map.Entry<String, String> entry : userData.entrySet()) {
         //create the row data
         HSSFRow row = sheet.createRow(rowNum++);
         row.createCell(0).setCellValue(entry.getKey());
         row.createCell(1).setCellValue(entry.getValue());
      }
   }
}
TestWeb-servlet.xml
<beans xmlns = "http://www.springframework.org/schema/beans"
   xmlns:context = "http://www.springframework.org/schema/context"
   xmlns:xsi = "http://www.w3.org/2001/XMLSchema-instance"
   xmlns:mvc = "http://www.springframework.org/schema/mvc"
   xsi:schemaLocation = "
   http://www.springframework.org/schema/beans
   http://www.springframework.org/schema/beans/spring-beans-3.0.xsd
   http://www.springframework.org/schema/context
   http://www.springframework.org/schema/context/spring-context-3.0.xsd
   http://www.springframework.org/schema/mvc
   http://www.springframework.org/schema/mvc/spring-mvc-3.0.xsd">
   <bean class = "org.springframework.web.servlet.mvc.support.ControllerClassNameHandlerMapping" />
   <bean class = "com.iowiki.ExcelController" />
   <bean class = "org.springframework.web.servlet.view.XmlViewResolver">
      <property name = "location">
         <value>/WEB-INF/views.xml</value>
      </property>
   </bean>
</beans>
views.xml
<beans xmlns = "http://www.springframework.org/schema/beans"
   xmlns:context = "http://www.springframework.org/schema/context"
   xmlns:xsi = "http://www.w3.org/2001/XMLSchema-instance"
   xsi:schemaLocation = "
   http://www.springframework.org/schema/beans
   http://www.springframework.org/schema/beans/spring-beans-3.0.xsd
   http://www.springframework.org/schema/context
   http://www.springframework.org/schema/context/spring-context-3.0.xsd">
   <bean id = "UserSummary" class = "com.iowiki.UserExcelView"></bean>
</beans>
在这里,我们创建了一个ExcelController和一个ExcelView。 Apache POI库处理Microsoft Office文件格式,并将数据转换为Excel文档。
完成创建源文件和配置文件后,导出应用程序。 右键单击您的应用程序,使用Export → WAR File选项并将TestWeb.war文件保存在Tomcat的webapps文件夹中。
现在,启动Tomcat服务器并确保您可以使用标准浏览器从webapps文件夹访问其他网页。 尝试一个URL - http://localhost:8080/TestWeb/excel ,我们将看到以下屏幕。
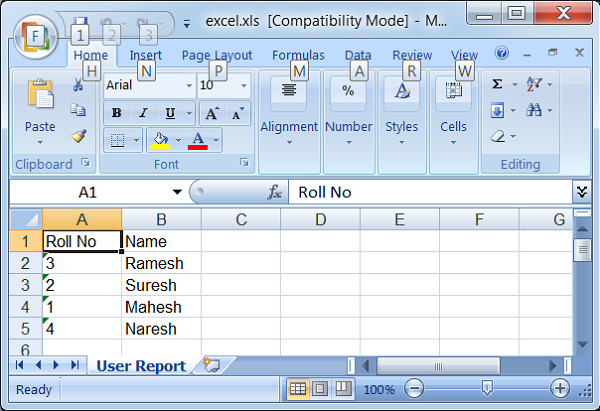
Spring MVC - Generate PDF Example
以下示例说明如何使用Spring Web MVC Framework生成PDF。 首先,让我们使用一个可用的Eclipse IDE,并遵循以下步骤使用Spring Web Framework开发基于动态表单的Web应用程序。
| 步 | 描述 |
|---|---|
| 1 | 在Spring MVC - Hello World章节中解释,在com.iowiki包下创建一个名为TestWeb的项目。 |
| 2 | 在com.iowiki包下创建Java类UserPDFView和PDFController。 |
| 3 | 从maven存储库页面下载iText库 - iText 。 把它放在你的CLASSPATH中。 |
| 4 | 最后一步是创建源文件和配置文件的内容并导出应用程序,如下所述。 |
PDFController.java
package com.iowiki;
import java.util.HashMap;
import java.util.Map;
import javax.servlet.http.HttpServletRequest;
import javax.servlet.http.HttpServletResponse;
import org.springframework.web.servlet.ModelAndView;
import org.springframework.web.servlet.mvc.AbstractController;
public class PDFController extends AbstractController {
   @Override
   protected ModelAndView handleRequestInternal(HttpServletRequest request,
      HttpServletResponse response) throws Exception {
      //user data
      Map<String,String> userData = new HashMap<String,String>();
      userData.put("1", "Mahesh");
      userData.put("2", "Suresh");
      userData.put("3", "Ramesh");
      userData.put("4", "Naresh");
      return new ModelAndView("UserSummary","userData",userData);
   }
}
UserExcelView.java
package com.iowiki;
import java.util.Map;
import javax.servlet.http.HttpServletRequest;
import javax.servlet.http.HttpServletResponse;
import org.springframework.web.servlet.view.document.AbstractPdfView;
import com.lowagie.text.Document;
import com.lowagie.text.Table;
import com.lowagie.text.pdf.PdfWriter;
public class UserPDFView extends AbstractPdfView {
   protected void buildPdfDocument(Map<String, Object> model, Document document,
      PdfWriter pdfWriter, HttpServletRequest request, HttpServletResponse response)
      throws Exception {
      Map<String,String> userData = (Map<String,String>) model.get("userData");
      Table table = new Table(2);
      table.addCell("Roll No");
      table.addCell("Name");
      for (Map.Entry<String, String> entry : userData.entrySet()) {
         table.addCell(entry.getKey());
         table.addCell(entry.getValue());
      }
      document.add(table);
   }
}
TestWeb-servlet.xml
<beans xmlns = "http://www.springframework.org/schema/beans"
   xmlns:context = "http://www.springframework.org/schema/context"
   xmlns:xsi = "http://www.w3.org/2001/XMLSchema-instance"
   xmlns:mvc = "http://www.springframework.org/schema/mvc"
   xsi:schemaLocation = "
   http://www.springframework.org/schema/beans
   http://www.springframework.org/schema/beans/spring-beans-3.0.xsd
   http://www.springframework.org/schema/context
   http://www.springframework.org/schema/context/spring-context-3.0.xsd
   http://www.springframework.org/schema/mvc
   http://www.springframework.org/schema/mvc/spring-mvc-3.0.xsd">
   <bean class = "org.springframework.web.servlet.mvc.support.ControllerClassNameHandlerMapping" />
   <bean class = "com.iowiki.PDFController" />
   <bean class = "org.springframework.web.servlet.view.XmlViewResolver">
      <property name = "location">
         <value>/WEB-INF/views.xml</value>
      </property>
   </bean>
</beans>
views.xml
<beans xmlns = "http://www.springframework.org/schema/beans"
   xmlns:context = "http://www.springframework.org/schema/context"
   xmlns:xsi = "http://www.w3.org/2001/XMLSchema-instance"
   xsi:schemaLocation = "
   http://www.springframework.org/schema/beans
   http://www.springframework.org/schema/beans/spring-beans-3.0.xsd
   http://www.springframework.org/schema/context
   http://www.springframework.org/schema/context/spring-context-3.0.xsd">
   <bean id = "UserSummary" class = "com.iowiki.UserPDFView"></bean>
</beans>
在这里,我们创建了一个PDFController和UserPDFView。 iText库处理PDF文件格式,并将数据转换为PDF文档。
完成创建源文件和配置文件后,导出应用程序。 右键单击您的应用程序,使用Export → WAR File选项并将TestWeb.war文件保存在Tomcat的webapps文件夹中。
现在,启动Tomcat服务器并确保您可以使用标准浏览器从webapps文件夹访问其他网页。 我们也可以尝试以下URL - http://localhost:8080/TestWeb/pdf ,如果一切按计划进行,我们将看到以下屏幕。
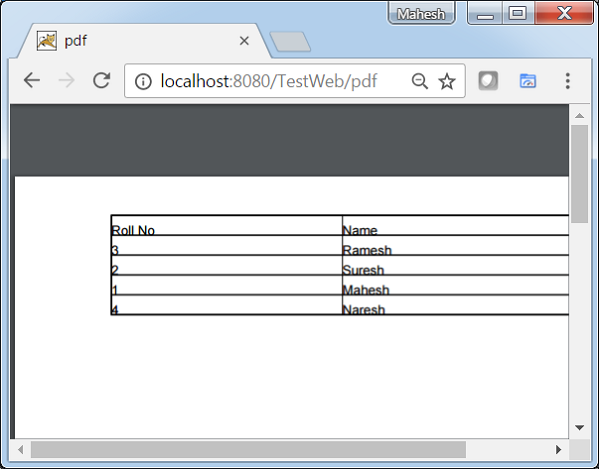
Spring MVC - Integrate LOG4J Example
以下示例说明如何使用Spring Web MVC Framework集成LOG4J。 首先,让我们使用一个有效的Eclipse IDE,并坚持以下步骤,使用Spring Web Framework开发基于动态表单的Web应用程序。
| 步 | 描述 |
|---|---|
| 1 | 在Spring MVC - Hello World章节中解释,在com.iowiki包下创建一个名为TestWeb的项目。 |
| 2 | 在com.iowikipackage下创建一个Java类HelloController。 |
| 3 | 从maven存储库页面下载log4j库LOG4J 。 把它放在你的CLASSPATH中。 |
| 4 | 在SRC文件夹下创建log4j.properties。 |
| 5 | 最后一步是创建源文件和配置文件的内容并导出应用程序,如下所述。 |
HelloController.java
package com.iowiki;
import org.apache.log4j.Logger;
import org.springframework.stereotype.Controller;
import org.springframework.web.bind.annotation.RequestMapping;
import org.springframework.web.bind.annotation.RequestMethod;
import org.springframework.ui.ModelMap;
@Controller
@RequestMapping("/hello")
public class HelloController{
   private static final Logger LOGGER = Logger.getLogger(HelloController.class);
   @RequestMapping(method = RequestMethod.GET)
   public String printHello(ModelMap model) {
      LOGGER.info("printHello started.");
      //logs debug message
      if(LOGGER.isDebugEnabled()){
         LOGGER.debug("Inside:  printHello");
      }
      //logs exception
      LOGGER.error("Logging a sample exception", new Exception("Testing"));
      model.addAttribute("message", "Hello Spring MVC Framework!");
      LOGGER.info("printHello ended.");
      return "hello";
   }
}
log4j.properties
# Root logger option
log4j.rootLogger = DEBUG, stdout, file
# Redirect log messages to console
log4j.appender.stdout = org.apache.log4j.ConsoleAppender
log4j.appender.stdout.Target = System.out
log4j.appender.stdout.layout = org.apache.log4j.PatternLayout
log4j.appender.stdout.layout.ConversionPattern = %d{yyyy-MM-dd HH:mm:ss} %-5p %c{1}:%L - %m%n
# Redirect log messages to a log file
log4j.appender.file = org.apache.log4j.RollingFileAppender
#outputs to Tomcat home
log4j.appender.file.File = ${catalina.home}/logs/myapp.log
log4j.appender.file.MaxFileSize = 5MB
log4j.appender.file.MaxBackupIndex = 10
log4j.appender.file.layout = org.apache.log4j.PatternLayout
log4j.appender.file.layout.ConversionPattern = %d{yyyy-MM-dd HH:mm:ss} %-5p %c{1}:%L - %m%n
TestWeb-servlet.xml
<beans xmlns = "http://www.springframework.org/schema/beans"
   xmlns:context = "http://www.springframework.org/schema/context"
   xmlns:xsi = "http://www.w3.org/2001/XMLSchema-instance"
   xmlns:mvc = "http://www.springframework.org/schema/mvc"
   xsi:schemaLocation = "
   http://www.springframework.org/schema/beans
   http://www.springframework.org/schema/beans/spring-beans-3.0.xsd
   http://www.springframework.org/schema/context
   http://www.springframework.org/schema/context/spring-context-3.0.xsd
   http://www.springframework.org/schema/mvc
   http://www.springframework.org/schema/mvc/spring-mvc-3.0.xsd">
   <context:component-scan base-package = "com.iowiki" />
   <bean class = "org.springframework.web.servlet.view.InternalResourceViewResolver">
      <property name = "prefix" value = "/WEB-INF/jsp/" />
      <property name = "suffix" value = ".jsp" />
   </bean>
</beans>
hello.jsp
<%@ page contentType = "text/html; charset = UTF-8" %>
<html>
   <head>
      <title>Hello World</title>
   </head>
   <body>
      <h2>${message}</h2>
   </body>
</html>
在这里,我们已经将LOG4J配置为在Tomcat控制台和&t中存在的文件中记录详细信息。 tomcat home→以myapp.log登录。
完成创建源文件和配置文件后,导出应用程序。 右键单击您的应用程序,使用Export → WAR File选项并将TestWeb.war文件保存在Tomcat的webapps文件夹中。
现在,启动Tomcat服务器并确保您可以使用标准浏览器从webapps文件夹访问其他网页。 尝试一个URL - http://localhost:8080/TestWeb/hello ,我们将在Tomcat的日志中看到以下屏幕。