SimplePanel
介绍 (Introduction)
SimplePanel小部件表示仅包含一个小部件的面板的基类。
Class 声明 (Class Declaration)
以下是com.google.gwt.user.client.ui.SimplePanel类的声明 -
public class SimplePanel
   extends Panel
      implements HasOneWidget
类构造函数 (Class Constructors)
| Sr.No. | 构造函数和描述 |
|---|---|
| 1 | SimplePanel() 创建一个使用DIV作为其内容的空面板。 |
| 2 | protected SimplePanel(Element elem) 创建一个空面板,使用指定的浏览器元素作为其内容。 |
Class Methods
| Sr.No. | 功能名称和描述 |
|---|---|
| 1 | void add(Widget w) 将小部件添加到此面板。 |
| 2 | protected Element getContainerElement() 重写此方法以指定除根元素之外的元素是面板的子窗口小部件的容器。 |
| 3 | Widget getWidget() 获取面板的子窗口小部件。 |
| 4 | java.util.Iterator《Widget》 iterator() 获取包含的小部件的迭代器。 |
| 5 | boolean remove(Widget w) 删除子窗口小部件。 |
| 6 | void setWidget(IsWidget w) 设置接收器的唯一小部件,替换之前的小部件(如果有的话)。 |
| 7 | void setWidget(Widget w) 设置此面板的小部件。 |
方法继承 (Methods Inherited)
该类继承以下类中的方法 -
com.google.gwt.user.client.ui.UIObject
com.google.gwt.user.client.ui.Widget
com.google.gwt.user.client.ui.Panel
java.lang.Object
SimplePanel小部件示例
此示例将指导您完成在GWT中显示SimplePanel Widget的使用的简单步骤。 按照以下步骤更新我们在GWT - Create Application的GWT应用程序GWT - Create Application章节 -
| 步 | 描述 |
|---|---|
| 1 | 在com.iowiki包下创建一个名为HelloWorld的项目,如GWT - Create Application一章中所述。 |
| 2 | 修改HelloWorld.gwt.xml , HelloWorld.css , HelloWorld.html和HelloWorld.java ,如下所述。 保持其余文件不变。 |
| 3 | 编译并运行应用程序以验证实现的逻辑的结果。 |
以下是修改后的模块描述符src/com.iowiki/HelloWorld.gwt.xml 。
<?xml version = "1.0" encoding = "UTF-8"?>
<module rename-to = 'helloworld'>
  <!-- Inherit the core Web Toolkit stuff.                        -->
  <inherits name = 'com.google.gwt.user.User'/>
  <!-- Inherit the default GWT style sheet.                       -->
  <inherits name = 'com.google.gwt.user.theme.clean.Clean'/>
  <!-- Specify the app entry point class.                         -->
  <entry-point class = 'com.iowiki.client.HelloWorld'/>
  <!-- Specify the paths for translatable code                    -->
  <source path = 'client'/>
  <source path = 'shared'/>
</module>
以下是修改后的样式表文件war/HelloWorld.css 。
body {
   text-align: center;
   font-family: verdana, sans-serif;
}
h1 {
   font-size: 2em;
   font-weight: bold;
   color: #777777;
   margin: 40px 0px 70px;
   text-align: center;
}
以下是修改后的HTML主机文件war/HelloWorld.html 。
<html>
<head>
<title>Hello World</title>
<link rel = "stylesheet" href = "HelloWorld.css"/>
<script language = "javascript" src = "helloworld/helloworld.nocache.js">
</script>
</head>
<body>
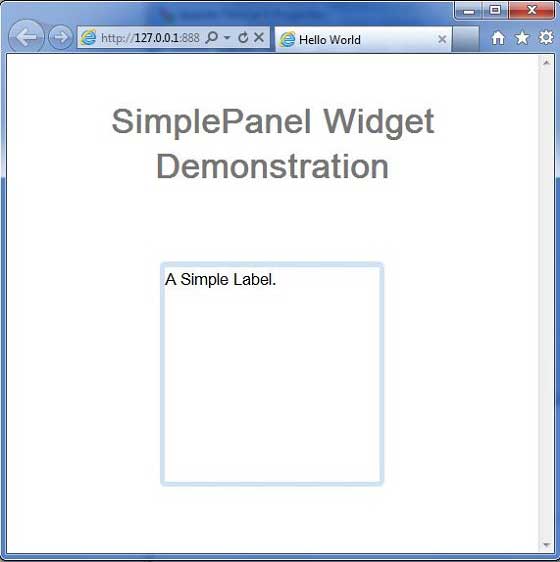
<h1>SimplePanel Widget Demonstration</h1>
<div id = "gwtContainer"></div>
</body>
</html>
让我们有以下Java文件src/com.iowiki/HelloWorld.java ,它将演示SimplePanel小部件的使用。
package com.iowiki.client;
import com.google.gwt.core.client.EntryPoint;
import com.google.gwt.user.client.ui.DecoratorPanel;
import com.google.gwt.user.client.ui.Label;
import com.google.gwt.user.client.ui.RootPanel;
import com.google.gwt.user.client.ui.SimplePanel;
public class HelloWorld implements EntryPoint {
   public void onModuleLoad() {
      // Create a Simple Panel
      SimplePanel simplePanel = new SimplePanel();
      Label label = new Label("A Simple Label.");
      //add label to simple panel
      simplePanel.add(label);
	  //set height and width of simple panel
      simplePanel.setHeight("200");
      simplePanel.setWidth("200");
      DecoratorPanel decoratorPanel = new DecoratorPanel();
      decoratorPanel.add(simplePanel);
      // Add the widgets to the root panel.
      RootPanel.get().add(decoratorPanel);
   }
}
一旦准备好完成所有更改,让我们像在GWT - 创建应用程序章节中那样在开发模式下编译和运行应用程序 。 如果您的应用程序一切正常,这将产生以下结果 -