Spring AOP - 快速指南
Spring AOP - Overview
Spring Framework的一个关键组件是Aspect Oriented Programming (AOP)框架。 面向方面编程需要将程序逻辑分解为称为so-called concerns不同部分。 跨越应用程序多个点的功能称为横切关注点。 这些cross-cutting concerns在概念上与应用程序的业务逻辑分开。 各种常见的良好示例包括日志记录,审计,声明式事务,安全性,缓存等。
OOP中模块化的关键单元是类,而在AOP中,模块化单元是方面。 依赖注入可以帮助您将应用程序对象相互分离,而AOP可以帮助您将交叉问题与它们所影响的对象分离。 AOP就像Perl,.NET,Java等编程语言中的触发器。
Spring AOP模块允许拦截器拦截应用程序。 例如,执行方法时,可以在方法执行之前或之后添加额外的功能。
Spring AOP - Environment Setup
本章将指导您完成在基于Windows和Linux的系统上设置Spring AOP的过程。 Spring AOP可以通过几个简单的步骤轻松安装并与您当前的Java环境和MAVEN集成,而无需任何复杂的设置过程。 安装时需要用户管理。
系统需求 (System Requirements)
| JDK | Java SE 2 JDK 1.5或以上版本 |
| Memory | 1 GB RAM(推荐) |
| 磁盘空间 | 没有最低要求 |
| 操作系统版本 | Windows XP或更高版本,Linux |
现在让我们看一下安装Spring AOP的步骤。
第1步:验证Java安装
首先,您需要在系统上安装Java软件开发工具包(SDK)。 要验证这一点,请根据您正在使用的平台执行以下两个命令中的任何一个。
如果Java安装已正确完成,那么它将显示Java安装的当前版本和规范。 下表给出了示例输出。
| 平台 | 命令 | 样本输出 |
|---|---|---|
| Windows | 打开命令控制台并输入 - \》java -version | Java版“1.7.0_60” Java(TM)SE运行时环境(版本1.7.0_60-b19) Java Hotspot(TM)64位服务器VM(内置24.60-b09,混合模式) |
| Linux | 打开命令终端并输入 - $java -version | java版“1.7.0_25” 打开JDK运行时环境(rhel-2.3.10.4.el6_4-x86_64) 打开JDK 64位服务器VM(内置23.7-b01,混合模式) |
我们假设本教程的读者在他们的系统上安装了Java SDK版本1.7.0_60。
如果您没有Java SDK,请从https://www.oracle.com/technetwork/java/javase/downloads/index.html下载其当前版本并安装它。
第2步:设置Java环境
将环境变量JAVA_HOME设置为指向计算机上安装Java的基本目录位置。 例如,
| Sr.No. | 平台和描述 |
|---|---|
| 1 | Windows 将JAVA_HOME设置为C:\ProgramFiles\java\jdk1.7.0_60 |
| 2 | Linux 导出JAVA_HOME =/usr/local/java-current |
将Java编译器位置的完整路径附加到系统路径。
| Sr.No. | 平台和描述 |
|---|---|
| 1 | Windows 将字符串“C:\Program Files\Java\jdk1.7.0_60\bin”追加到系统变量Path的末尾。 |
| 2 | Linux 导出PATH = $ PATH:$ JAVA_HOME/bin/ |
如上所述,从命令提示符执行命令java -version 。
第3步:下载Maven存档
从https://maven.apache.org/download.cgi下载Maven 3.3.3
| OS | 存档名称 |
|---|---|
| Windows | apache-maven-3.3.3-bin.zip |
| Linux | apache-maven-3.3.3-bin.tar.gz |
| Mac | apache-maven-3.3.3-bin.tar.gz |
第4步:提取Maven存档
将存档解压缩到要安装Maven 3.3.3的目录。 将从存档创建子目录apache-maven-3.3.3。
| OS | 位置(根据您的安装可能会有所不同) |
|---|---|
| Windows | C:\Program Files\Apache Software Foundation\apache-maven-3.3.3 |
| Linux | /usr/local/apache-maven |
| Mac | /usr/local/apache-maven |
第5步:设置Maven环境变量
将M2_HOME,M2,MAVEN_OPTS添加到环境变量中。
| OS | output |
|---|---|
| Windows | 使用系统属性设置环境变量。 M2_HOME = C:\Program Files\Apache Software Foundation\apache-maven-3.3.3 M2 = %M2_HOME%\bin MAVEN_OPTS = -Xms256m -Xmx512m |
| Linux | 打开命令终端并设置环境变量。 export M2_HOME = /usr/local/apache-maven/apache-maven-3.3.3 export M2 = $M2_HOME/bin export MAVEN_OPTS = -Xms256m -Xmx512m |
| Mac | 打开命令终端并设置环境变量。 export M2_HOME = /usr/local/apache-maven/apache-maven-3.3.3 export M2 = $M2_HOME/bin export MAVEN_OPTS = -Xms256m -Xmx512m |
步骤6:将Maven Bin目录位置添加到系统路径
现在将M2变量附加到系统路径。
| OS | output |
|---|---|
| Windows | 将字符串;%M2%附加到系统变量Path的末尾。 |
| Linux | export PATH = $ M2:$ PATH |
| Mac | export PATH = $ M2:$ PATH |
第7步:验证Maven安装
现在打开控制台,并执行以下mvn命令。
| OS | 任务 | 命令 |
|---|---|---|
| Windows | 打开命令控制台 | c:\> mvn --version |
| Linux | 打开命令终端 | $ mvn --version |
| Mac | 开放式终端 | 机器: |
最后,验证上述命令的输出,该命令应如下所示 -
| OS | output |
|---|---|
| Windows | Apache Maven 3.3.3(7994120775791599e205a5524ec3e0dfe41d4a06; 2015-04-22T17:27:37 + 05:30) Maven home:C:\Program Files\Apache Software Foundation\apache-maven-3.3.3 Java版本:1.7.0_75,供应商:Oracle Corporation Java home:C:\Program Files\Java\jdk1.7.0_75\jre 默认语言环境:en_US,平台编码:Cp1252 |
| Linux | Apache Maven 3.3.3(7994120775791599e205a5524ec3e0dfe41d4a06; 2015-04-22T17:27:37 + 05:30) Maven home:/usr/local/apache-maven/apache-maven-3.3.3 Java版本:1.7.0_75,供应商:Oracle Corporation Java home:/usr/local/java-current/jdk1.7.0_75/jre |
| Mac | Apache Maven 3.3.3(7994120775791599e205a5524ec3e0dfe41d4a06; 2015-04-22T17:27:37 + 05:30) Maven home:/usr/local/apache-maven/apache-maven-3.3.3 Java版本:1.7.0_75,供应商:Oracle Corporation Java home:/Library/Java/Home/jdk1.7.0_75/jre |
第8步 - 设置Eclipse IDE
本教程中的所有示例都是使用Eclipse IDE编写的。 所以我建议你应该在你的机器上安装最新版本的Eclipse。
要安装Eclipse IDE,请从https://www.eclipse.org/downloads/下载最新的Eclipse二进制文件。 下载安装后,将二进制分发包解压到一个方便的位置。 例如,在Windows上的C:\eclipse或Linux/Unix上的/ usr/local/eclipse中,最后适当地设置PATH变量。
可以通过在Windows机器上执行以下命令来启动Eclipse,也可以双击eclipse.exe
%C:\eclipse\eclipse.exe
可以通过在Unix(Solaris,Linux等)机器上执行以下命令来启动Eclipse -
$/usr/local/eclipse/eclipse
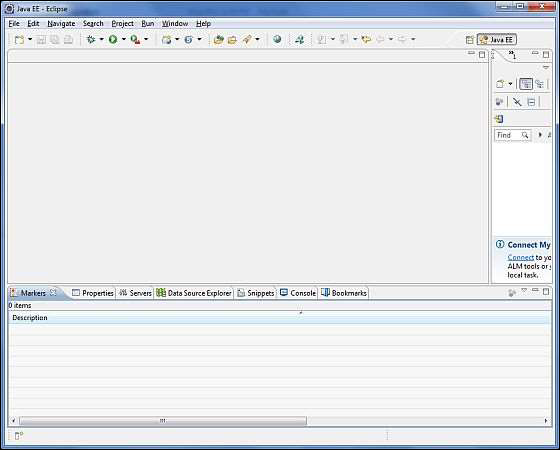
成功启动后,如果一切正常,那么它应该显示以下结果 -
完成最后一步后,您就可以继续学习第一个AOP示例,您将在下一章中看到它。
Spring AOP - Core Concepts
在我们开始使用AOP之前,让我们熟悉AOP概念和术语。 这些术语并非特定于Spring,而是与AOP相关。
| Sr.No. | 条款和说明 |
|---|---|
| 1 | Aspect 一个模块,其中包含一组提供交叉要求的API。 例如,日志记录模块将被称为AOP方面以进行日志记录。 根据要求,应用程序可以具有任意数量的方面。 |
| 2 | Join point 这代表了您可以插入AOP方面的应用程序中的一个点。 您还可以说,它是应用程序中使用Spring AOP框架执行操作的实际位置。 |
| 3 | Advice 这是在方法执行之前或之后要采取的实际操作。 这是Spring AOP框架在程序执行期间调用的实际代码段。 |
| 4 | PointCut 这是一组应该执行建议的一个或多个连接点。 您可以使用表达式或模式指定PointCuts,我们将在AOP示例中看到。 |
| 5 | Introduction 介绍允许您向现有类添加新方法或属性。 |
| 6 | Target object 由一个或多个方面建议的对象。 该对象始终是代理对象。 也称为建议对象。 |
| 7 | Weaving 编织是将方面与其他应用程序类型或对象链接以创建建议对象的过程。 这可以在编译时,加载时或运行时完成。 |
Spring AOP - Advice Types
Spring方面可以使用下表中提到的五种建议。
| Sr.No. | 建议和说明 |
|---|---|
| 1 | before 在方法执行之前运行建议。 |
| 2 | after 无论结果如何,在方法执行后运行建议。 |
| 3 | after-returning 仅在方法成功完成时,在方法执行后运行建议。 |
| 4 | after-throwing 仅在方法通过抛出异常退出时,才在方法执行后运行建议。 |
| 5 | around 在调用建议方法之前和之后运行建议。 |
Spring AOP - Implementations
Spring支持@AspectJ annotation style方法和schema-based方法来实现自定义方面。
基于XML模式
使用常规类以及基于XML的配置来实现方面。
要使用本节中描述的AOP命名空间标记,您需要导入spring AOP模式,如下所述 -
<?xml version = "1.0" encoding = "UTF-8"?>
<beans xmlns = "http://www.springframework.org/schema/beans"
   xmlns:xsi = "http://www.w3.org/2001/XMLSchema-instance"
   xmlns:aop = "http://www.springframework.org/schema/aop"
   xsi:schemaLocation = "http://www.springframework.org/schema/beans
   http://www.springframework.org/schema/beans/spring-beans-3.0.xsd
   http://www.springframework.org/schema/aop
   http://www.springframework.org/schema/aop/spring-aop-3.0.xsd ">
   <!-- bean definition & AOP specific configuration -->
</beans>
声明一个方面
使用《aop:aspect》元素声明《aop:aspect》 ,并使用ref属性引用支持bean,如下所示。
<aop:config>
   <aop:aspect id = "myAspect" ref = "aBean">
   ...
   </aop:aspect>
</aop:config>
<bean id = "aBean" class = "...">
   ...
</bean>
这里将配置“aBean”并像其他任何Spring bean一样注入依赖项,如前面章节所述。
声明一个PointCut
PointCut有助于确定要用不同建议执行的感兴趣的连接点(即方法)。 在使用基于XML Schema的配置时,PointCut将定义如下 -
<aop:config>
   <aop:aspect id = "myAspect" ref = "aBean">
   <aop:PointCut id = "businessService"
      expression = "execution(* com.xyz.myapp.service.*.*(..))"/>
      ...
   </aop:aspect>
</aop:config>
<bean id = "aBean" class = "...">
   ...
</bean>
以下示例定义了一个名为“businessService”的PointCut,它将匹配com.iowiki包下Student类中可用的getName()方法的执行。
<aop:config>
   <aop:aspect id = "myAspect" ref = "aBean">
   <aop:PointCut id = "businessService"
      expression = "execution(* com.iowiki.Student.getName(..))"/>
   ...
   </aop:aspect>
</aop:config>
<bean id = "aBean" class = "...">
   ...
</bean>
声明建议
您可以使用
<aop:config>
   <aop:aspect id = "myAspect" ref = "aBean">
      <aop:PointCut id = "businessService"
         expression = "execution(* com.xyz.myapp.service.*.*(..))"/>
      <!-- a before advice definition -->
      <aop:before PointCut-ref = "businessService"
         method = "doRequiredTask"/>
      <!-- an after advice definition -->
      <aop:after PointCut-ref = "businessService"
         method = "doRequiredTask"/>
      <!-- an after-returning advice definition -->
      <!--The doRequiredTask method must have parameter named retVal -->
      <aop:after-returning PointCut-ref = "businessService"
         returning = "retVal"
         method = "doRequiredTask"/>
      <!-- an after-throwing advice definition -->
      <!--The doRequiredTask method must have parameter named ex -->
      <aop:after-throwing PointCut-ref = "businessService"
        throwing = "ex"
         method = "doRequiredTask"/>
      <!-- an around advice definition -->
      <aop:around PointCut-ref = "businessService"
         method = "doRequiredTask"/>
   ...
   </aop:aspect>
</aop:config>
<bean id = "aBean" class = "...">
   ...
</bean>
您可以对不同的建议使用相同的doRequiredTask或不同的方法。 这些方法将被定义为方面模块的一部分。
@AspectJ基于
@AspectJ指的是将方面声明为使用Java 5注释注释的常规Java类的样式。 @AspectJ指的是将方面声明为使用Java 5注释注释的常规Java类的样式。 通过在基于XML模式的配置文件中包含以下元素来启用@AspectJ支持。
<aop:aspectj-autoproxy/>
声明一个方面
Aspects类与任何其他普通bean一样,并且可以像任何其他类一样拥有方法和字段,除了它们将使用@Aspect进行注释,如下所示。
package org.xyz;
import org.aspectj.lang.annotation.Aspect;
@Aspect
public class AspectModule {
}
它们将像任何其他bean一样以XML格式配置,如下所示。
<bean id = "myAspect" class = "org.xyz.AspectModule">
   <!-- configure properties of aspect here as normal -->
</bean>
声明一个PointCut
PointCut有助于确定要用不同建议执行的感兴趣的连接点(即方法)。 在使用基于@AspectJ的配置时,PointCut声明有两个部分 -
一个PointCut表达式,它确切地确定我们感兴趣的方法执行。
PointCut签名,包含名称和任意数量的参数。 该方法的实际主体是无关紧要的,实际上应该是空的。
以下示例定义了一个名为“businessService”的PointCut,它将匹配com.xyz.myapp.service包下的类中可用的每个方法的执行。
import org.aspectj.lang.annotation.PointCut;
@PointCut("execution(* com.xyz.myapp.service.*.*(..))") // expression
private void businessService() {}  // signature
以下示例定义了一个名为“getname”的PointCut,它将匹配com.iowiki包下Student类中可用的getName()方法的执行。
import org.aspectj.lang.annotation.PointCut;
@PointCut("execution(* com.iowiki.Student.getName(..))")
private void getname() {}
声明建议
您可以使用下面给出的@ {ADVICE-NAME}注释声明五个建议中的任何一个。 这假设您已经定义了PointCut签名方法businessService()。
@Before("businessService()")
public void doBeforeTask(){
   ...
}
@After("businessService()")
public void doAfterTask(){
   ...
}
@AfterReturning(PointCut = "businessService()", returning = "retVal")
public void doAfterReturnningTask(Object retVal){
   // you can intercept retVal here.
   ...
}
@AfterThrowing(PointCut = "businessService()", throwing = "ex")
public void doAfterThrowingTask(Exception ex){
   // you can intercept thrown exception here.
   ...
}
@Around("businessService()")
public void doAroundTask(){
   ...
}
您可以为任何建议定义PointCut内联。 以下是为建议之前定义内联PointCut的示例。
@Before("execution(* com.xyz.myapp.service.*.*(..))")
public doBeforeTask(){
   ...
}
Spring AOP - XML Based Application
在本章中,我们将使用Spring AOP Framework编写实际的AOP应用程序。 在开始使用Spring-WS框架编写第一个示例之前,必须确保已按照Spring Web Services - Environment Setup一章中的说明正确设置Spring AOP环境。
现在,继续编写一个简单的控制台Spring AOP应用程序,它将演示AOP概念。
创建一个项目 (Create a Project)
Step 1 - 打开命令控制台,转到C:\MVN目录并执行以下mvn命令。
C:\MVN>mvn archetype:generate -DgroupId = com.iowiki -DartifactId = Student
	-DarchetypeArtifactId = maven-archetype-quickstart -DinteractiveMode = false
Maven将开始处理并将创建完整的Java应用程序项目结构。
[INFO] Scanning for projects...
[INFO]
[INFO] ------------------------------------------------------------------------
[INFO] Building Maven Stub Project (No POM) 1
[INFO] ------------------------------------------------------------------------
[INFO]
[INFO] >>> maven-archetype-plugin:2.4:generate (default-cli) > generate-sources
@ standalone-pom >>>
[INFO]
[INFO] <<< maven-archetype-plugin:2.4:generate (default-cli) < generate-sources
@ standalone-pom <<<
[INFO]
[INFO] --- maven-archetype-plugin:2.4:generate (default-cli) @ standalone-pom --
-
[INFO] Generating project in Batch mode
Downloading: https://repo.maven.apache.org/maven2/org/apache/maven/archetypes/ma
ven-archetype-quickstart/1.0/maven-archetype-quickstart-1.0.jar
Downloaded: https://repo.maven.apache.org/maven2/org/apache/maven/archetypes/mav
en-archetype-quickstart/1.0/maven-archetype-quickstart-1.0.jar (5 KB at 1.1 KB/s
ec)
Downloading: https://repo.maven.apache.org/maven2/org/apache/maven/archetypes/ma
ven-archetype-quickstart/1.0/maven-archetype-quickstart-1.0.pom
Downloaded: https://repo.maven.apache.org/maven2/org/apache/maven/archetypes/mav
en-archetype-quickstart/1.0/maven-archetype-quickstart-1.0.pom (703 B at 1.2 KB/
sec)
[INFO] -------------------------------------------------------------------------
---
[INFO] Using following parameters for creating project from Old (1.x) Archetype:
 maven-archetype-quickstart:1.0
[INFO] -------------------------------------------------------------------------
---
[INFO] Parameter: groupId, Value: com.iowiki
[INFO] Parameter: packageName, Value: com.iowiki
[INFO] Parameter: package, Value: com.iowiki
[INFO] Parameter: artifactId, Value: Student
[INFO] Parameter: basedir, Value: C:\MVN
[INFO] Parameter: version, Value: 1.0-SNAPSHOT
[INFO] project created from Old (1.x) Archetype in dir: C:\MVN\Student
[INFO] ------------------------------------------------------------------------
[INFO] BUILD SUCCESS
[INFO] ------------------------------------------------------------------------
[INFO] Total time: 01:17 min
[INFO] Finished at: 2017-02-19T21:11:14+05:30
[INFO] Final Memory: 15M/114M
[INFO] ------------------------------------------------------------------------
Step 2 - 转到C:/ MVN目录。 您将看到一个名为student的Java应用程序项目(在artifactId中指定)。 更新POM.xml以包含Spring-AOP依赖项。 添加MainApp.java,Student.java和Logging.java文件。
POM.xml
<project xmlns = "http://maven.apache.org/POM/4.0.0"
   xmlns:xsi = "http://www.w3.org/2001/XMLSchema-instance"
   xsi:schemaLocation = "http://maven.apache.org/POM/4.0.0
   http://maven.apache.org/maven-v4_0_0.xsd">
   <modelVersion>4.0.0</modelVersion>
   <groupId>com.iowiki</groupId>
   <artifactId>Student</artifactId>
   <packaging>jar</packaging>
   <version>1.0-SNAPSHOT</version>
   <name>Student</name>
   <url>http://maven.apache.org</url>
   <dependencies>
      <dependency>
         <groupId>junit</groupId>
         <artifactId>junit</artifactId>
         <version>3.8.1</version>
         <scope>test</scope>
      </dependency>
      <dependency>
         <groupId>org.springframework</groupId>
         <artifactId>spring-aop</artifactId>
         <version>4.1.0.RELEASE</version>
      </dependency>
      <dependency>
         <groupId>org.springframework</groupId>
         <artifactId>spring-context</artifactId>
         <version>4.1.4.RELEASE</version>
      </dependency>
      <dependency>
         <groupId>org.aspectj</groupId>
         <artifactId>aspectjweaver</artifactId>
         <version>1.6.8</version>
      </dependency>
   </dependencies>
</project>
package com.iowiki;
public class Logging {
   /**
    * This is the method which I would like to execute
    * before a selected method execution.
    */
   public void beforeAdvice() {
      System.out.println("Going to setup student profile.");
   }
   /**
    * This is the method which I would like to execute
    * after a selected method execution.
    */
   public void afterAdvice() {
      System.out.println("Student profile has been setup.");
   }
   /**
    * This is the method which I would like to execute
    * when any method returns.
    */
   public void afterReturningAdvice(Object retVal){
      System.out.println("Returning:" + retVal.toString() );
   }
   /**
    * This is the method which I would like to execute
    * if there is an exception raised.
    */
   public void AfterThrowingAdvice(IllegalArgumentException ex) {
      System.out.println("There has been an exception: " + ex.toString());
   }
}
以下是Student.java文件的内容。
package com.iowiki;
public class Student {
   private Integer age;
   private String name;
   public void setAge(Integer age) {
      this.age = age;
   }
   public Integer getAge() {
      System.out.println("Age : " + age );
      return age;
   }
   public void setName(String name) {
      this.name = name;
   }
   public String getName() {
      System.out.println("Name : " + name );
      return name;
   }
   public void printThrowException(){
      System.out.println("Exception raised");
      throw new IllegalArgumentException();
   }
}
以下是MainApp.java文件的内容。
package com.iowiki;
import org.springframework.context.ApplicationContext;
import org.springframework.context.support.ClassPathXmlApplicationContext;
public class MainApp {
   public static void main(String[] args) {
      ApplicationContext context =
         new ClassPathXmlApplicationContext("Beans.xml");
      Student student = (Student) context.getBean("student");
      student.getName();
      student.getAge();
      student.printThrowException();
   }
}
Step 3 - 在src 》 main 》 resources文件夹下添加配置文件Beans.xml 。
<?xml version = "1.0" encoding = "UTF-8"?>
<beans xmlns = "http://www.springframework.org/schema/beans"
   xmlns:xsi = "http://www.w3.org/2001/XMLSchema-instance"
   xmlns:aop = "http://www.springframework.org/schema/aop"
   xsi:schemaLocation = "http://www.springframework.org/schema/beans
   http://www.springframework.org/schema/beans/spring-beans-3.0.xsd
   http://www.springframework.org/schema/aop
   http://www.springframework.org/schema/aop/spring-aop-3.0.xsd ">
   <aop:config>
      <aop:aspect id = "log" ref = "logging">
         <aop:PointCut id = "selectAll"
            expression = "execution(* com.iowiki.*.*(..))"/>
         <aop:before PointCut-ref = "selectAll" method = "beforeAdvice"/>
         <aop:after PointCut-ref = "selectAll" method = "afterAdvice"/>
         <aop:after-returning PointCut-ref = "selectAll"
            returning = "retVal"
            method = "afterReturningAdvice"/>
         <aop:after-throwing PointCut-ref = "selectAll"
           throwing = "ex"
            method = "AfterThrowingAdvice"/>
      </aop:aspect>
   </aop:config>
   <!-- Definition for student bean -->
   <bean id = "student" class = "com.iowiki.Student">
      <property name = "name"  value = "Zara" />
      <property name = "age"  value = "11"/>
   </bean>
   <!-- Definition for logging aspect -->
   <bean id = "logging" class = "com.iowiki.Logging"/>
</beans>
Step 4 - 打开命令控制台,转到C:\MVN目录并执行以下mvn命令。
C:\MVN>Student> mvn package
Maven将开始处理和下载所需的库。
[INFO] Scanning for projects...
[INFO]
[INFO] ------------------------------------------------------------------------
[INFO] Building Student 1.0-SNAPSHOT
[INFO] ------------------------------------------------------------------------
Downloading: https://repo.maven.apache.org/maven2/org/apache/maven/plugins/maven
-jar-plugin/2.4/maven-jar-plugin-2.4.pom
Downloaded: https://repo.maven.apache.org/maven2/org/apache/maven/plugins/maven-
jar-plugin/2.4/maven-jar-plugin-2.4.pom (6 KB at 2.2 KB/sec)
Downloading: https://repo.maven.apache.org/maven2/org/apache/maven/plugins/maven
-jar-plugin/2.4/maven-jar-plugin-2.4.jar
Downloaded: https://repo.maven.apache.org/maven2/org/apache/maven/plugins/maven-
jar-plugin/2.4/maven-jar-plugin-2.4.jar (34 KB at 31.6 KB/sec)
Downloading: https://repo.maven.apache.org/maven2/org/springframework/spring-aop
/4.1.0.RELEASE/spring-aop-4.1.0.RELEASE.pom
Downloaded: https://repo.maven.apache.org/maven2/org/springframework/spring-aop/
4.1.0.RELEASE/spring-aop-4.1.0.RELEASE.pom (3 KB at 3.7 KB/sec)
Downloading: https://repo.maven.apache.org/maven2/org/springframework/spring-bea
ns/4.1.0.RELEASE/spring-beans-4.1.0.RELEASE.pom
Downloaded: https://repo.maven.apache.org/maven2/org/springframework/spring-bean
s/4.1.0.RELEASE/spring-beans-4.1.0.RELEASE.pom (3 KB at 4.1 KB/sec)
Downloading: https://repo.maven.apache.org/maven2/org/springframework/spring-cor
e/4.1.0.RELEASE/spring-core-4.1.0.RELEASE.pom
Downloaded: https://repo.maven.apache.org/maven2/org/springframework/spring-core
/4.1.0.RELEASE/spring-core-4.1.0.RELEASE.pom (3 KB at 4.0 KB/sec)
Downloading: https://repo.maven.apache.org/maven2/org/springframework/spring-aop
/4.1.0.RELEASE/spring-aop-4.1.0.RELEASE.jar
Downloading: https://repo.maven.apache.org/maven2/org/springframework/spring-cor
e/4.1.0.RELEASE/spring-core-4.1.0.RELEASE.jar
Downloading: https://repo.maven.apache.org/maven2/org/springframework/spring-bea
ns/4.1.0.RELEASE/spring-beans-4.1.0.RELEASE.jar
Downloaded: https://repo.maven.apache.org/maven2/org/springframework/spring-aop/
4.1.0.RELEASE/spring-aop-4.1.0.RELEASE.jar (351 KB at 43.9 KB/sec)
Downloaded: https://repo.maven.apache.org/maven2/org/springframework/spring-bean
s/4.1.0.RELEASE/spring-beans-4.1.0.RELEASE.jar (685 KB at 37.5 KB/sec)
Downloaded: https://repo.maven.apache.org/maven2/org/springframework/spring-core
/4.1.0.RELEASE/spring-core-4.1.0.RELEASE.jar (982 KB at 47.1 KB/sec)
[INFO]
[INFO] --- maven-resources-plugin:2.6:resources (default-resources) @ Student --
-
[WARNING] Using platform encoding (Cp1252 actually) to copy filtered resources,
i.e. build is platform dependent!
[INFO] skip non existing resourceDirectory C:\MVN\Student\src\main\resources
[INFO]
[INFO] --- maven-compiler-plugin:3.1:compile (default-compile) @ Student ---
[INFO] Changes detected - recompiling the module!
[WARNING] File encoding has not been set, using platform encoding Cp1252, i.e. b
uild is platform dependent!
[INFO] Compiling 1 source file to C:\MVN\Student\target\classes
[INFO]
[INFO] --- maven-resources-plugin:2.6:testResources (default-testResources) @ St
udent ---
[WARNING] Using platform encoding (Cp1252 actually) to copy filtered resources,
i.e. build is platform dependent!
[INFO] skip non existing resourceDirectory C:\MVN\Student\src\test\resources
[INFO]
[INFO] --- maven-compiler-plugin:3.1:testCompile (default-testCompile) @ Student
 ---
[INFO] Changes detected - recompiling the module!
[WARNING] File encoding has not been set, using platform encoding Cp1252, i.e. b
uild is platform dependent!
[INFO] Compiling 1 source file to C:\MVN\Student\target\test-classes
[INFO]
[INFO] --- maven-surefire-plugin:2.12.4:test (default-test) @ Student ---
[INFO] Surefire report directory: C:\MVN\Student\target\surefire-reports
Downloading: https://repo.maven.apache.org/maven2/org/apache/maven/surefire/sure
fire-junit3/2.12.4/surefire-junit3-2.12.4.pom
Downloaded: https://repo.maven.apache.org/maven2/org/apache/maven/surefire/suref
ire-junit3/2.12.4/surefire-junit3-2.12.4.pom (2 KB at 1.3 KB/sec)
Downloading: https://repo.maven.apache.org/maven2/org/apache/maven/surefire/sure
fire-junit3/2.12.4/surefire-junit3-2.12.4.jar
Downloaded: https://repo.maven.apache.org/maven2/org/apache/maven/surefire/suref
ire-junit3/2.12.4/surefire-junit3-2.12.4.jar (26 KB at 27.7 KB/sec)
-------------------------------------------------------
 T E S T S
-------------------------------------------------------
Running com.iowiki.AppTest
Tests run: 1, Failures: 0, Errors: 0, Skipped: 0, Time elapsed: 0.002 sec
Results :
Tests run: 1, Failures: 0, Errors: 0, Skipped: 0
[INFO]
[INFO] --- maven-jar-plugin:2.4:jar (default-jar) @ Student ---
Downloading: https://repo.maven.apache.org/maven2/classworlds/classworlds/1.1-al
pha-2/classworlds-1.1-alpha-2.jar
Downloaded: https://repo.maven.apache.org/maven2/classworlds/classworlds/1.1-alp
ha-2/classworlds-1.1-alpha-2.jar (37 KB at 35.8 KB/sec)
[INFO] Building jar: C:\MVN\Student\target\Student-1.0-SNAPSHOT.jar
[INFO] ------------------------------------------------------------------------
[INFO] BUILD SUCCESS
[INFO] ------------------------------------------------------------------------
[INFO] Total time: 38.441 s
[INFO] Finished at: 2017-02-19T21:18:59+05:30
[INFO] Final Memory: 18M/109M
[INFO] ------------------------------------------------------------------------
在Eclipse中导入项目
Step 1 - 打开Eclipse。
Step 2 - 选择File → Import →选项。
Step 3 - 选择Maven项目选项。 单击“下一步”按钮。
Step 4 - 选择项目位置,其中学生项目是使用Maven创建的。
Step 5 - 单击“完成”按钮。
运行项目 (Run Project)
完成源和配置文件的创建后,运行您的应用程序。 右键单击应用程序中的MainApp.java,并使用run as Java Application命令。 如果您的应用程序一切正常,它将打印以下消息。
Going to setup student profile.
Name : Zara
Student profile has been setup.
Returning:Zara
Going to setup student profile.
Age : 11
Student profile has been setup.
Returning:11
Going to setup student profile.
Exception raised
Student profile has been setup.
There has been an exception: java.lang.IllegalArgumentException
Exception in thread "main" java.lang.IllegalArgumentException
   at com.iowiki.Student.printThrowException(Student.java:25)
   at com.iowiki.Student$$FastClassBySpringCGLIB$$7dc55815.invoke(<generated>)
   at org.springframework.cglib.proxy.MethodProxy.invoke(MethodProxy.java:204)
   at org.springframework.aop.framework.CglibAopProxy$CglibMethodInvocation.invokeJoinpoint(CglibAopProxy.java:717)
   at org.springframework.aop.framework.ReflectiveMethodInvocation.proceed(ReflectiveMethodInvocation.java:157)
   at org.springframework.aop.framework.adapter.MethodBeforeAdviceInterceptor.invoke(MethodBeforeAdviceInterceptor.java:52)
   at org.springframework.aop.framework.ReflectiveMethodInvocation.proceed(ReflectiveMethodInvocation.java:179)
   at org.springframework.aop.aspectj.AspectJAfterAdvice.invoke(AspectJAfterAdvice.java:43)
   at org.springframework.aop.framework.ReflectiveMethodInvocation.proceed(ReflectiveMethodInvocation.java:179)
   at org.springframework.aop.framework.adapter.AfterReturningAdviceInterceptor.invoke(AfterReturningAdviceInterceptor.java:52)
   at org.springframework.aop.framework.ReflectiveMethodInvocation.proceed(ReflectiveMethodInvocation.java:179)
   at org.springframework.aop.aspectj.AspectJAfterThrowingAdvice.invoke(AspectJAfterThrowingAdvice.java:58)
   at org.springframework.aop.framework.ReflectiveMethodInvocation.proceed(ReflectiveMethodInvocation.java:179)
   at org.springframework.aop.interceptor.ExposeInvocationInterceptor.invoke(ExposeInvocationInterceptor.java:92)
   at org.springframework.aop.framework.ReflectiveMethodInvocation.proceed(ReflectiveMethodInvocation.java:179)
   at org.springframework.aop.framework.CglibAopProxy$DynamicAdvisedInterceptor.intercept(CglibAopProxy.java:653)
   at com.iowiki.Student$$EnhancerBySpringCGLIB$$56a970f2.printThrowException(<generated>)
   at com.iowiki.MainApp.main(MainApp.java:16)
Spring AOP - XML Based PointCut
加入Point
JoinPoint代表应用程序中可以插入AOP方面的一个点。 您还可以说,它是应用程序中使用Spring AOP框架执行操作的实际位置。 考虑以下示例 -
包中包含的所有方法类。
一个特定的类方法。
PointCut
PointCut是一组一个或多个JoinPoints,其中应该执行建议。 您可以使用表达式或模式指定PointCuts,我们将在AOP示例中看到。 在Spring中,PointCut有助于使用特定的JoinPoints来应用建议。 考虑以下示例 -
expression =“execution(* com.iowiki。*。*(..))”
expression =“execution(* com.iowiki.Student.getName(..))”
语法 (Syntax)
<aop:config>
   <aop:aspect id = "log" ref = "adviceClass">
      <aop:PointCut id = "PointCut-id" expression = "execution( expression )"/>
   </aop:aspect>
</aop:config>
Where,
adviceClass - 包含通知方法的类的ref
PointCut-id - PointCut-id
execution( expression ) - 覆盖要应用建议的方法的表达式。
为了理解与JoinPoint和PointCut相关的上述概念,让我们编写一个实现几个PointCuts的例子。 要编写我们的示例并提供一些建议,让我们使用一个可用的Eclipse IDE,并使用以下步骤创建一个Spring应用程序。
| 步 | 描述 |
|---|---|
| 1 | 更新项目Student根据Spring AOP - Application章节创建。 |
| 2 | 更新bean配置并运行应用程序,如下所述。 |
以下是Logging.java文件的内容。 这实际上是方面模块的一个示例,它定义了在各个点调用的方法。
package com.iowiki;
public class Logging {
   /**
    * This is the method which I would like to execute
    * before a selected method execution.
    */
   public void beforeAdvice(){
      System.out.println("Going to setup student profile.");
   }
}
以下是Student.java文件的内容。
package com.iowiki;
public class Student {
   private Integer age;
   private String name;
   public void setAge(Integer age) {
      this.age = age;
   }
   public Integer getAge() {
      System.out.println("Age : " + age );
      return age;
   }
   public void setName(String name) {
      this.name = name;
   }
   public String getName() {
      System.out.println("Name : " + name );
      return name;
   }
   public void printThrowException(){
      System.out.println("Exception raised");
      throw new IllegalArgumentException();
   }
}
以下是MainApp.java文件的内容。
package com.iowiki;
import org.springframework.context.ApplicationContext;
import org.springframework.context.support.ClassPathXmlApplicationContext;
public class MainApp {
   public static void main(String[] args) {
      ApplicationContext context =
         new ClassPathXmlApplicationContext("Beans.xml");
      Student student = (Student) context.getBean("student");
      student.getName();
      student.getAge();
   }
}
以下是配置文件Beans.xml 。
<?xml version = "1.0" encoding = "UTF-8"?>
<beans xmlns = "http://www.springframework.org/schema/beans"
   xmlns:xsi = "http://www.w3.org/2001/XMLSchema-instance"
   xmlns:aop = "http://www.springframework.org/schema/aop"
   xsi:schemaLocation = "http://www.springframework.org/schema/beans
   http://www.springframework.org/schema/beans/spring-beans-3.0.xsd
   http://www.springframework.org/schema/aop
   http://www.springframework.org/schema/aop/spring-aop-3.0.xsd ">
   <aop:config>
      <aop:aspect id = "log" ref = "logging">
         <aop:PointCut id = "selectAll"
         expression = "execution(* com.iowiki.*.*(..))"/>
         <aop:before PointCut-ref = "selectAll" method = "beforeAdvice"/>
      </aop:aspect>
   </aop:config>
   <!-- Definition for student bean -->
   <bean id = "student" class = "com.iowiki.Student">
      <property name = "name"  value = "Zara" />
      <property name = "age"  value = "11"/>
   </bean>
   <!-- Definition for logging aspect -->
   <bean id = "logging" class = "com.iowiki.Logging"/>
</beans>
完成创建源和Bean配置文件后,运行该应用程序。 如果您的应用程序一切正常,它将打印以下消息。
Going to setup student profile.
Name : Zara
Going to setup student profile.
Age : 11
上面定义的
<?xml version = "1.0" encoding = "UTF-8"?>
<beans xmlns = "http://www.springframework.org/schema/beans"
   xmlns:xsi = "http://www.w3.org/2001/XMLSchema-instance"
   xmlns:aop = "http://www.springframework.org/schema/aop"
   xsi:schemaLocation = "http://www.springframework.org/schema/beans
   http://www.springframework.org/schema/beans/spring-beans-3.0.xsd
   http://www.springframework.org/schema/aop
   http://www.springframework.org/schema/aop/spring-aop-3.0.xsd ">
   <aop:config>
      <aop:aspect id = "log" ref = "logging">
         <aop:PointCut id = "selectAll"
            expression = "execution(* com.iowiki.Student.getName(..))"/>
         <aop:before PointCut-ref = "selectAll" method = "beforeAdvice"/>
      </aop:aspect>
   </aop:config>
   <!-- Definition for student bean -->
   <bean id = "student" class = "com.iowiki.Student">
      <property name = "name"  value = "Zara" />
      <property name = "age"  value = "11"/>
   </bean>
   <!-- Definition for logging aspect -->
   <bean id = "logging" class = "com.iowiki.Logging"/>
</beans>
运行项目 (Run Project)
完成源和配置文件的创建后,运行您的应用程序。 右键单击应用程序中的MainApp.java,并使用run as Java Application命令。 如果您的应用程序一切正常,它将打印以下消息。
Going to setup student profile.
Name : Zara
Age : 11
Spring AOP - XML Based Before Advice
Before是一个通知类型,它确保在方法执行之前运行通知。 以下是before advice的语法。
语法 (Syntax)
<aop:config>
   <aop:aspect id = "log" ref = "logging">
      <aop:PointCut id = "PointCut-id" expression = "execution( expression )"/>
      <aop:before PointCut-ref = "PointCut-id" method = "methodName"/>
   </aop:aspect>
</aop:config>
Where,
PointCut-id - PointCut-id 。
methodName - 在被调用函数之前调用的函数的方法名称。
为了理解与Before Advice相关的上述概念,让我们编写一个示例,它将实现Before Advice。 要编写我们的示例并提供一些建议,让我们使用一个可用的Eclipse IDE,并使用以下步骤创建一个Spring应用程序。
| 步 | 描述 |
|---|---|
| 1 | 更新项目Student根据Spring AOP - Application章节创建。 |
| 2 | 更新bean配置并运行应用程序,如下所述。 |
以下是Logging.java文件的内容。 这实际上是方面模块的一个示例,它定义了在各个点调用的方法。
package com.iowiki;
public class Logging {
   /**
    * This is the method which I would like to execute
    * before a selected method execution.
    */
   public void beforeAdvice(){
      System.out.println("Going to setup student profile.");
   }
}
以下是Student.java文件的内容。
package com.iowiki;
public class Student {
   private Integer age;
   private String name;
   public void setAge(Integer age) {
      this.age = age;
   }
   public Integer getAge() {
      System.out.println("Age : " + age );
      return age;
   }
   public void setName(String name) {
      this.name = name;
   }
   public String getName() {
      System.out.println("Name : " + name );
      return name;
   }
   public void printThrowException(){
      System.out.println("Exception raised");
      throw new IllegalArgumentException();
   }
}
以下是MainApp.java文件的内容。
package com.iowiki;
import org.springframework.context.ApplicationContext;
import org.springframework.context.support.ClassPathXmlApplicationContext;
public class MainApp {
   public static void main(String[] args) {
      ApplicationContext context =
         new ClassPathXmlApplicationContext("Beans.xml");
      Student student = (Student) context.getBean("student");
      student.getName();
      student.getAge();
   }
}
以下是配置文件Beans.xml 。
<?xml version = "1.0" encoding = "UTF-8"?>
<beans xmlns = "http://www.springframework.org/schema/beans"
   xmlns:xsi = "http://www.w3.org/2001/XMLSchema-instance"
   xmlns:aop = "http://www.springframework.org/schema/aop"
   xsi:schemaLocation = "http://www.springframework.org/schema/beans
   http://www.springframework.org/schema/beans/spring-beans-3.0.xsd
   http://www.springframework.org/schema/aop
   http://www.springframework.org/schema/aop/spring-aop-3.0.xsd ">
   <aop:config>
      <aop:aspect id = "log" ref = "logging">
         <aop:PointCut id = "selectAll"
            expression = "execution(* com.iowiki.Student.getName(..))"/>
         <aop:before PointCut-ref = "selectAll" method = "beforeAdvice"/>
      </aop:aspect>
   </aop:config>
   <!-- Definition for student bean -->
   <bean id = "student" class = "com.iowiki.Student">
      <property name = "name"  value = "Zara" />
      <property name = "age"  value = "11"/>
   </bean>
   <!-- Definition for logging aspect -->
   <bean id = "logging" class = "com.iowiki.Logging"/>
</beans>
运行项目 (Run Project)
完成源和配置文件的创建后,运行您的应用程序。 右键单击应用程序中的MainApp.java,然后使用run as Java Application命令。 如果您的应用程序一切正常,它将打印以下消息。
Going to setup student profile.
Name : Zara
Age : 11
Spring AOP - XML Based After Advice
After是一个通知类型,确保在方法执行后运行通知。 以下是after advice的语法。
语法 (Syntax)
<aop:config>
   <aop:aspect id = "log" ref = "logging">
      <aop:PointCut id = "PointCut-id" expression = "execution( expression )"/>
      <aop:after PointCut-ref = "PointCut-id" method = "methodName"/>
   </aop:aspect>
</aop:config>
Where,
PointCut-id - PointCut-id 。
methodName - 在被调用函数之后调用的函数的方法名称。
为了理解上述与After Advice相关的概念,让我们编写一个实现After Advice的例子。 要编写我们的示例并提供一些建议,让我们使用一个可用的Eclipse IDE,并使用以下步骤创建一个Spring应用程序。
| 步 | 描述 |
|---|---|
| 1 | 更新项目Student根据Spring AOP - Application章节创建。 |
| 2 | 更新bean配置并运行应用程序,如下所述。 |
以下是Logging.java文件的内容。 这实际上是方面模块的一个示例,它定义了在各个点调用的方法。
package com.iowiki;
public class Logging {
   /**
    * This is the method which I would like to execute
    * after a selected method execution.
    */
   public void afterAdvice(){
      System.out.println("Student profile setup complete.");
   }
}
以下是Student.java文件的内容。
package com.iowiki;
public class Student {
   private Integer age;
   private String name;
   public void setAge(Integer age) {
      this.age = age;
   }
   public Integer getAge() {
      System.out.println("Age : " + age );
      return age;
   }
   public void setName(String name) {
      this.name = name;
   }
   public String getName() {
      System.out.println("Name : " + name );
      return name;
   }
   public void printThrowException(){
      System.out.println("Exception raised");
      throw new IllegalArgumentException();
   }
}
以下是MainApp.java文件的内容。
package com.iowiki;
import org.springframework.context.ApplicationContext;
import org.springframework.context.support.ClassPathXmlApplicationContext;
public class MainApp {
   public static void main(String[] args) {
      ApplicationContext context =
         new ClassPathXmlApplicationContext("Beans.xml");
      Student student = (Student) context.getBean("student");
      student.getName();
      student.getAge();
   }
}
以下是配置文件Beans.xml 。
<?xml version = "1.0" encoding = "UTF-8"?>
<beans xmlns = "http://www.springframework.org/schema/beans"
   xmlns:xsi = "http://www.w3.org/2001/XMLSchema-instance"
   xmlns:aop = "http://www.springframework.org/schema/aop"
   xsi:schemaLocation = "http://www.springframework.org/schema/beans
   http://www.springframework.org/schema/beans/spring-beans-3.0.xsd
   http://www.springframework.org/schema/aop
   http://www.springframework.org/schema/aop/spring-aop-3.0.xsd ">
   <aop:config>
      <aop:aspect id = "log" ref = "logging">
         <aop:PointCut id = "selectAll"
            expression = "execution(* com.iowiki.Student.getAge(..))"/>
         <aop:after PointCut-ref = "selectAll" method = "afterAdvice"/>
      </aop:aspect>
   </aop:config>
   <!-- Definition for student bean -->
   <bean id = "student" class = "com.iowiki.Student">
      <property name = "name"  value = "Zara" />
      <property name = "age"  value = "11"/>
   </bean>
   <!-- Definition for logging aspect -->
   <bean id = "logging" class = "com.iowiki.Logging"/>
</beans>
运行项目 (Run Project)
完成源和配置文件的创建后,运行您的应用程序。 右键单击应用程序中的MainApp.java,然后使用run as Java Application命令。 如果您的应用程序一切正常,这将打印以下消息。
Name : Zara
Age : 11
Student profile setup complete.
Spring AOP - XML Based After Returning Advice
After是一种通知类型,只有在方法成功完成时才能确保在方法执行后运行通知。 以下是after advice的语法。
语法 (Syntax)
<aop:config>
   <aop:aspect id = "log" ref = "logging">
      <aop:PointCut id = "PointCut-id" expression = "execution( expression )"/>
      <aop:after-returning PointCut-ref = "PointCut-id"
         returning = "retVal" method = "methodName"/>
   </aop:aspect>
</aop:config>
Where,
PointCut-id - PointCut-id 。
methodName - 被调用函数成功返回后要调用的函数的方法名称。
为了理解与After Returning Advice相关的上述概念,让我们编写一个实现After Returning advice的示例。 要编写我们的示例并提供一些建议,让我们使用一个可用的Eclipse IDE并使用以下步骤创建一个Spring应用程序 -
| 步 | 描述 |
|---|---|
| 1 | 更新项目Student根据Spring AOP - Application章节创建。 |
| 2 | 更新bean配置并运行应用程序,如下所述。 |
以下是Logging.java文件的内容。 这实际上是方面模块的一个示例,它定义了在各个点调用的方法。
package com.iowiki;
public class Logging {
   /**
    * This is the method which I would like to execute
    * when any method returns.
    */
   public void afterReturningAdvice(Object retVal){
      System.out.println("Returning:" + retVal.toString() );
   }
}
以下是Student.java文件的内容。
package com.iowiki;
public class Student {
   private Integer age;
   private String name;
   public void setAge(Integer age) {
      this.age = age;
   }
   public Integer getAge() {
      System.out.println("Age : " + age );
      System.out.println("Exception raised");
      throw new IllegalArgumentException();
      return age;
   }
   public void setName(String name) {
      this.name = name;
   }
   public String getName() {
      System.out.println("Name : " + name );
      return name;
   }
   public void printThrowException(){
      System.out.println("Exception raised");
      throw new IllegalArgumentException();
   }
}
以下是MainApp.java文件的内容。
package com.iowiki;
import org.springframework.context.ApplicationContext;
import org.springframework.context.support.ClassPathXmlApplicationContext;
public class MainApp {
   public static void main(String[] args) {
      ApplicationContext context =
         new ClassPathXmlApplicationContext("Beans.xml");
      Student student = (Student) context.getBean("student");
      student.getName();
      student.getAge();
   }
}
以下是配置文件Beans.xml 。
<?xml version = "1.0" encoding = "UTF-8"?>
<beans xmlns = "http://www.springframework.org/schema/beans"
   xmlns:xsi = "http://www.w3.org/2001/XMLSchema-instance"
   xmlns:aop = "http://www.springframework.org/schema/aop"
   xsi:schemaLocation = "http://www.springframework.org/schema/beans
   http://www.springframework.org/schema/beans/spring-beans-3.0.xsd
   http://www.springframework.org/schema/aop
   http://www.springframework.org/schema/aop/spring-aop-3.0.xsd ">
   <aop:config>
      <aop:aspect id = "log" ref = "logging">
         <aop:PointCut id = "selectAll"
         expression = "execution(* com.iowiki.*.*(..))"/>
         <aop:after-returning PointCut-ref = "selectAll"
            method = "afterReturningAdvice" returning = "retVal"/>
      </aop:aspect>
   </aop:config>
   <!-- Definition for student bean -->
   <bean id = "student" class = "com.iowiki.Student">
      <property name = "name"  value = "Zara" />
      <property name = "age"  value = "11"/>
   </bean>
   <!-- Definition for logging aspect -->
   <bean id = "logging" class = "com.iowiki.Logging"/>
</beans>
运行项目 (Run Project)
完成源和配置文件的创建后,运行您的应用程序。 右键单击应用程序中的MainApp.java,并使用run as Java Application命令。 如果您的应用程序一切正常,它将打印以下消息。
Name : Zara
Returning : Name
Age : 11
Exception raised
Spring AOP - XML Based After Throwing Advice
After-throwing是一种通知类型,它确保在方法执行后运行通知,只有当方法通过抛出异常退出时才会运行。 以下是投掷后建议的语法。
语法 (Syntax)
<aop:config>
   <aop:aspect id = "log" ref = "logging">
      <aop:PointCut id = "PointCut-id" expression = "execution( expression )"/>
      <aop:after-throwing PointCut-ref = "PointCut-id" throwing = "ex"
         method = "methodName"/>
   </aop:aspect>
</aop:config>
Where,
PointCut-id - PointCut-id 。
ex - 被抛出的异常。
methodName - 被调用函数抛出异常并退出时要调用的函数的方法名称。
为了理解上述与After Throwing Advice相关的概念,让我们编写一个实现After Throwing Advice的示例。 要编写我们的示例并提供一些建议,让我们使用一个可用的Eclipse IDE并使用以下步骤创建一个Spring应用程序 -
| 步 | 描述 |
|---|---|
| 1 | 更新项目Student根据Spring AOP - Application章节创建。 |
| 2 | 更新bean配置并运行应用程序,如下所述。 |
以下是Logging.java文件的内容。 这实际上是方面模块的一个示例,它定义了在各个点调用的方法。
package com.iowiki;
public class Logging {
   /**
    * This is the method which I would like to execute
    * if there is an exception raised.
    */
   public void afterThrowingAdvice(IllegalArgumentException ex) {
      System.out.println("There has been an exception: " + ex.toString());
   }
}
以下是Student.java文件的内容。
package com.iowiki;
public class Student {
   private Integer age;
   private String name;
   public void setAge(Integer age) {
      this.age = age;
   }
   public Integer getAge() {
      System.out.println("Age : " + age );
	  return age;
   }
   public void setName(String name) {
      this.name = name;
   }
   public String getName() {
      System.out.println("Name : " + name );
      return name;
   }
   public void printThrowException(){
      System.out.println("Exception raised");
      throw new IllegalArgumentException();
   }
}
以下是MainApp.java文件的内容。
package com.iowiki;
import org.springframework.context.ApplicationContext;
import org.springframework.context.support.ClassPathXmlApplicationContext;
public class MainApp {
   public static void main(String[] args) {
      ApplicationContext context =
         new ClassPathXmlApplicationContext("Beans.xml");
      Student student = (Student) context.getBean("student");
      student.printThrowException();
   }
}
以下是配置文件Beans.xml 。
<?xml version = "1.0" encoding = "UTF-8"?>
<beans xmlns = "http://www.springframework.org/schema/beans"
   xmlns:xsi = "http://www.w3.org/2001/XMLSchema-instance"
   xmlns:aop = "http://www.springframework.org/schema/aop"
   xsi:schemaLocation = "http://www.springframework.org/schema/beans
   http://www.springframework.org/schema/beans/spring-beans-3.0.xsd
   http://www.springframework.org/schema/aop
   http://www.springframework.org/schema/aop/spring-aop-3.0.xsd ">
   <aop:config>
      <aop:aspect id = "log" ref = "logging">
         <aop:PointCut id = "selectAll"
         expression = "execution(* com.iowiki.*.*(..))"/>
         <aop:after-throwing PointCut-ref = "selectAll"
            throwing = "ex" method = "afterThrowingAdvice"/>
      </aop:aspect>
   </aop:config>
   <!-- Definition for student bean -->
   <bean id = "student" class = "com.iowiki.Student">
      <property name = "name"  value = "Zara" />
      <property name = "age"  value = "11"/>
   </bean>
   <!-- Definition for logging aspect -->
   <bean id = "logging" class = "com.iowiki.Logging"/>
</beans>
运行项目 (Run Project)
完成源和配置文件的创建后,运行您的应用程序。 右键单击应用程序中的MainApp.java,并使用run as Java Application命令。 如果您的应用程序一切正常,它将打印以下消息。
Exception raised
There has been an exception: java.lang.IllegalArgumentException
Exception in thread "main" java.lang.IllegalArgumentException
   at com.iowiki.Student.printThrowException(Student.java:25)
   at com.iowiki.Student$$FastClassBySpringCGLIB$$7dc55815.invoke(<generated>>)
   at org.springframework.cglib.proxy.MethodProxy.invoke(MethodProxy.java:204)
   at org.springframework.aop.framework.CglibAopProxy$CglibMethodInvocation.invokeJoinpoint(CglibAopProxy.java:717)
   at org.springframework.aop.framework.ReflectiveMethodInvocation.proceed(ReflectiveMethodInvocation.java:157)
   at org.springframework.aop.aspectj.AspectJAfterThrowingAdvice.invoke(AspectJAfterThrowingAdvice.java:58)
   at org.springframework.aop.framework.ReflectiveMethodInvocation.proceed(ReflectiveMethodInvocation.java:179)
   at org.springframework.aop.interceptor.ExposeInvocationInterceptor.invoke(ExposeInvocationInterceptor.java:92)
   at org.springframework.aop.framework.ReflectiveMethodInvocation.proceed(ReflectiveMethodInvocation.java:179)
   at org.springframework.aop.framework.CglibAopProxy$DynamicAdvisedInterceptor.intercept(CglibAopProxy.java:653)
   at com.iowiki.Student$$EnhancerBySpringCGLIB$$8514cd8.printThrowException(<generated>)
   at com.iowiki.MainApp.main(MainApp.java:15)
Spring AOP - XML Based Around Advice
Around是一种通知类型,可确保在方法执行之前和之后运行建议。 以下是around建议的语法。
语法 (Syntax)
<aop:config>
   <aop:aspect id = "log" ref = "logging">
      <aop:PointCut id = "PointCut-id" expression = "execution( expression )"/>
      <aop:around PointCut-ref = "PointCut-id" method = "methodName"/>
   </aop:aspect>
</aop:config>
Where,
PointCut-id - PointCut-id 。
methodName - 在被调用函数之前调用的函数的方法名称。
为了理解与Around Advice相关的上述概念,让我们编写一个实现Around Advice的例子。 要编写我们的示例并提供一些建议,让我们使用一个可用的Eclipse IDE并使用以下步骤创建一个Spring应用程序 -
| 步 | 描述 |
|---|---|
| 1 | 更新项目Student根据Spring AOP - Application章节创建。 |
| 2 | 更新bean配置并运行应用程序,如下所述。 |
以下是Logging.java文件的内容。 这实际上是方面模块的一个示例,它定义了在各个点调用的方法。
package com.iowiki;
import org.aspectj.lang.ProceedingJoinPoint;
public class Logging {
   /**
    * This is the method which I would like to execute
    * around a selected method execution.
    */
   public String aroundAdvice(ProceedingJoinPoint jp) throws Throwable{
      System.out.println("Around advice");
      Object[] args = jp.getArgs();
      if(args.length>0){
         System.out.print("Arguments passed: " );
         for (int i = 0; i < args.length; i++) {
            System.out.print("arg "+(i+1)+": "+args[i]);
         }
      }
      Object result = jp.proceed(args);
      System.out.println("Returning " + result);
      return result.toString();
   }
}
以下是Student.java文件的内容。
package com.iowiki;
public class Student {
   private Integer age;
   private String name;
   public void setAge(Integer age) {
      this.age = age;
   }
   public Integer getAge() {
      System.out.println("Age : " + age );
      return age;
   }
   public void setName(String name) {
      this.name = name;
   }
   public String getName() {
      System.out.println("Name : " + name );
      return name;
   }
   public void printThrowException(){
      System.out.println("Exception raised");
      throw new IllegalArgumentException();
   }
}
以下是MainApp.java文件的内容。
package com.iowiki;
import org.springframework.context.ApplicationContext;
import org.springframework.context.support.ClassPathXmlApplicationContext;
public class MainApp {
   public static void main(String[] args) {
      ApplicationContext context =
         new ClassPathXmlApplicationContext("Beans.xml");
      Student student = (Student) context.getBean("student");
      student.getName();
   }
}
以下是配置文件Beans.xml 。
<?xml version = "1.0" encoding = "UTF-8"?>
<beans xmlns = "http://www.springframework.org/schema/beans"
   xmlns:xsi = "http://www.w3.org/2001/XMLSchema-instance"
   xmlns:aop = "http://www.springframework.org/schema/aop"
   xsi:schemaLocation = "http://www.springframework.org/schema/beans
   http://www.springframework.org/schema/beans/spring-beans-3.0.xsd
   http://www.springframework.org/schema/aop
   http://www.springframework.org/schema/aop/spring-aop-3.0.xsd ">
   <aop:config>
      <aop:aspect id = "log" ref = "logging">
         <aop:PointCut id = "selectName"
            expression = "execution(* com.iowiki.Student.getName(..))"/>
         <aop:around PointCut-ref = "selectName" method = "aroundAdvice"/>
      </aop:aspect>
   </aop:config>
   <!-- Definition for student bean -->
   <bean id = "student" class = "com.iowiki.Student">
      <property name = "name"  value = "Zara" />
      <property name = "age"  value = "11"/>
   </bean>
   <!-- Definition for logging aspect -->
   <bean id = "logging" class = "com.iowiki.Logging"/>
</beans>
运行项目 (Run Project)
完成源和配置文件的创建后,运行您的应用程序。 右键单击应用程序中的MainApp.java,并使用run as Java Application命令。 如果您的应用程序一切正常,它将打印以下消息。
Around advice
Name : Zara
Returning Zara
Spring AOP - Annotation Based Application
让我们编写一个示例,它将使用基于Annotation的配置实现建议。 为此,让我们使用一个可用的Eclipse IDE,并使用以下步骤创建一个Spring应用程序。
| 步 | 描述 |
|---|---|
| 1 | 更新项目Student根据Spring AOP - Application章节创建。 |
| 2 | 更新bean配置并运行应用程序,如下所述。 |
以下是Logging.java文件的内容。 这实际上是方面模块的一个示例,它定义了在各个点调用的方法。
package com.iowiki;
import org.aspectj.lang.annotation.Aspect;
import org.aspectj.lang.annotation.Before;
import org.aspectj.lang.annotation.PointCut;
@Aspect
public class Logging {
   /** Following is the definition for a PointCut to select
    *  all the methods available. So advice will be called
    *  for all the methods.
    */
   @PointCut("execution(* com.iowiki.*.*(..))")
   private void selectAll(){}
   /**
    * This is the method which I would like to execute
    * before a selected method execution.
    */
   @Before("selectAll()")
   public void beforeAdvice(){
      System.out.println("Going to setup student profile.");
   }
}
以下是Student.java文件的内容。
package com.iowiki;
public class Student {
   private Integer age;
   private String name;
   public void setAge(Integer age) {
      this.age = age;
   }
   public Integer getAge() {
      System.out.println("Age : " + age );
      return age;
   }
   public void setName(String name) {
      this.name = name;
   }
   public String getName() {
      System.out.println("Name : " + name );
      return name;
   }
   public void printThrowException(){
      System.out.println("Exception raised");
      throw new IllegalArgumentException();
   }
}
以下是MainApp.java文件的内容。
package com.iowiki;
import org.springframework.context.ApplicationContext;
import org.springframework.context.support.ClassPathXmlApplicationContext;
public class MainApp {
   public static void main(String[] args) {
      ApplicationContext context =
         new ClassPathXmlApplicationContext("Beans.xml");
      Student student = (Student) context.getBean("student");
      student.getName();
      student.getAge();
   }
}
以下是配置文件Beans.xml 。
<?xml version = "1.0" encoding = "UTF-8"?>
<beans xmlns = "http://www.springframework.org/schema/beans"
   xmlns:xsi = "http://www.w3.org/2001/XMLSchema-instance"
   xmlns:aop = "http://www.springframework.org/schema/aop"
   xsi:schemaLocation = "http://www.springframework.org/schema/beans
   http://www.springframework.org/schema/beans/spring-beans-3.0.xsd
   http://www.springframework.org/schema/aop
   http://www.springframework.org/schema/aop/spring-aop-3.0.xsd ">
   <aop:aspectj-autoproxy/>
   <!-- Definition for student bean -->
   <bean id = "student" class = "com.iowiki.Student">
      <property name = "name"  value = "Zara" />
      <property name = "age"  value = "11"/>
   </bean>
   <!-- Definition for logging aspect -->
   <bean id = "logging" class = "com.iowiki.Logging"/>
</beans>
运行项目 (Run Project)
完成源和配置文件的创建后,运行您的应用程序。 右键单击应用程序中的MainApp.java,并使用run as Java Application命令。 如果您的应用程序一切正常,它将打印以下消息。
Going to setup student profile.
Name : Zara
Going to setup student profile.
Age : 11
Spring AOP - Annotation Based PointCut
JoinPoint
JoinPoint代表应用程序中可以插入AOP方面的一个点。 您还可以说,它是应用程序中使用Spring AOP框架执行操作的实际位置。 考虑以下示例 -
包中包含的所有方法类。
一个特定的类方法。
PointCut
PointCut是一组一个或多个JoinPoint,其中应该执行建议。 您可以使用表达式或模式指定PointCuts,我们将在AOP示例中看到。 在Spring中,PointCut有助于使用特定的JoinPoints来应用建议。 考虑以下示例 -
@PointCut(“execution(* com.iowiki。*。*(..))”)
@PointCut(“execution(* com.iowiki.Student.getName(..))”)
语法 (Syntax)
@Aspect
public class Logging {
   @PointCut("execution(* com.iowiki.*.*(..))")
   private void selectAll(){}
}
Where,
@Aspect - 将类标记为包含通知方法的类。
@PointCut - 将函数标记为PointCut
execution( expression ) - 覆盖要应用建议的方法的表达式。
为了理解与JoinPoint和PointCut相关的上述概念,让我们编写一个实现几个PointCuts的例子。 要编写我们的示例并提供一些建议,让我们使用一个可用的Eclipse IDE并使用以下步骤创建一个Spring应用程序 -
| 步 | 描述 |
|---|---|
| 1 | 更新项目Student根据Spring AOP - Application章节创建。 |
| 2 | 更新bean配置并运行应用程序,如下所述。 |
以下是Logging.java文件的内容。 这实际上是方面模块的一个示例,它定义了在各个点调用的方法。
package com.iowiki;
import org.aspectj.lang.annotation.Aspect;
import org.aspectj.lang.annotation.PointCut;
import org.aspectj.lang.annotation.Before;
@Aspect
public class Logging {
   /** Following is the definition for a PointCut to select
    *  all the methods available. So advice will be called
    *  for all the methods.
    */
   @PointCut("execution(* com.iowiki.*.*(..))")
   private void selectAll(){}
   /**
    * This is the method which I would like to execute
    * before a selected method execution.
    */
   @Before("selectAll()")
   public void beforeAdvice(){
      System.out.println("Going to setup student profile.");
   }
}
以下是Student.java文件的内容。
package com.iowiki;
public class Student {
   private Integer age;
   private String name;
   public void setAge(Integer age) {
      this.age = age;
   }
   public Integer getAge() {
      System.out.println("Age : " + age );
      return age;
   }
   public void setName(String name) {
      this.name = name;
   }
   public String getName() {
      System.out.println("Name : " + name );
      return name;
   }
   public void printThrowException(){
      System.out.println("Exception raised");
      throw new IllegalArgumentException();
   }
}
以下是MainApp.java文件的内容。
package com.iowiki;
import org.springframework.context.ApplicationContext;
import org.springframework.context.support.ClassPathXmlApplicationContext;
public class MainApp {
   public static void main(String[] args) {
      ApplicationContext context =
         new ClassPathXmlApplicationContext("Beans.xml");
      Student student = (Student) context.getBean("student");
      student.getName();
      student.getAge();
   }
}
以下是配置文件Beans.xml 。
<?xml version = "1.0" encoding = "UTF-8"?>
<beans xmlns = "http://www.springframework.org/schema/beans"
   xmlns:xsi = "http://www.w3.org/2001/XMLSchema-instance"
   xmlns:aop = "http://www.springframework.org/schema/aop"
   xsi:schemaLocation = "http://www.springframework.org/schema/beans
   http://www.springframework.org/schema/beans/spring-beans-3.0.xsd
   http://www.springframework.org/schema/aop
   http://www.springframework.org/schema/aop/spring-aop-3.0.xsd ">
   <aop:aspectj-autoproxy/>
   <!-- Definition for student bean -->
   <bean id = "student" class = "com.iowiki.Student">
      <property name = "name"  value = "Zara" />
      <property name = "age"  value = "11"/>
   </bean>
   <!-- Definition for logging aspect -->
   <bean id = "logging" class = "com.iowiki.Logging"/>
</beans>
运行项目 (Run Project)
完成源和配置文件的创建后,运行您的应用程序。 右键单击应用程序中的MainApp.java,并使用run as Java Application命令。 如果您的应用程序一切正常,它将打印以下消息。
Going to setup student profile.
Name : Zara
Going to setup student profile.
Age : 11
上面定义的@Pointcut使用表达式来选择com.iowiki包下定义的所有方法。 @Before建议使用上面定义的PointCut作为参数。 在上面的PointCut所涵盖的每个方法之前,有效地调用beforeAdvice()方法。
Spring AOP - Annotation Based Before Advice
@Before是一种通知类型,可确保在方法执行之前运行通知。 以下是@Before建议的语法。
语法 (Syntax)
@PointCut("execution(* com.iowiki.Student.getName(..))")
private void selectGetName(){}
@Before("selectGetName()")
public void beforeAdvice(){
   System.out.println("Going to setup student profile.");
}
Where,
@PointCut - 将函数标记为PointCut
execution( expression ) - 覆盖要应用建议的方法的表达式。
@Before - 将函数标记为在PointCut涵盖的方法之前执行的建议。
为了理解与@Before Advice相关的上述概念,让我们编写一个实现@Before Advice的例子。 要编写我们的示例并提供一些建议,让我们使用一个可用的Eclipse IDE并使用以下步骤创建一个Spring应用程序 -
| 步 | 描述 |
|---|---|
| 1 | 更新项目Student根据Spring AOP - Application章节创建。 |
| 2 | 更新bean配置并运行应用程序,如下所述。 |
以下是Logging.java文件的内容。 这实际上是方面模块的一个示例,它定义了在各个点调用的方法。
package com.iowiki;
import org.aspectj.lang.annotation.Aspect;
import org.aspectj.lang.annotation.PointCut;
import org.aspectj.lang.annotation.Before;
@Aspect
public class Logging {
   /** Following is the definition for a PointCut to select
    *  all the methods available. So advice will be called
    *  for all the methods.
    */
   @PointCut("execution(* com.iowiki.Student.getName(..))")
   private void selectGetName(){}
   /**
    * This is the method which I would like to execute
    * before a selected method execution.
    */
   @Before("selectGetName()")
   public void beforeAdvice(){
      System.out.println("Going to setup student profile.");
   }
}
以下是Student.java文件的内容。
package com.iowiki;
public class Student {
   private Integer age;
   private String name;
   public void setAge(Integer age) {
      this.age = age;
   }
   public Integer getAge() {
      System.out.println("Age : " + age );
      return age;
   }
   public void setName(String name) {
      this.name = name;
   }
   public String getName() {
      System.out.println("Name : " + name );
      return name;
   }
   public void printThrowException(){
      System.out.println("Exception raised");
      throw new IllegalArgumentException();
   }
}
以下是MainApp.java文件的内容。
package com.iowiki;
import org.springframework.context.ApplicationContext;
import org.springframework.context.support.ClassPathXmlApplicationContext;
public class MainApp {
   public static void main(String[] args) {
      ApplicationContext context =
         new ClassPathXmlApplicationContext("Beans.xml");
      Student student = (Student) context.getBean("student");
      student.getName();
      student.getAge();
   }
}
以下是配置文件Beans.xml 。
<?xml version = "1.0" encoding = "UTF-8"?>
<beans xmlns = "http://www.springframework.org/schema/beans"
   xmlns:xsi = "http://www.w3.org/2001/XMLSchema-instance"
   xmlns:aop = "http://www.springframework.org/schema/aop"
   xsi:schemaLocation = "http://www.springframework.org/schema/beans
   http://www.springframework.org/schema/beans/spring-beans-3.0.xsd
   http://www.springframework.org/schema/aop
   http://www.springframework.org/schema/aop/spring-aop-3.0.xsd ">
   <aop:aspectj-autoproxy/>
   <!-- Definition for student bean -->
   <bean id = "student" class = "com.iowiki.Student">
      <property name = "name"  value = "Zara" />
      <property name = "age"  value = "11"/>
   </bean>
   <!-- Definition for logging aspect -->
   <bean id = "logging" class = "com.iowiki.Logging"/>
</beans>
运行项目 (Run Project)
完成源和配置文件的创建后,运行您的应用程序。 右键单击应用程序中的MainApp.java,并使用run as Java Application命令。 如果您的应用程序一切正常,它将打印以下消息。
Going to setup student profile.
Name : Zara
Age : 11
上面定义的@Pointcut使用表达式来选择com.iowiki包下的类(es)中定义的方法getAge()。 @After建议使用上面定义的PointCut作为参数。 有效地afterAdvice()方法将在上述PointCut覆盖的每个方法之前调用。
Spring AOP - Annotation Based After Advice
@After是一种通知类型,可确保在方法执行后运行通知。 以下是@After建议的语法。
语法 (Syntax)
@PointCut("execution(* com.iowiki.Student.getAge(..))")
private void selectGetName(){}
@After("selectGetAge()")
public void afterAdvice(){
   System.out.println("Student profile setup completed.");
}
Where,
@PointCut - 将函数标记为PointCut
execution( expression ) - 覆盖要应用建议的方法的表达式。
@After - 将函数标记为在PointCut涵盖的方法之前执行的建议。
为了理解与@After Advice相关的上述概念,让我们编写一个实现@After Advice的例子。 要编写我们的示例并提供一些建议,让我们使用一个可用的Eclipse IDE,并使用以下步骤创建一个Spring应用程序。
| 步 | 描述 |
|---|---|
| 1 | 更新项目Student根据Spring AOP - Application章节创建。 |
| 2 | 更新bean配置并运行应用程序,如下所述。 |
以下是Logging.java文件的内容。 这实际上是方面模块的一个示例,它定义了在各个点调用的方法。
package com.iowiki;
import org.aspectj.lang.annotation.Aspect;
import org.aspectj.lang.annotation.PointCut;
import org.aspectj.lang.annotation.After;
@Aspect
public class Logging {
   /** Following is the definition for a PointCut to select
    *  all the methods available. So advice will be called
    *  for all the methods.
    */
   @PointCut("execution(* com.iowiki.Student.getAge(..))")
   private void selectGetAge(){}
   /**
    * This is the method which I would like to execute
    * after a selected method execution.
    */
   @After("selectGetAge()")
   public void afterAdvice(){
      System.out.println("Student profile setup completed.");
   }
}
以下是Student.java文件的内容。
package com.iowiki;
public class Student {
   private Integer age;
   private String name;
   public void setAge(Integer age) {
      this.age = age;
   }
   public Integer getAge() {
      System.out.println("Age : " + age );
      return age;
   }
   public void setName(String name) {
      this.name = name;
   }
   public String getName() {
      System.out.println("Name : " + name );
      return name;
   }
   public void printThrowException(){
      System.out.println("Exception raised");
      throw new IllegalArgumentException();
   }
}
以下是MainApp.java文件的内容。
package com.iowiki;
import org.springframework.context.ApplicationContext;
import org.springframework.context.support.ClassPathXmlApplicationContext;
public class MainApp {
   public static void main(String[] args) {
      ApplicationContext context =
         new ClassPathXmlApplicationContext("Beans.xml");
      Student student = (Student) context.getBean("student");
      student.getName();
      student.getAge();
   }
}
以下是配置文件Beans.xml 。
<?xml version = "1.0" encoding = "UTF-8"?>
<beans xmlns = "http://www.springframework.org/schema/beans"
   xmlns:xsi = "http://www.w3.org/2001/XMLSchema-instance"
   xmlns:aop = "http://www.springframework.org/schema/aop"
   xsi:schemaLocation = "http://www.springframework.org/schema/beans
   http://www.springframework.org/schema/beans/spring-beans-3.0.xsd
   http://www.springframework.org/schema/aop
   http://www.springframework.org/schema/aop/spring-aop-3.0.xsd ">
   <aop:aspectj-autoproxy/>
   <!-- Definition for student bean -->
   <bean id = "student" class = "com.iowiki.Student">
      <property name = "name"  value = "Zara" />
      <property name = "age"  value = "11"/>
   </bean>
   <!-- Definition for logging aspect -->
   <bean id = "logging" class = "com.iowiki.Logging"/>
</beans>
运行项目 (Run Project)
完成源和配置文件的创建后,运行您的应用程序。 右键单击应用程序中的MainApp.java,并使用run as Java Application命令。 如果您的应用程序一切正常,它将打印以下消息。
Name : Zara
Age : 11
Student profile setup completed.
上面定义的@Pointcut使用表达式来选择com.iowiki包下的类(es)中定义的方法getAge()。 @After建议使用上面定义的PointCut作为参数。 有效地afterAdvice()方法将在上述PointCut覆盖的每个方法之前调用。
Spring AOP - Annotation Based After Returning Advice
@AfterReturning是一种通知类型,可确保在方法成功执行后运行通知。 以下是@AfterReturning建议的语法。
语法 (Syntax)
@AfterReturning(PointCut = "execution(* com.iowiki.Student.*(..))",
   returning = "retVal")
public void afterReturningAdvice(JoinPoint jp, Object retVal){
   System.out.println("Method Signature: "  + jp.getSignature());
   System.out.println("Returning:" + retVal.toString() );
}
Where,
@AfterReturning - 如果方法成功返回,则将函数标记为在PointCut覆盖的方法之前执行的建议。
PointCut - 提供用于选择函数的表达式
execution( expression ) - 覆盖要应用建议的方法的表达式。
returning - 要返回的变量的名称。
为了理解与@AfterReturning Advice相关的上述概念,让我们编写一个实例,它将实现@AfterReturning Advice。 要编写我们的示例并提供一些建议,让我们使用一个可用的Eclipse IDE,并使用以下步骤创建一个Spring应用程序。
| 步 | 描述 |
|---|---|
| 1 | 更新项目Student根据Spring AOP - Application章节创建。 |
| 2 | 更新bean配置并运行应用程序,如下所述。 |
以下是Logging.java文件的内容。 这实际上是方面模块的一个示例,它定义了在各个点调用的方法。
package com.iowiki;
import org.aspectj.lang.annotation.Aspect;
import org.aspectj.lang.JoinPoint;
import org.aspectj.lang.annotation.AfterReturning;
@Aspect
public class Logging {
   /**
    * This is the method which I would like to execute
    * after a selected method execution.
    */
   @AfterReturning(PointCut = "execution(* com.iowiki.Student.*(..))",
      returning = "retVal")
   public void afterReturningAdvice(JoinPoint jp, Object retVal){
      System.out.println("Method Signature: "  + jp.getSignature());
      System.out.println("Returning:" + retVal.toString() );
   }
}
以下是Student.java文件的内容。
package com.iowiki;
public class Student {
   private Integer age;
   private String name;
   public void setAge(Integer age) {
      this.age = age;
   }
   public Integer getAge() {
      System.out.println("Age : " + age );
      return age;
   }
   public void setName(String name) {
      this.name = name;
   }
   public String getName() {
      System.out.println("Name : " + name );
      return name;
   }
   public void printThrowException(){
      System.out.println("Exception raised");
      throw new IllegalArgumentException();
   }
}
以下是MainApp.java文件的内容。
package com.iowiki;
import org.springframework.context.ApplicationContext;
import org.springframework.context.support.ClassPathXmlApplicationContext;
public class MainApp {
   public static void main(String[] args) {
      ApplicationContext context =
         new ClassPathXmlApplicationContext("Beans.xml");
      Student student = (Student) context.getBean("student");
      student.getAge();
   }
}
以下是配置文件Beans.xml 。
<?xml version = "1.0" encoding = "UTF-8"?>
<beans xmlns = "http://www.springframework.org/schema/beans"
   xmlns:xsi = "http://www.w3.org/2001/XMLSchema-instance"
   xmlns:aop = "http://www.springframework.org/schema/aop"
   xsi:schemaLocation = "http://www.springframework.org/schema/beans
   http://www.springframework.org/schema/beans/spring-beans-3.0.xsd
   http://www.springframework.org/schema/aop
   http://www.springframework.org/schema/aop/spring-aop-3.0.xsd ">
   <aop:aspectj-autoproxy/>
   <!-- Definition for student bean -->
   <bean id = "student" class = "com.iowiki.Student">
      <property name = "name"  value = "Zara" />
      <property name = "age"  value = "11"/>
   </bean>
   <!-- Definition for logging aspect -->
   <bean id = "logging" class = "com.iowiki.Logging"/>
</beans>
运行项目 (Run Project)
完成源和配置文件的创建后,运行您的应用程序。 右键单击应用程序中的MainApp.java,并使用run as Java Application命令。 如果您的应用程序一切正常,它将打印以下消息。
Age : 11
Method Signature: Integer com.iowiki.Student.getAge()
Returning 11
Spring AOP - Annotation Based After Throwing Advice
@AfterThrowing是一种通知类型,可确保在方法抛出异常时运行通知。 以下是@AfterThrowing建议的语法。
语法 (Syntax)
@AfterThrowing(PointCut = "execution(* com.iowiki.Student.*(..))",
   throwing = "error")
public void afterThrowingAdvice(JoinPoint jp, Throwable error){
   System.out.println("Method Signature: "  + jp.getSignature());
   System.out.println("Exception: "+error);
}
Where,
@AfterThrowing - 如果方法抛出异常,则将函数标记为在PointCut覆盖的方法之前执行的建议。
PointCut - 提供用于选择函数的表达式。
execution( expression ) - 覆盖要应用建议的方法的表达式。
throwing - 要返回的异常的名称。
为了理解上述与@AfterThrowing建议相关的概念,让我们编写一个实现@AfterThrowing建议的例子。 要编写我们的示例并提供一些建议,让我们使用一个可用的Eclipse IDE,并使用以下步骤创建一个Spring应用程序。
| 步 | 描述 |
|---|---|
| 1 | 更新项目Student根据Spring AOP - Application章节创建。 |
| 2 | 更新bean配置并运行应用程序,如下所述。 |
以下是Logging.java文件的内容。 这实际上是方面模块的一个示例,它定义了在各个点调用的方法。
package com.iowiki;
import org.aspectj.lang.annotation.Aspect;
import org.aspectj.lang.JoinPoint;
import org.aspectj.lang.annotation.AfterThrowing;
@Aspect
public class Logging {
   /**
    * This is the method which I would like to execute
    * after a selected method execution throws exception.
    */
   @AfterThrowing(PointCut = "execution(* com.iowiki.Student.*(..))",
      throwing = "error")
   public void afterThrowingAdvice(JoinPoint jp, Throwable error){
      System.out.println("Method Signature: "  + jp.getSignature());
      System.out.println("Exception: "+error);
   }
}
以下是Student.java文件的内容。
package com.iowiki;
public class Student {
   private Integer age;
   private String name;
   public void setAge(Integer age) {
      this.age = age;
   }
   public Integer getAge() {
      System.out.println("Age : " + age );
      return age;
   }
   public void setName(String name) {
      this.name = name;
   }
   public String getName() {
      System.out.println("Name : " + name );
      return name;
   }
   public void printThrowException(){
      System.out.println("Exception raised");
      throw new IllegalArgumentException();
   }
}
以下是MainApp.java文件的内容。
package com.iowiki;
import org.springframework.context.ApplicationContext;
import org.springframework.context.support.ClassPathXmlApplicationContext;
public class MainApp {
   public static void main(String[] args) {
      ApplicationContext context =
         new ClassPathXmlApplicationContext("Beans.xml");
      Student student = (Student) context.getBean("student");
      student.printThrowException();
   }
}
以下是配置文件Beans.xml 。
<?xml version = "1.0" encoding = "UTF-8"?>
<beans xmlns = "http://www.springframework.org/schema/beans"
   xmlns:xsi = "http://www.w3.org/2001/XMLSchema-instance"
   xmlns:aop = "http://www.springframework.org/schema/aop"
   xsi:schemaLocation = "http://www.springframework.org/schema/beans
   http://www.springframework.org/schema/beans/spring-beans-3.0.xsd
   http://www.springframework.org/schema/aop
   http://www.springframework.org/schema/aop/spring-aop-3.0.xsd ">
   <aop:aspectj-autoproxy/>
   <!-- Definition for student bean -->
   <bean id = "student" class = "com.iowiki.Student">
      <property name = "name"  value = "Zara" />
      <property name = "age"  value = "11"/>
   </bean>
   <!-- Definition for logging aspect -->
   <bean id = "logging" class = "com.iowiki.Logging"/>
</beans>
运行项目 (Run Project)
完成源和配置文件的创建后,运行您的应用程序。 右键单击应用程序中的MainApp.java,并使用run as Java Application命令。 如果您的应用程序一切正常,它将打印以下消息。
Exception raised
Method Signature: void com.iowiki.Student.printThrowException()
Exception: java.lang.IllegalArgumentException
Exception in thread "main" java.lang.IllegalArgumentException
   at com.iowiki.Student.printThrowException(Student.java:25)
   at com.iowiki.Student$$FastClassBySpringCGLIB$$7dc55815.invoke(<generated>)
   at org.springframework.cglib.proxy.MethodProxy.invoke(MethodProxy.java:204)
   at org.springframework.aop.framework.CglibAopProxy$CglibMethodInvocation.invokeJoinpoint(CglibAopProxy.java:717)
   at org.springframework.aop.framework.ReflectiveMethodInvocation.proceed(ReflectiveMethodInvocation.java:157)
   at org.springframework.aop.aspectj.AspectJAfterThrowingAdvice.invoke(AspectJAfterThrowingAdvice.java:58)
   at org.springframework.aop.framework.ReflectiveMethodInvocation.proceed(ReflectiveMethodInvocation.java:179)
   at org.springframework.aop.interceptor.ExposeInvocationInterceptor.invoke(ExposeInvocationInterceptor.java:92)
   at org.springframework.aop.framework.ReflectiveMethodInvocation.proceed(ReflectiveMethodInvocation.java:179)
   at org.springframework.aop.framework.CglibAopProxy$DynamicAdvisedInterceptor.intercept(CglibAopProxy.java:653)
   at com.iowiki.Student$$EnhancerBySpringCGLIB$$99b0a988.printThrowException(<generated>)
   at com.iowiki.MainApp.main(MainApp.java:13)
Spring AOP - Annotation Based Around Advice
@Around是一种通知类型,可确保在方法执行之前和之后运行建议。 以下是@Around建议的语法。
语法 (Syntax)
@PointCut("execution(* com.iowiki.Student.getAge(..))")
private void selectGetName(){}
@Around("selectGetAge()")
public void aroundAdvice(ProceedingJoinPoint proceedingJoinPoint){
   System.out.println("Around advice");
   Object[] args = jp.getArgs();
   if(args.length>0){
      System.out.print("Arguments passed: " );
      for (int i = 0; i < args.length; i++) {
         System.out.print("arg "+(i+1)+": "+args[i]);
      }
   }
   Object result = jp.proceed(args);
   System.out.println("Returning " + result);
   return result.toString();
}
Where,
@PointCut - 将函数标记为PointCut
execution( expression ) - 覆盖要应用建议的方法的表达式。
@Around - 将函数标记为在PointCut涵盖的方法之前执行的建议。
为了理解与@Around Advice相关的上述概念,让我们编写一个实现@Around Advice的例子。 要编写我们的示例并提供一些建议,让我们使用一个可用的Eclipse IDE并使用以下步骤创建一个Spring应用程序 -
| 步 | 描述 |
|---|---|
| 1 | 更新项目Student根据Spring AOP - Application章节创建。 |
| 2 | 更新bean配置并运行应用程序,如下所述。 |
以下是Logging.java文件的内容。 这实际上是方面模块的一个示例,它定义了在各个点调用的方法。
package com.iowiki;
import org.aspectj.lang.annotation.Aspect;
import org.aspectj.lang.annotation.PointCut;
import org.aspectj.lang.annotation.Around;
import org.aspectj.lang.ProceedingJoinPoint;
@Aspect
public class Logging {
   /** Following is the definition for a PointCut to select
    *  all the methods available. So advice will be called
    *  for all the methods.
    */
   @PointCut("execution(* com.iowiki.Student.getAge(..))")
   private void selectGetAge(){}
   /**
    * This is the method which I would like to execute
    * around a selected method execution.
    */
   @Around("selectGetAge()")
   public void aroundAdvice(ProceedingJoinPoint proceedingJoinPoint) throws Throwable{
      System.out.println("Around advice");
      Object[] args = proceedingJoinPoint.getArgs();
      if(args.length>0){
         System.out.print("Arguments passed: " );
         for (int i = 0; i < args.length; i++) {
            System.out.print("arg "+(i+1)+": "+args[i]);
         }
      }
      Object result = proceedingJoinPoint.proceed(args);
      System.out.println("Returning " + result);
   }
}
以下是Student.java文件的内容。
package com.iowiki;
public class Student {
   private Integer age;
   private String name;
   public void setAge(Integer age) {
      this.age = age;
   }
   public Integer getAge() {
      System.out.println("Age : " + age );
      return age;
   }
   public void setName(String name) {
      this.name = name;
   }
   public String getName() {
      System.out.println("Name : " + name );
      return name;
   }
   public void printThrowException(){
      System.out.println("Exception raised");
      throw new IllegalArgumentException();
   }
}
以下是MainApp.java文件的内容。
package com.iowiki;
import org.springframework.context.ApplicationContext;
import org.springframework.context.support.ClassPathXmlApplicationContext;
public class MainApp {
   public static void main(String[] args) {
      ApplicationContext context =
         new ClassPathXmlApplicationContext("Beans.xml");
      Student student = (Student) context.getBean("student");
      student.getAge();
   }
}
以下是配置文件Beans.xml 。
<?xml version = "1.0" encoding = "UTF-8"?>
<beans xmlns = "http://www.springframework.org/schema/beans"
   xmlns:xsi = "http://www.w3.org/2001/XMLSchema-instance"
   xmlns:aop = "http://www.springframework.org/schema/aop"
   xsi:schemaLocation = "http://www.springframework.org/schema/beans
   http://www.springframework.org/schema/beans/spring-beans-3.0.xsd
   http://www.springframework.org/schema/aop
   http://www.springframework.org/schema/aop/spring-aop-3.0.xsd ">
   <aop:aspectj-autoproxy/>
   <!-- Definition for student bean -->
   <bean id = "student" class = "com.iowiki.Student">
      <property name = "name"  value = "Zara" />
      <property name = "age"  value = "11"/>
   </bean>
   <!-- Definition for logging aspect -->
   <bean id = "logging" class = "com.iowiki.Logging"/>
</beans>
运行项目 (Run Project)
完成源和配置文件的创建后,运行您的应用程序。 右键单击应用程序中的MainApp.java,并使用run as Java Application命令。 如果您的应用程序一切正常,它将打印以下消息。
Around advice
Age : 11
Returning 11
Spring AOP - Proxy
到目前为止,我们已经使用《aop:config》或《 aop:aspectj-autoproxy》声明了方面。 我们可以以编程方式创建代理,也可以使用代理对象以编程方式调用方面。
语法 (Syntax)
//Create object to be proxied
Student student = new Student();
//Create the Proxy Factory
AspectJProxyFactory proxyFactory = new AspectJProxyFactory(student);
//Add Aspect class to the factory
proxyFactory.addAspect(Logging.class);
//Get the proxy object
Student proxyStudent = proxyFactory.getProxy();
//Invoke the proxied method.
proxyStudent.getAge();
Where,
AspectJProxyFactory - 用于创建代理对象的工厂类。
Logging.class - 包含建议的Aspect的类。
Student - 建议的商务舱。
为了理解上面提到的与代理相关的概念,让我们编写一个实现代理的例子。 要编写我们的示例并提供一些建议,让我们使用一个可用的Eclipse IDE并使用以下步骤创建一个Spring应用程序 -
| 步 | 描述 |
|---|---|
| 1 | 更新项目Student根据Spring AOP - Application章节创建。 |
| 2 | 更新bean配置并运行应用程序,如下所述。 |
以下是Logging.java文件的内容。 这实际上是方面模块的一个示例,它定义了在各个点调用的方法。
package com.iowiki;
import org.aspectj.lang.annotation.Aspect;
import org.aspectj.lang.annotation.PointCut;
import org.aspectj.lang.annotation.Before;
@Aspect
public class Logging {
   /** Following is the definition for a PointCut to select
    *  all the methods available. So advice will be called
    *  for all the methods.
    */
   @PointCut("execution(* com.iowiki.Student.getAge(..))")
   private void selectGetAge(){}
   /**
    * This is the method which I would like to execute
    * before a selected method execution.
    */
   @Before("selectGetAge()")
   public void beforeAdvice(){
      System.out.println("Going to setup student profile.");
   }
}
以下是Student.java文件的内容。
package com.iowiki;
public class Student {
   private Integer age;
   public void setAge(Integer age) {
      this.age = age;
   }
   public Integer getAge() {
      System.out.println("Age : " + age );
      return age;
   }
}
以下是MainApp.java文件的内容。
package com.iowiki;
import org.springframework.context.ApplicationContext;
import org.springframework.context.support.ClassPathXmlApplicationContext;
import org.springframework.aop.aspectj.annotation.AspectJProxyFactory;
public class MainApp {
   public static void main(String[] args) {
      ApplicationContext context =
         new ClassPathXmlApplicationContext("Beans.xml");
      Student student = (Student) context.getBean("student");
      //Create the Proxy Factory
      AspectJProxyFactory proxyFactory = new AspectJProxyFactory(student);
      //Add Aspect class to the factory
      proxyFactory.addAspect(Logging.class);
      //Get the proxy object
      Student proxyStudent = proxyFactory.getProxy();
      //Invoke the proxied method.
      proxyStudent.getAge();
   }
}
以下是配置文件Beans.xml 。
<?xml version = "1.0" encoding = "UTF-8"?>
<beans xmlns = "http://www.springframework.org/schema/beans"
   xmlns:xsi = "http://www.w3.org/2001/XMLSchema-instance"
   xmlns:aop = "http://www.springframework.org/schema/aop"
   xsi:schemaLocation = "http://www.springframework.org/schema/beans
   http://www.springframework.org/schema/beans/spring-beans-3.0.xsd
   http://www.springframework.org/schema/aop
   http://www.springframework.org/schema/aop/spring-aop-3.0.xsd ">
   <!-- Definition for student bean -->
   <bean id = "student" class = "com.iowiki.Student">
      <property name = "age"  value = "11"/>
   </bean>
   <!-- Definition for logging aspect -->
   <bean id = "logging" class = "com.iowiki.Logging"/>
</beans>
运行项目 (Run Project)
完成源和配置文件的创建后,运行您的应用程序。 右键单击应用程序中的MainApp.java,并使用run as Java Application命令。 如果您的应用程序一切正常,它将打印以下消息。
Going to setup student profile.
Age : 11
Spring AOP - Custom Annotation
根据PointCut表达式,可能会将它们应用于某些其他bean,而这些bean不是针对哪些建议的。 例如,请考虑以下表达式。
execution(* com.iowiki.*.getAge(..))
使用getAge()方法添加一个新的spring bean,虽然它可能不是预期的,但是建议将开始应用于它。 为此,我们可以创建自定义注释并注释要应用建议的方法。
@Before("@annotation(com.iowiki.Loggable)")
为了理解与@Before Advice相关的上述概念,让我们编写一个实现@Before Advice的例子。 要编写我们的示例并提供一些建议,让我们使用一个可用的Eclipse IDE,并使用以下步骤创建一个Spring应用程序。
| 步 | 描述 |
|---|---|
| 1 | 更新项目Student根据Spring AOP - Application章节创建。 |
| 2 | 更新bean配置并运行应用程序,如下所述。 |
以下是Logging.java文件的内容。 这实际上是方面模块的一个示例,它定义了在各个点调用的方法。
package com.iowiki;
import org.aspectj.lang.annotation.Aspect;
import org.aspectj.lang.annotation.Before;
@Aspect
public class Logging {
   /**
    * This is the method which I would like to execute
    * before a selected method execution.
    */
   @Before("@annotation(com.iowiki.Loggable)")
   public void beforeAdvice(){
      System.out.println("Going to setup student profile.");
   }
}
以下是Loggable.java文件的内容 -
package com.iowiki;
public @interface Loggable {
}
以下是Student.java文件的内容。
package com.iowiki;
public class Student {
   private Integer age;
   private String name;
   public void setAge(Integer age) {
      this.age = age;
   }
   public Integer getAge() {
      System.out.println("Age : " + age );
      return age;
   }
   public void setName(String name) {
      this.name = name;
   }
   @Loggable
   public String getName() {
      System.out.println("Name : " + name );
      return name;
   }
   public void printThrowException(){
      System.out.println("Exception raised");
      throw new IllegalArgumentException();
   }
}
以下是MainApp.java文件的内容。
package com.iowiki;
import org.springframework.context.ApplicationContext;
import org.springframework.context.support.ClassPathXmlApplicationContext;
public class MainApp {
   public static void main(String[] args) {
      ApplicationContext context =
         new ClassPathXmlApplicationContext("Beans.xml");
      Student student = (Student) context.getBean("student");
      student.getName();
      student.getAge();
   }
}
以下是配置文件Beans.xml 。
<?xml version = "1.0" encoding = "UTF-8"?>
<beans xmlns = "http://www.springframework.org/schema/beans"
   xmlns:xsi = "http://www.w3.org/2001/XMLSchema-instance"
   xmlns:aop = "http://www.springframework.org/schema/aop"
   xsi:schemaLocation = "http://www.springframework.org/schema/beans
   http://www.springframework.org/schema/beans/spring-beans-3.0.xsd
   http://www.springframework.org/schema/aop
   http://www.springframework.org/schema/aop/spring-aop-3.0.xsd ">
   <aop:aspectj-autoproxy/>
   <!-- Definition for student bean -->
   <bean id = "student" class = "com.iowiki.Student">
      <property name = "name"  value = "Zara" />
      <property name = "age"  value = "11"/>
   </bean>
   <!-- Definition for logging aspect -->
   <bean id = "logging" class = "com.iowiki.Logging"/>
</beans>
运行项目 (Run Project)
完成源和配置文件的创建后,运行您的应用程序。 右键单击应用程序中的MainApp.java,并使用run as Java Application命令。 如果您的应用程序一切正常,它将打印以下消息。
Going to setup student profile.
Name : Zara
Age : 11
