Spring Batch - 环境
在本章中,我们将解释如何在Eclipse IDE中设置Spring Batch环境。 在继续安装之前,请确保已在系统中安装了Eclipse。 如果没有,请在系统中下载并安装Eclipse。
有关Eclipse的更多信息,请参阅我们的Eclipse教程。
在Eclipse上设置Spring Batch
按照下面给出的步骤在Eclipse上设置Spring Batch环境。
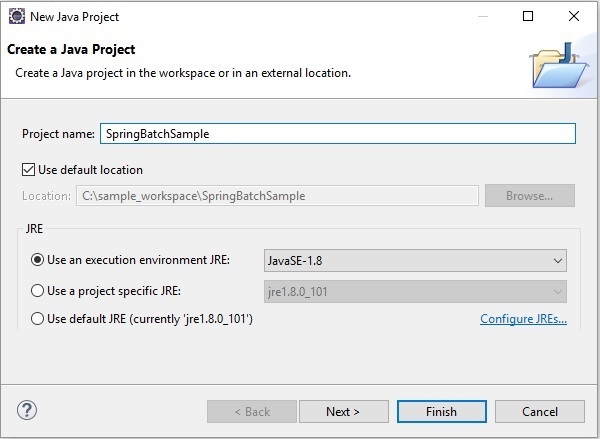
Step 1 - 安装Eclipse并打开一个新项目,如以下屏幕截图所示。

Step 2 - 创建一个Sample Spring Batch项目,如下所示。
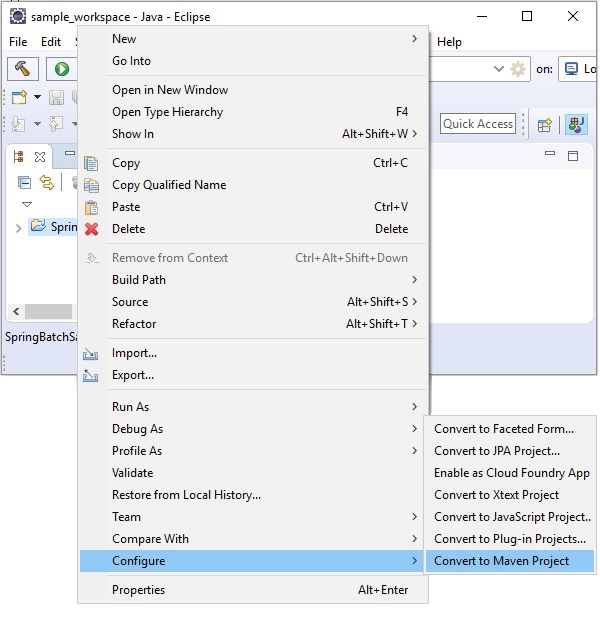
Step 3 - 右键单击项目并将其转换为Maven项目,如下所示。 一旦将其转换为Maven项目,它将为您提供一个Pom.xml ,您需要在其中提及所需的依赖项。 此后,这些jar文件将自动下载到您的项目中。
Step 4 - 现在,在项目的pom.xml中,复制并粘贴以下内容(Spring批处理应用程序的依赖项)并刷新项目。
<project xmlns = "http://maven.apache.org/POM/4.0.0"
   xmlns:xsi = "http://www.w3.org/2001/XMLSchema-instance"
   xsi:schemaLocation = "http://maven.apache.org/POM/4.0.0
   http://maven.apache.org/maven-v4_0_0.xsd">
   <modelVersion>4.0.0</modelVersion>
   <groupId>com.iowiki</groupId>
   <artifactId>SpringBatchSample</artifactId>
   <packaging>jar</packaging>
   <version>1.0-SNAPSHOT</version>
   <name>SpringBatchExample</name>
   <url>http://maven.apache.org</url>
   <properties>
      <jdk.version>1.8</jdk.version>
      <spring.version>4.3.8.RELEASE</spring.version>
      <spring.batch.version>3.0.7.RELEASE</spring.batch.version>
      <mysql.driver.version>5.1.25</mysql.driver.version>
      <junit.version>4.11</junit.version>
   </properties>
   <dependencies>
      <!-- Spring Core -->
      <dependency>
         <groupId>org.springframework</groupId>
         <artifactId>spring-core</artifactId>
         <version>${spring.version}</version>
      </dependency>
      <!-- Spring jdbc, for database -->
      <dependency>
         <groupId>org.springframework</groupId>
         <artifactId>spring-jdbc</artifactId>
         <version>${spring.version}</version>
      </dependency>
      <!-- Spring XML to/back object -->
      <dependency>
         <groupId>org.springframework</groupId>
         <artifactId>spring-oxm</artifactId>
         <version>${spring.version}</version>
      </dependency>
      <!-- MySQL database driver -->
      <dependency>
         <groupId>mysql</groupId>
         <artifactId>mysql-connector-java</artifactId>
         <version>${mysql.driver.version}</version>
      </dependency>
      <!-- Spring Batch dependencies -->
      <dependency>
         <groupId>org.springframework.batch</groupId>
         <artifactId>spring-batch-core</artifactId>
         <version>${spring.batch.version}</version>
      </dependency>
      <dependency>
         <groupId>org.springframework.batch</groupId>
         <artifactId>spring-batch-infrastructure</artifactId>
         <version>${spring.batch.version}</version>
      </dependency>
      <!-- Spring Batch unit test -->
      <dependency>
         <groupId>org.springframework.batch</groupId>
         <artifactId>spring-batch-test</artifactId>
         <version>${spring.batch.version}</version>
      </dependency>
      <!-- Junit -->
      <dependency>
         <groupId>junit</groupId>
         <artifactId>junit</artifactId>
         <version>${junit.version}</version>
         <scope>test</scope>
      </dependency>
   </dependencies>
   <build>
      <finalName>spring-batch</finalName>
      <plugins>
         <plugin>
            <groupId>org.apache.maven.plugins</groupId>
            <artifactId>maven-eclipse-plugin</artifactId>
            <version>2.9</version>
            <configuration>
               <downloadSources>true</downloadSources>
               <downloadJavadocs>false</downloadJavadocs>
            </configuration>
         </plugin>
         <plugin>
            <groupId>org.apache.maven.plugins</groupId>
            <artifactId>maven-compiler-plugin</artifactId>
            <version>2.3.2</version>
            <configuration>
               <source>${jdk.version}</source>
               <target>${jdk.version}</target>
            </configuration>
         </plugin>
      </plugins>
   </build>
</project>
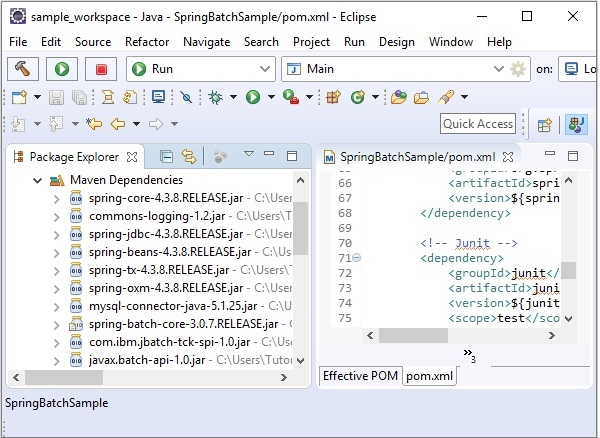
最后,如果您观察Maven依赖项,您可以观察到已下载了所有必需的jar文件。
<上一篇.Spring Batch - 概述
