LeafletJS - 标记( Markers)
要在地图上标记单个位置,传单会提供标记。 这些标记使用标准符号,这些符号可以自定义。 在本章中,我们将了解如何添加标记以及如何自定义,动画和删除标记。
添加简单标记
要使用Leaflet JavaScript库向地图添加标记,请按照以下步骤操作 -
Step 1 - 通过传递“ div ”元素(字符串或对象)和映射选项(可选)来创建Map对象。
Step 2 - 通过传递所需图块的URL来创建Layer对象。
Step 3 - 使用Map类的addLayer()方法将图层对象添加到Map 。
Step 4 - 通过传递表示要标记的位置的latlng对象来实例化Marker类,如下所示。
// Creating a marker
var marker = new L.Marker([17.385044, 78.486671]);
Step 5 - 使用Marker类的addTo()方法将前面步骤中创建的标记对象添加到地图中。
// Adding marker to the map
marker.addTo(map);
例子 (Example)
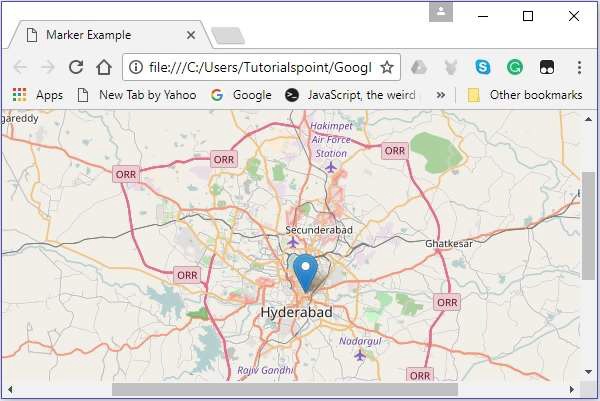
以下代码设置了名为Hyderabad(India)的城市的标记。
<!DOCTYPE html>
<html>
   <head>
      <title>Leaflet sample</title>
      <link rel = "stylesheet" href = "http://cdn.leafletjs.com/leaflet-0.7.3/leaflet.css"/>
      <script src = "http://cdn.leafletjs.com/leaflet-0.7.3/leaflet.js"></script>
   </head>
   <body>
      <div id = "map" style = "width:900px; height:580px"></div>
      <script>
         // Creating map options
         var mapOptions = {
            center: [17.385044, 78.486671],
            zoom: 10
         }
         // Creating a map object
         var map = new L.map('map', mapOptions);
         // Creating a Layer object
         var layer = new L.TileLayer('http://{s}.tile.openstreetmap.org/{z}/{x}/{y}.png');
         // Adding layer to the map
         map.addLayer(layer);
         // Creating a marker
         var marker = L.marker([17.385044, 78.486671]);
         // Adding marker to the map
         marker.addTo(map);
      </script>
   </body>
</html>
它生成以下输出 -

将弹出窗口绑定到标记
要将显示消息的简单弹出窗口绑定到标记,请按照以下步骤操作 -
Step 1 - 通过传递“ div ”元素(字符串或对象)和映射选项(可选)来创建Map对象。
Step 2 - 通过传递所需图块的URL来创建Layer对象。
Step 3 - 使用Map类的addLayer()方法将图层对象添加到Map 。
Step 4 - 通过传递表示要标记的位置的latlng对象来实例化Marker类。
Step 5 - 使用bindPopup()将弹出窗口附加到标记,如下所示。
// Adding pop-up to the marker
marker.bindPopup('Hi Welcome to IoWiki').openPopup();
Step 6 - 最后,使用Marker类的addTo()方法将前面步骤中创建的Marker对象添加到地图中。
例子 (Example)
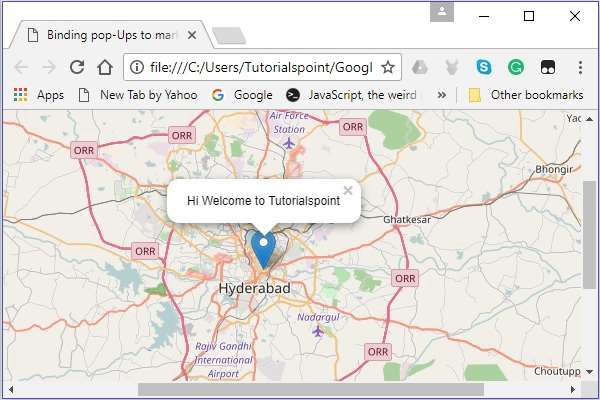
以下代码设置了Hyderabad(印度)城市的标记,并添加了一个弹出窗口。
<!DOCTYPE html>
<html>
   <head>
      <title>Binding pop-Ups to marker</title>
      <link rel = "stylesheet" href = "http://cdn.leafletjs.com/leaflet-0.7.3/leaflet.css"/>
      <script src = "http://cdn.leafletjs.com/leaflet-0.7.3/leaflet.js"></script>
   </head>
   <body>
      <div id = "map" style = "width:900px; height:580px"></div>
      <script>
         // Creating map options
         var mapOptions = {
            center: [17.385044, 78.486671],
            zoom: 15
         }
         var map = new L.map('map', mapOptions); // Creating a map object
         // Creating a Layer object
         var layer = new L.TileLayer('http://{s}.tile.openstreetmap.org/{z}/{x}/{y}.png');
         map.addLayer(layer);         // Adding layer to the map
         var marker = L.marker([17.438139, 78.395830]);    // Creating a Marker
         // Adding popup to the marker
         marker.bindPopup('This is IoWiki').openPopup();
         marker.addTo(map); // Adding marker to the map
      </script>
   </body>
</html>
它生成以下输出

标记选项
创建标记时,除了latlang对象外,还可以传递marker options变量。 使用此变量,您可以将值设置为标记的各种选项,如图标,可拖动,键盘,标题,alt,zInsexOffset,不透明度,riseOnHover,riseOffset,窗格,可拖动等。
要使用地图选项创建地图,您需要按照以下步骤进行操作 -
Step 1 - 通过传递“ div ”元素(字符串或对象)和映射选项(可选)来创建Map对象。
Step 2 - 通过传递所需图块的URL来创建Layer对象。
Step 3 - 使用Map类的addLayer()方法将图层对象添加到Map 。
Step 4 - 为markerOptions创建变量,并为所需选项指定值。
创建一个markerOptions对象(它就像文字一样创建)并为选项iconUrl和iconSize设置值。
// Options for the marker
var markerOptions = {
   title: "MyLocation",
   clickable: true,
   draggable: true
}
Step 5 - 通过传递表示要标记的位置的latlng对象和在上一步骤中创建的选项对象来实例化Marker类。
// Creating a marker
var marker = L.marker([17.385044, 78.486671], markerOptions);
Step 6 - 最后,使用Marker类的addTo()方法将前面步骤中创建的Marker对象添加到地图中。
例子 (Example)
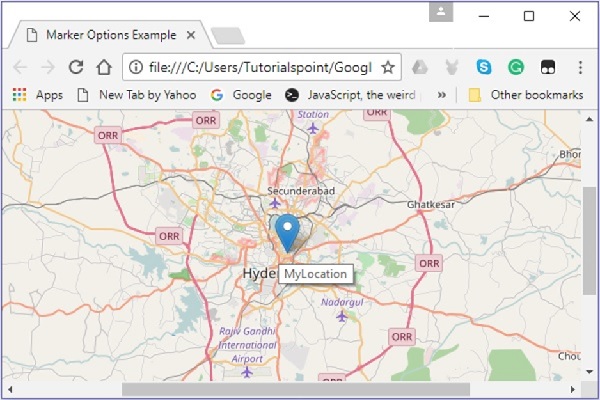
以下代码设置了海德拉巴市(印度)的标记。 此标记是可点击的,可拖动,标题为MyLocation 。
<html>
   <head>
      <title>Marker Options Example</title>
      <link rel = "stylesheet" href = "http://cdn.leafletjs.com/leaflet-0.7.3/leaflet.css"/>
      <script src = "http://cdn.leafletjs.com/leaflet-0.7.3/leaflet.js"></script>
   </head>
   <body>
      <div id = "map" style = "width:900px; height:580px"></div>
      <script>
         // Creating map options
         var mapOptions = {
            center: [17.385044, 78.486671],
            zoom: 10
         }
         // Creating a map object
         var map = new L.map('map', mapOptions);
         // Creating a Layer object
         var layer = new L.TileLayer('http://{s}.tile.openstreetmap.org/{z}/{x}/{y}.png');
         // Adding layer to the map
         map.addLayer(layer);
         // Creating a Marker
         var markerOptions = {
            title: "MyLocation",
            clickable: true,
            draggable: true
         }
         // Creating a marker
         var marker = L.marker([17.385044, 78.486671], markerOptions);
         // Adding marker to the map
         marker.addTo(map);
      </script>
   </body>
</html>
它生成以下输出

标记自定义图标
您也可以添加自己的图标,而不是Leaflet库提供的默认图标。 您可以使用以下步骤将自定义图标添加到地图而不是默认图标。
Step 1 - 通过传递“ div ”元素(字符串或对象)和映射选项(可选)来创建Map对象。
Step 2 - 通过传递所需图块的URL来创建Layer对象。
Step 3 - 使用Map类的addLayer()方法将图层对象添加到Map 。
Step 4 - 为markerOptions创建变量并为所需选项指定值 -
iconUrl - 作为此选项的值,您需要传递一个String对象,该对象指定要用作图标的图像路径。
iconSize - 使用此选项,您可以指定图标的大小。
Note - 除了这些,您还可以将值设置为其他选项,如iconSize,shadowSize,iconAnchor,shadowAnchor和popupAnchor。
使用L.icon()创建一个自定义图标,传递上面的选项变量,如下所示。
// Icon options
var iconOptions = {
   iconUrl: 'logo.png',
   iconSize: [50, 50]
}
// Creating a custom icon
var customIcon = L.icon(iconOptions);
Step 5 - 为markerOptions创建变量,并为所需选项指定值。 除此之外,通过将上一步中创建的图标变量作为值传递来指定图标。
// Options for the marker
var markerOptions = {
   title: "MyLocation",
   clickable: true,
   draggable: true,
   icon: customIcon
}
Step 6 - 通过传递表示要标记的位置的latlng对象和在上一步骤中创建的选项对象来实例化Marker类。
// Creating a marker
var marker = L.marker([17.438139, 78.395830], markerOptions);
Step 7 - 最后,使用Marker类的addTo()方法将前面步骤中创建的Marker对象添加到地图中。
例子 (Example)
以下代码在IoWiki的位置设置标记。 这里我们使用IoWiki的徽标而不是默认标记。
<!DOCTYPE html>
<html>
   <head>
      <title>Marker Custom Icons Example</title>
      <link rel = "stylesheet" href = "http://cdn.leafletjs.com/leaflet-0.7.3/leaflet.css"/>
      <script src = "http://cdn.leafletjs.com/leaflet-0.7.3/leaflet.js"></script>
   </head>
   <body>
      <div id = "map" style = "width:900px; height:580px"></div>
      <script>
         // Creating map options
         var mapOptions = {
            center: [17.438139, 78.395830],
            zoom: 10
         }
         // Creating a map object
         var map = new L.map('map', mapOptions);
         // Creating a Layer object
         var layer = new L.TileLayer('http://{s}.tile.openstreetmap.org/{z}/{x}/{y}.png');
         // Adding layer to the map
         map.addLayer(layer);
         // Icon options
         var iconOptions = {
            iconUrl: 'logo.png',
            iconSize: [50, 50]
         }
         // Creating a custom icon
         var customIcon = L.icon(iconOptions);
         // Creating Marker Options
         var markerOptions = {
            title: "MyLocation",
            clickable: true,
            draggable: true,
            icon: customIcon
         }
         // Creating a Marker
         var marker = L.marker([17.438139, 78.395830], markerOptions);
         // Adding popup to the marker
         marker.bindPopup('Hi welcome to IoWiki').openPopup();
         // Adding marker to the map
         marker.addTo(map);
      </script>
   </body>
</html>
它生成以下输出
