Koa.js - 文件上传( File Uploading)
Web应用程序需要提供允许文件上载的功能。 让我们看看如何从客户端接收文件并将它们存储在我们的服务器上。
我们已经使用koa-body中间件来解析请求。 此中间件还用于处理文件上载。 让我们创建一个表单,允许我们上传文件,然后使用Koa保存这些文件。 首先使用以下内容创建名为file_upload.pug的模板。
html
   head
      title File uploads
   body
      form(action = "/upload" method = "POST" enctype = "multipart/form-data")
         div
            input(type = "text" name = "name" placeholder = "Name")
         div
            input(type = "file" name = "image")
         div
            input(type = "submit")
请注意,您需要在表单中提供与上面相同的编码类型。 现在让我们在服务器上处理这些数据。
var koa = require('koa');
var router = require('koa-router');
var bodyParser = require('koa-body');
var app = koa();
//Set up Pug
var Pug = require('koa-pug');
var pug = new Pug({
   viewPath: './views',
   basedir: './views',
   app: app
});
//Set up body parsing middleware
app.use(bodyParser({
   formidable:{uploadDir: './uploads'},    //This is where the files would come
   multipart: true,
   urlencoded: true
}));
var _ = router(); //Instantiate the router
_.get('/files', renderForm);
_.post('/upload', handleForm);
function * renderForm(){
   this.render('file_upload');
}
function *handleForm(){
   console.log("Files: ", this.request.body.files);
   console.log("Fields: ", this.request.body.fields);
   this.body = "Received your data!"; //This is where the parsed request is stored
}
app.use(_.routes());
app.listen(3000);
运行此时,您将获得以下表单。

提交时,您的控制台将生成以下输出。
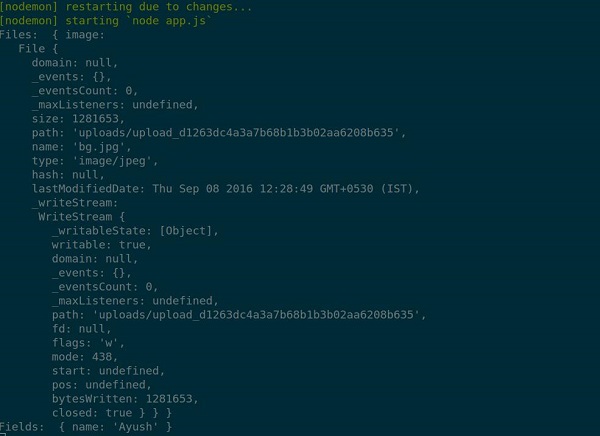
上载的文件存储在上述输出的路径中。 您可以使用this.request.body.files以及this.request.body.files在该请求中的字段来访问请求中的this.request.body.fields 。
Koa.js - Static 文件.下一篇>
