JasmineJS - 快速指南
JasmineJS - Overview
Jasmine是一个开源JavaScript框架,能够测试任何类型的JavaScript应用程序。 Jasmine遵循行为驱动开发(BDD)过程,以确保每行JavaScript语句都经过适当的单元测试。 通过遵循BDD过程,Jasmine提供了一种小语法来测试整个应用程序的最小单元,而不是作为一个整体进行测试。
为何使用茉莉花?
以下是使用Jasmine优于其他可用JavaScript测试框架的优势 -
Jasmine不依赖于任何其他JavaScript框架。
Jasmine不需要任何DOM。
Jasmine框架中使用的所有语法都很简洁明了。
Jasmine深受Rspec,JS Spec和Jspec的影响。
Jasmine是一个开源框架,可以在不同版本中轻松使用,如独立版,ruby gem,Node.js等。
如何使用茉莉花?
Jasmine很容易在任何开发方法中实现。 您需要下载的只是官方网站http://jasmine.github.io/的独立库文件,并在您的应用程序中实现相同的功能。
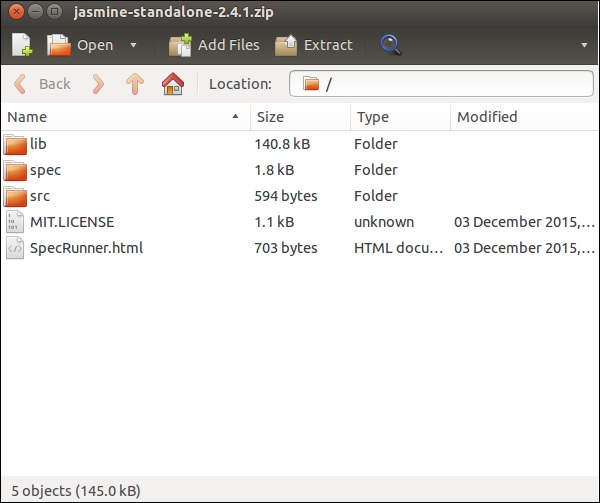
详细的环境设置将在下一章“环境设置”中介绍。 成功下载并解压缩zip文件后,您将在该zip文件中找到以下子文件夹。

JasmineJS - Environment Setup
在本章中,我们将讨论如何设置基于Jasmine的BDD测试应用程序的分步过程。
Step 1 - 访问茉莉花的官方网站http://jasmine.github.io/
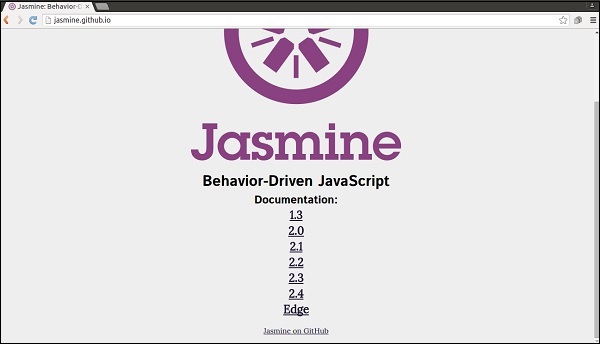
Step 2 - 单击任何版本链接。 最好使用最新版本的“Edge”。 您将被重定向到所选版本的主页。
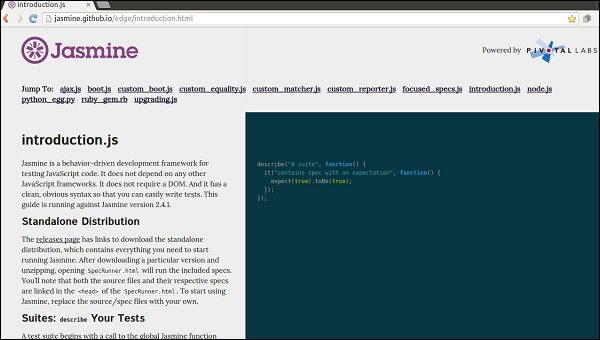
Step 3 - 转到主页的“下载”部分,然后单击独立版本页面。
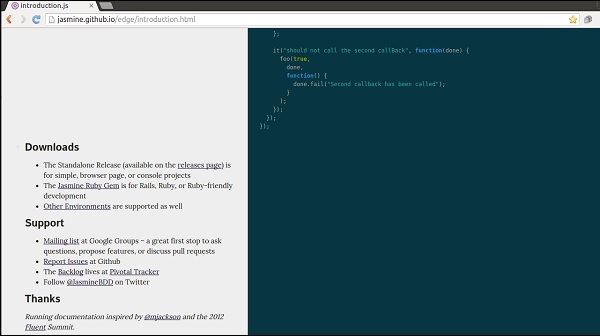
Step 4 - 重定向到github发布页面后,从那里下载Zip文件。

Step 5 - 解压缩下载的jasmine-standalone-2.4.1文件夹。 您将看到以下文件夹结构。
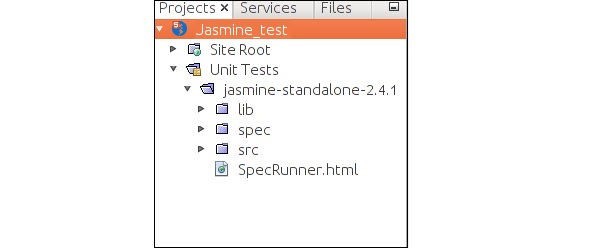
Step 6 - 现在在您喜欢的IDE中创建一个Web应用程序项目,并将下载的库文件添加到应用程序中。 在这里,我们使用了netbeans IDE。 以下是添加Jasmine框架后我们的应用程序的目录结构。
我们的环境设置已完成。 现在我们的应用程序已准备好通过Jasmine框架进行测试。
JasmineJS - Writing Text & Execution
在本章中,我们将创建一个hello world app ,它将测试我们的“helloworld.js”文件。 在开发hello world应用程序之前,请回到上一章,确保您的环境已准备好使用Jasmine进行测试。
Step 1 − Create a Web application in your IDE
在这里,我们使用NetBeans 8.1在Jasmine中开发我们的hello world应用程序。 在NetBeans中,转到文件→新建项目→Html5/JS应用程序并创建项目。 创建项目后,项目目录应如下面的屏幕截图所示。 我们将我们的项目命名为Jasmine_Demo 。

Step 2 − Include the Jasmine lib file into the application
创建演示项目后,您需要做的就是在创建的应用程序的Unit Tests文件夹中包含Jasmine库的unzip文件夹。 将所有库文件添加到我们的应用程序文件夹后,我们项目的结构将如下面的屏幕截图所示。

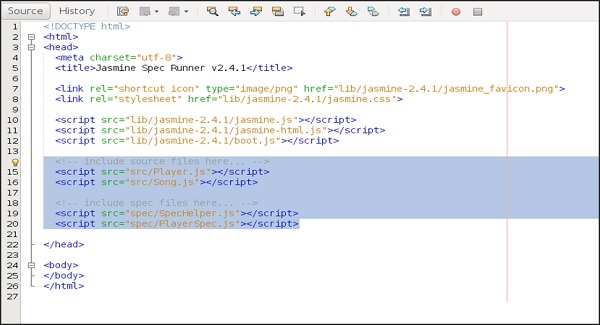
spec和src文件夹下给出的文件是Jasmine团队提供的演示文件。 删除这些文件,因为我们将创建自己的测试文件和测试用例。 删除这些JavaScript文件时,我们需要删除我们的输出html文件SpecRunner.html的那些文件的引用。
以下是SpecRunner.html文件的屏幕截图,其中将删除spec和src中不同JavaScript文件的引用。
Step 3 − Create a JavaScript file
在这一步中,我们将在src文件夹下创建一个名为helloworld.js的JavaScript文件。 这是我们将通过Jasmine测试的文件。 创建JavaScript文件后,在文件中附加以下代码集。
/*
* This is the JavaScript file that need to be tested through jasmine
* Below is the helloworld function that will return 'Hello World'
*
*/
var helloworld = function(){
   return 'Hello World';
};
Step 4 − Create a test case
在此步骤中,我们将创建另一个JavaScript文件,其中包含上述JavaScript文件的测试用例。 继续在“Spec”文件夹下创建一个JavaScript文件,并将其命名为“HelloWorldsSpec.js” 。 将以下代码行添加到此js文件中。
/*
* This is the file which will call our java script file that need to be tested.
* Each describe block is equivalent to one test case
*
*/
describe("Hello World", function(){
   it("should Return Hello world",function(){
      expect(helloworld()).toEqual('Hello World');
   });
});
Step 5 − Add reference to the output file
我们成功创建了自己的待测文件和相应的测试用例。 我们把它放在两个不同的文件夹下。 在此步骤中,我们将修改“SpecRunner.html”以包含这两个新创建的文件的引用。
<!DOCTYPE html>
<html>
   <head>
      <meta charset = "utf-8">
      <title>Jasmine Spec Runner v2.4.1</title>
      <link rel = "shortcut icon" type = "image/png" href =
      "lib/jasmine2.4.1/jasmine_favicon.png">
      <link rel = "stylesheet" href = "lib/jasmine-2.4.1/jasmine.css">
      <script src = "lib/jasmine-2.4.1/jasmine.js"></script>
      <script src = "lib/jasmine-2.4.1/jasmine-html.js"></script>
      <script src = "lib/jasmine-2.4.1/boot.js"></script>
      <!--Lines to be deleted
      <script src = "src/Player.js"></script>
      <script src = "src/Song.js"></script>
      <script src = "spec/SpecHelper.js"></script>
      <script src = "spec/PlayerSpec.js"></script> -->
      <!--adding the reference of our newly created file --->
      <script src = "src/helloworld.js"></script>
      <script src = "spec/HelloWorldsSpec.js"></script>
   </head>
   <body>
   </body>
</html>
Step 6 − Execute by running SpecRunner.html
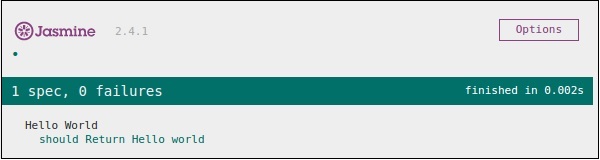
这是我们应用程序开发的最后一步。 在您喜欢的任何浏览器中运行SpecRunner.html。 以下屏幕截图将作为结果显示。 绿色屏幕表示成功,而红色表示测试用例失败。
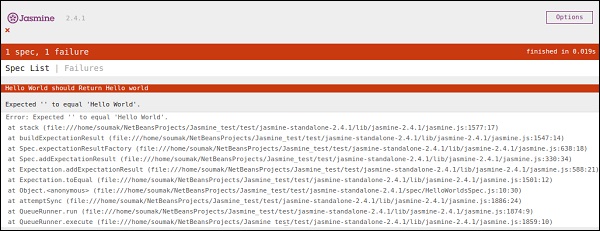
Step 7 − Understand the failure case
到目前为止,我们已经看到了hello world应用程序的success测试用例。 现在让我们看看如果出现问题并且测试失败了。 要实现失败案例,我们需要编写失败测试用例。 为此,我们将使用以下代码修改helloworld.js文件。
var helloworld = function (){
   return '';
};
// we are not returning any string whereas in the spec file
//we are expecting a // string as “Hello World”
上面的代码肯定会失败,因为我们的spec文件没有得到期望的字符串作为helloworld()的输出。 specRunner.html文件的以下屏幕截图描述了其红色指示符出错。
JasmineJS - BDD Architecture
Jasmine遵循行为驱动开发(BDD)框架。 在学习Jasmine的工作原理之前,让我们知道什么是BDD框架。
以下流程图描述了BDD框架的不同阶段。
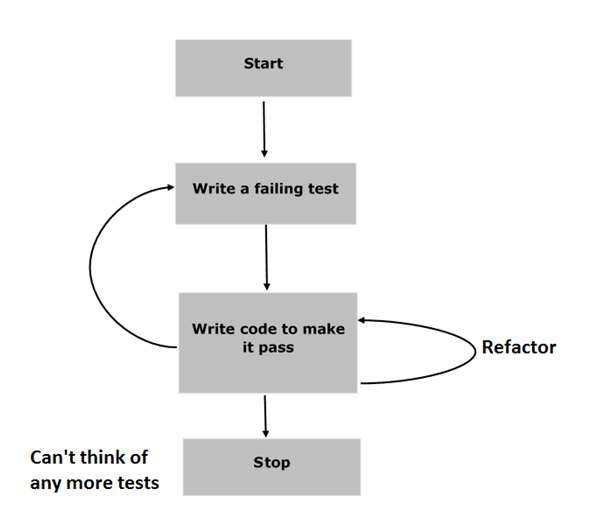
Step 1 − Start
在这个阶段,我们将为Jasmine应用程序准备好环境。
Step 2 − Write a failing test
在这一步中,我们将编写我们的第一个测试用例。 很明显,这个测试会失败,因为没有这样的文件或函数需要测试。
Step 3 − Write a code to make it pass
在这个阶段,我们将准备我们需要测试的JavaScript文件或函数。 这个阶段至关重要,因为我们需要确保我们在早期阶段准备的所有测试用例都能成功。
Step 4 − Refactor
重构是BDD模型的一个非常重要的阶段,我们需要为特定的应用程序或函数准备尽可能多的测试用例。
Step 5 − Stop
如果一切顺利,那么您的应用程序必须准备就绪。 因此,我们可以将此步骤视为BDD应用程序的结束。
例子 (Example)
我们现在已经收集了一些关于BDD框架工作原理的知识。 让我们看看Jasmine如何在JavaScript测试中遵循这个BDD框架。
截图描述我们需要使用Jasmine框架测试Abc.js。 SpecRunner.html是输出文件,它将采用Spec.js(Test case file ), Abc.js(file to be tested) ,LIB作为输入并运行spec文件中的所有测试用例并将结果呈现到浏览器。
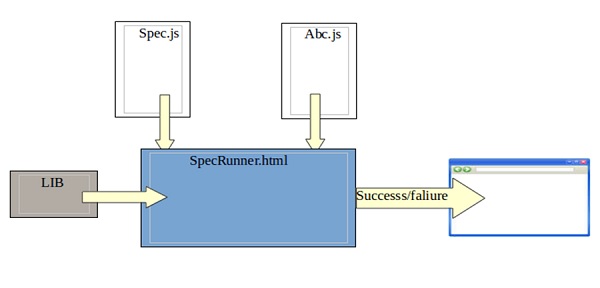
Lib - 这些是内置的JavaScript文件,有助于测试我们项目中使用的不同函数和其他JavaScript文件。
Spec.js(Test case file) - 这是包含测试任何JavaScript函数或文件所需的所有测试用例的JavaScript文件。 在BDD方法中,我们将首先编写测试,因此这是需要首先更新的文件。 肯定会失败,因为我们的项目中没有可以测试的文件或函数。 此文件可以无限次重构,直到测试完所有功能。
Abc.js(File to be tested)的文件Abc.js(File to be tested) - 这是包含您的功能的文件,将使用Spec.js和Lib文件进行单元测试。
SpecRunner.html - SpecRunner.html是一个普通的html文件,它将在嵌入式JavaScript代码的帮助下呈现单元测试的输出。
JasmineJS - Building Blocks of Test
在本章中,我们将讨论Jasmine的测试构建块。
套房
Jasmine是JavaScript的测试框架。 Suite是Jasmine框架的基本构建块。 为特定文件或函数编写的类似类型测试用例的集合称为一个套件。 它包含另外两个块,一个是“Describe()” ,另一个是“It()” 。
One Suite块只能有两个参数,一个是“name of that suite” ,另一个是“Function declaration” ,它实际上调用了我们要测试的单元功能。
在下面的示例中,我们将创建一个套件,用于在add.js文件中单元测试add函数。 在这个例子中,我们有一个名为“calculator.js” JS文件,它将通过Jasmine进行测试,相应的Jasmine规范文件是“CalCulatorSpec.js” 。
Calculator.js
window.Calculator = {
   currentVal:0,
   varAfterEachExmaple:0,
   add:function (num1){
      this.currentVal += num1;
      return this.currentVal;
   },
   addAny:function (){
      var sum = this.currentVal;
      for(var i = 0; i < arguments.length; i++) {
         sum += arguments[i];
      }
      this.currentVal = sum;
      Return  this.currentVal;
   },
};
CalCulatorSpec.js
describe("calculator",function(){
   //test case: 1
   it("Should retain the current value of all time", function (){
      expect(Calculator.currentVal).toBeDefined();
      expect(Calculator.currentVal).toEqual(0);
   });
   //test case: 2
   it("should add numbers",function(){
      expect(Calculator.add(5)).toEqual(5);
      expect(Calculator.add(5)).toEqual(10);
   });
   //test case :3
   it("Should add any number of numbers",function (){
      expect(Calculator.addAny(1,2,3)).toEqual(6);
   });
});
在上面的函数中,我们声明了两个函数。 函数add将添加两个作为参数给予该函数的数字,另一个函数addAny应该添加作为参数给出的任何数字。
创建此文件后,我们需要在head部分的“SpecRunner.html”添加此文件。 成功编译后,将生成以下输出作为结果。

嵌套套房
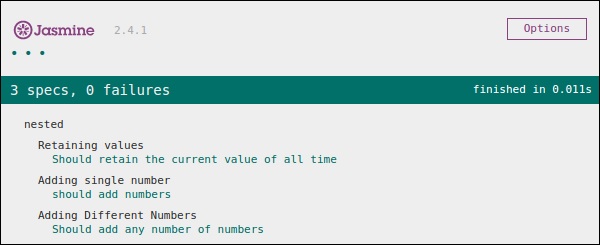
Suite block可以在另一个套房内设有许多套房。 以下示例将向您展示如何在另一个套件块中创建不同的套件块。 我们将创建两个JavaScript文件,一个名为“NestedSpec.js” ,另一个名为“nested.js” 。
NestedSpec.js
describe("nested",function(){
   // Starting of first suite block
   // First block
   describe("Retaining values ",function (){
      //test case:1
      it ("Should retain the current value of all time", function () {
         expect(nested.currentVal).toBeDefined();
         expect(nested.currentVal).toEqual(0);
      });
   }); //end of the suite block
   //second suite block
   describe("Adding single number ",function (){
      //test case:2
      it("should add numbers",function(){
         expect(nested.add(5)).toEqual(5);
         expect(nested.add(5)).toEqual(10);
      });
   }); //end of the suite block
   //third suite block
   describe("Adding Different Numbers",function (){
      //test case:3
      it("Should add any number of numbers",function() {
         expect(nested.addAny(1,2,3)).toEqual(6);
      });
   }); //end of the suite block
});
Nested.js
window.nested = {
   currentVal: 0,
   add:function (num1){
      this.currentVal += num1;
      return this.currentVal;
   },
   addAny:function (){
      Var sum = this.currentVal;
      for(var i = 0;i < arguments.length; i++) {
         sum += arguments[i];
      }
      this.currentVal = sum;
      return this.currentVal;
   }
};
在head部分中添加此文件后,上面的代码将生成以下输出作为运行specRunner.html文件的结果。
描述块
如前所述,block是Suite块的一部分。 与Suite块一样,它包含两个参数,一个是“the name of the describe block” ,另一个是“function declaration” 。 在我们即将发布的示例中,我们将通过许多描述块来了解Jasmine套件块的工作流程。 以下是完整描述块的示例。
describe("Adding single number ",function (){
   it("should add numbers",function(){
      expect(nested.add(5)).toEqual(5);
      expect(nested.add(5)).toEqual(10);
   });
}
IT Block
像describe block一样,我们也被引入了IT块。 它在描述块内。 这是实际包含每个单元测试用例的块。 在下面的代码中,在一个describe块中有一些IT块。
describe("Adding single number ",function (){
   // test case : 1
   it("should add numbers",function(){
      expect(nested.add(5)).toEqual(5);
      expect(nested.add(5)).toEqual(10);
   });
   //test case : 2
   it("should add numbers",function(){
      expect(nested.addAny(1,2,3)).toEqual(6);
   });
}
期待阻止
Jasmine Expect允许您从所需的函数或JavaScript文件中编写您的期望。 它属于IT块。 一个IT块可以有多个Expect块。
以下是Expect块的示例。 这个expect块提供了各种方法来对您的JavaScript函数或JavaScript文件进行单元测试。 每个Expect块也称为matcher 。 有两种不同类型的匹配器,一种是inbuilt matcher ,另一种是user defined matchers 。
describe("Adding single number ",function (){
   // test case : 1
   it("should add numbers",function(){
      expect(nested.add(5)).toEqual(5);
      expect(nested.add(5)).toEqual(10);
   });
   //test case : 2
   it("should add numbers",function(){
      expect(nested.addAny(1,2,3)).toEqual(6);
   });
}
在接下来的章节中,我们将讨论Expect块的不同内置方法的各种用法。
JasmineJS - Matchers
Jasmine是一个测试框架,因此它总是旨在将JavaScript文件或函数的结果与预期结果进行比较。 Matcher在Jasmine框架中的工作方式类似。
Matchers是JavaScript函数,它在实际输出和预期输出之间进行布尔比较。 有两种类型的匹配器Inbuilt matcher和Custom matchers 。
内置匹配器
内置于Jasmine框架中的inbuilt matcher称为inbuilt matcher 。 用户可以轻松地implicitly使用它。
以下示例显示了Inbuilt Matcher如何在Jasmine框架中工作。 我们在前一章中已经使用了一些匹配器。
describe("Adding single number ", function (){
   //example of toEqual() matcher
   it("should add numbers",function(){
      expect(nested.add(5)).toEqual(5);
      expect(nested.add(5)).toEqual(10);
   });
   it("should add numbers",function(){
      expect(nested.addAny(1,2,3)).toEqual(6);
   });
}
在示例中,toEqual()是内置匹配器,它将add()和addAny()方法的结果与传递给toEqual()匹配器的参数进行toEqual() 。
自定义匹配器
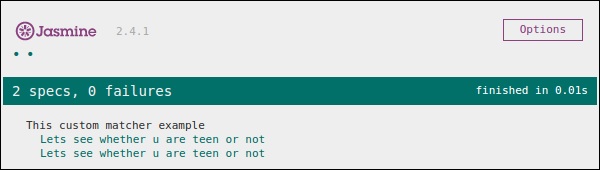
内置的Jasmine系统库中没有的匹配器称为custom matcher 。 需要explicitly()定义自定义匹配器explicitly() 。 在以下示例中,我们将看到自定义匹配器的工作原理。
describe('This custom matcher example', function() {
   beforeEach(function() {
      // We should add custom matched in beforeEach() function.
      jasmine.addMatchers ({
         validateAge: function() {
            Return {
               compare: function(actual,expected) {
                  var result = {};
                  result.pass = (actual > = 13 && actual < = 19);
                  result.message = 'sorry u are not a teen ';
                  return result;
               }
            };
         }
      });
   });
   it('Lets see whether u are teen or not', function() {
      var myAge = 14;
      expect(myAge).validateAge();
   });
   it('Lets see whether u are teen or not ', function() {
      var yourAge = 18;
      expect(yourAge).validateAge();
   });
});
在上面的示例中, validateAge()用作匹配器,实际上是在某个范围内验证您的年龄。 在此示例中,validateAge()用作自定义匹配器。 将此JS文件添加到SpecRunner.html并运行相同的文件。 它将生成以下输出。
JasmineJS - Skip Block
Jasmine还允许开发人员跳过一个或多个测试用例。 这些技术可以在Spec level或Suite level 。 根据应用程序的不同,此块可分别称为Skipping Spec和Skipping Suite 。
在以下示例中,我们将学习如何使用“x”字符跳过特定的Spec或Suite 。
跳过规格
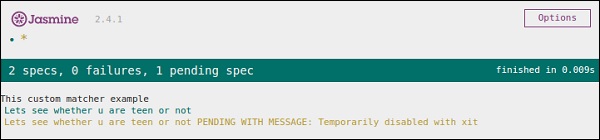
我们将在语句之前使用“x”修改前面的示例。
describe('This custom matcher example ', function() {
   beforeEach(function() {
      // We should add custom matched in beforeEach() function.
      jasmine.addMatchers({
         validateAge: function() {
            return {
               compare: function(actual,expected) {
                 var result = {};
                 result.pass = (actual > = 13 && actual < = 19);
                 result.message = 'sorry u are not a teen ';
                 return result;
               }
            };
         }
      });
   });
   it('Lets see whether u are teen or not', function() {
      var myAge = 14;
      expect(myAge).validateAge();
   });
   xit('Lets see whether u are teen or not ', function() {
      //Skipping this Spec
      var yourAge = 18;
   });
});
如果我们运行此JavaScript代码,我们将在浏览器中收到以下输出。 Jasmine本身将使用“xit”通知用户临时disabled特定块。
skipping_suite
以同样的方式,我们可以禁用describe块以实现Skipping Suite的技术。 在下面的示例中,我们将了解跳过套件块的过程。
xdescribe('This custom matcher example ', function() {
   //Skipping the entire describe  block
   beforeEach(function() {
      // We should add custom matched in beforeEach() function.
      jasmine.addMatchers({
         validateAge: function() {
            return {
               compare: function(actual,expected) {
                 var result = {};
                 result.pass = (actual >=13 && actual<=19);
                 result.message ='sorry u are not a teen ';
                 return result;
               }
            };
         }
      });
   });
   it('Lets see whether u are teen or not', function() {
      var myAge = 14;
      expect(myAge).validateAge();
   });
   it('Lets see whether u are teen or not ', function() {
      var yourAge = 18;
      expect(yourAge).validateAge();
   });
});
上面的代码将生成以下屏幕截图作为输出。
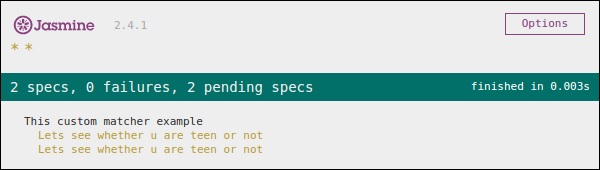
正如我们在消息栏中看到的,它显示处于挂起状态的两个spec块,这意味着使用“x”字符禁用这两个Spec块。 在接下来的章节中,我们将讨论不同类型的Jasmine测试场景。
JasmineJS - Equality Check
Jasmine提供了许多方法来帮助我们检查任何JavaScript函数和文件的相等性。 以下是检查平等条件的一些示例。
toEqual()
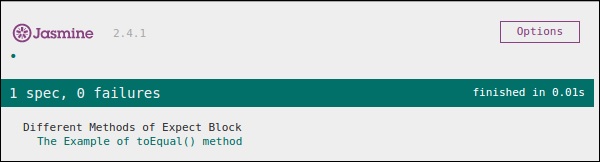
toEqual()是内置的Jasmine库中最简单的匹配器。 它只是匹配作为此方法的参数给出的操作的结果是否与其结果匹配。
以下示例将帮助您了解此匹配器的工作原理。 我们有两个要测试的文件,名为“expectexam.js” ,另一个我们需要测试的文件是“expectSpec.js” 。
Expectexam.js
window.expectexam = {
   currentVal: 0,
};
ExpectSpec.js
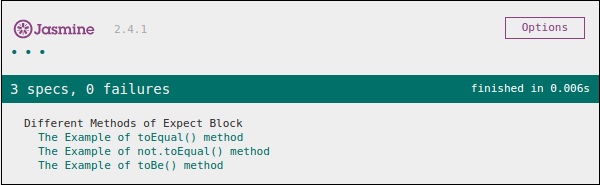
describe("Different Methods of Expect Block",function (){
   it("The Example of toEqual() method",function (){
      //this will check whether the value of the variable
      // currentVal is equal to 0 or not.
      expect(expectexam.currentVal).toEqual(0);
   });
});
成功执行后,这些代码将产生以下输出。 请记住,您需要按照前面示例中的说明将这些文件添加到specRunner.html文件的标题部分。
not.toEqual()
not.toEqual()与toEqual()完全相反。 当我们需要检查值是否与任何函数的输出不匹配时,使用not.toEqual() 。
我们将修改上面的示例以显示其工作原理。
ExpectSpec.js
describe("Different Methods of Expect Block",function (){
   it("The Example of toEqual() method",function (){
      expect(expectexam.currentVal).toEqual(0);
   });
   it("The Example of not.toEqual() method",function (){
      //negation  testing expect(expectexam.currentVal).not.toEqual(5);
   });
});
Expectexam.js
window.expectexam = {
   currentVal: 0,
};
在第二个expect块中,我们检查currentVal的值是否等于5,因为currentVal的值为零,因此我们的测试通过并为我们提供绿色输出。

toBe()
toBe()匹配器以与toEqual()类似的方式工作,但它们在技术上彼此不同。 toBe()匹配器与对象的类型匹配,而toEqual()与结果的等效性匹配。
以下示例将帮助您了解toBe()匹配器的工作原理。 这个匹配器完全等同于JavaScript的“===”运算符,而toEqual()类似于JavaScript的“==”运算符。
ExpectSpec.js
describe("Different Methods of Expect Block",function (){
   it("The Example of toBe() method",function (){
      expect(expectexam.name).toBe(expectexam.name1);
   });
});
Expectexam.js
window.expectexam = {
   currentVal: 0,
   name:"iowiki",
   name1:iowiki
};
我们将略微修改我们的expectexam JavaScript文件。 我们添加了两个新变量, name和name1 。 请找出这两个添加的变量之间的区别 - 一个是字符串类型,另一个不是字符串类型。
截图是我们的测试结果,其中红叉表示这两个值不相等,而预计它们是相等的。 因此我们的测试失败。

让我们将变量name和name1为String类型变量, SpecRunner.html再次运行相同的SpecRunner.html 。 现在检查输出。 它将证明toBe()不仅与变量的等价性匹配,而且还与变量的数据类型或对象类型匹配。
not.toBe()
如前所述,并非只是对toBe()方法的否定。 当预期结果与函数或JavaScript文件的实际输出匹配时,它会失败。
以下是一个简单的示例,可帮助您了解not.toBe()匹配器的工作原理。
describe("Different Methods of Expect Block",function (){
   it("The Example of not.toBe() method",function (){
      expect(true).not.toBe(false);
   });
});
在这里,Jasmine将尝试将true与false匹配。 由于true不能与false相同,因此该测试用例将有效并通过。
JasmineJS - Boolean Check
除了相等检查,Jasmine还提供了一些方法来检查布尔条件。 以下是帮助我们检查布尔条件的方法。
toBeTruthy()
此布尔匹配器在Jasmine中用于检查结果是等于true还是false。
以下示例将帮助我们理解toBeTruthy()函数的工作原理。
ExpectSpec.js
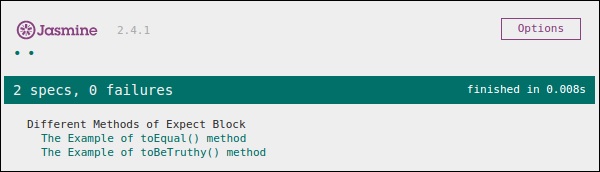
describe("Different Methods of Expect Block",function (){
   it("The Example of toBeTruthy() method",function (){
      expect(expectexam.exampleoftrueFalse(5)).toBeTruthy();
   });
});
Expectexam.js
window.expectexam = {
   exampleoftrueFalse: function (num){
      if(num < 10)
         return true;
      else
         return false;
   },
};
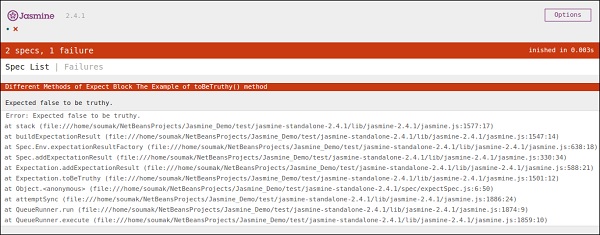
当我们传递小于10的数字5时,此测试用例将通过并给出以下输出。
如果我们传递一个大于10的数字,那么这个绿色测试将变为红色。 在第二个屏幕截图中,您可以看到在传递大于10的某个值时,预期的测试用例失败并生成红色输出,指出“预期错误为真”。
toBeFalsy()
toBeFalsy()的工作方式与toBeTruthy()方法相同。 它将输出与false匹配,而toBeTruthy将输出与true匹配。 以下示例将帮助您了解toBeFalsy()的基本工作原理。
ExpectSpec.js
describe("Different Methods of Expect Block",function(){
   it("The Example of toBeTruthy() method",function (){
      expect(expectexam.exampleoftrueFalse(15)).toBeFalsy();
   });
});
Expectexam.js
window.expectexam = {
   exampleoftrueFalse: function (num){
      if(num < 10)
         Return true;
      else
         return false;
   },
};
上面的代码将传递Jasmine测试用例,因为我们传递的值超过10并且预期输出为false。 因此,浏览器将向我们显示绿色标志,这意味着它已通过。
JasmineJS - Sequential Check
Jasmine还提供了不同的方法来提供JS输出的顺序性。 以下示例显示了如何使用Jasmine实现顺序检查。
toContain()
toContain()匹配器为我们提供了检查任何元素是否是同一数组或其他顺序对象的一部分的工具。 以下示例将帮助我们了解Jasmine toContain()方法的工作方法。 让我们在之前创建的customerMatcherSpec.js文件中添加以下代码。
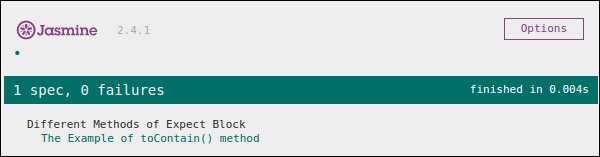
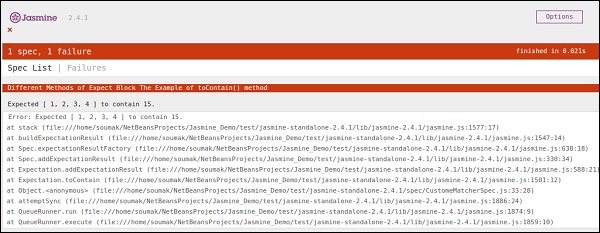
describe("Different Methods of Expect Block",function (){
   it("The  Example of toContain() method",function (){
      expect([1,2, 3, 4]).toContain(3);
   });
});
在上面的例子中,我们检查该数组中是否存在3。 我们得到一个绿色输出,因为数组中存在3。
在上面的例子中,让我们用15改变3的值并再次运行规范。 我们将得到以下红色屏幕,因为15不属于我们作为该函数的参数传递的数组。
toBeCloseTo()
toBeCloseTo()匹配器匹配实际值是否接近预期值。 在以下示例中,我们将修改customerMatcherSpec.js文件并查看其实际工作原理。
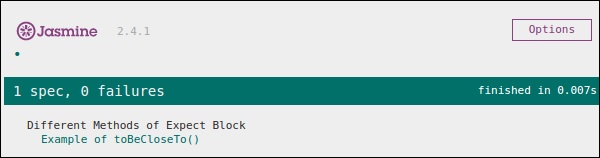
describe("Different Methods of Expect Block", function (){
   it("Example of toBeCloseTo()", function (){
      expect(12.34).toBeCloseTo(12.3, 1);
   });
});
在上述描述块中,我们检查实际结果“12.3”是否更接近预期输出“12.34”。 由于这符合我们的要求,我们将有以下绿色屏幕截图作为输出。 此方法的第二个参数是要与之比较的小数位数。
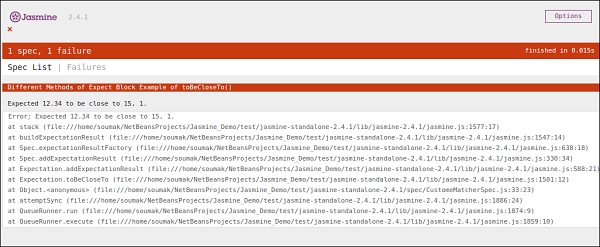
在上面的代码中,让我们将期望值修改为15并运行SpecRunner.html 。
describe("Different Methods of Expect Block",function (){
   it("Example of  toBeCloseTo()", function (){
      expect(12.34).toBeCloseTo(15, 1);
   });
});
在这种情况下,15不会接近15,因此它将生成错误并将红色屏幕截图显示为错误。
toMatch()
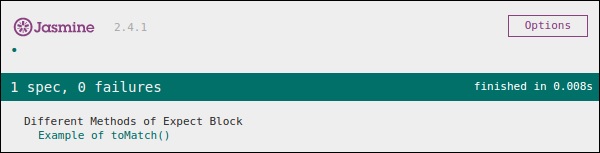
toMatch()匹配器适用于String类型变量。 查找预期输出中是否存在特定字符串很有帮助。 以下是我们的customerMatcherSpec.js样子。
describe("Different Methods of Expect Block",function (){
   it("Example of toMatch()", function (){
      expect("Jasmine tutorial in tutorials.com").toMatch(/com/);
   });
});
这段代码将测试给定的预期String中是否存在“com” 。 由于com存在于字符串中,它将生成绿色屏幕截图并传递测试条件。
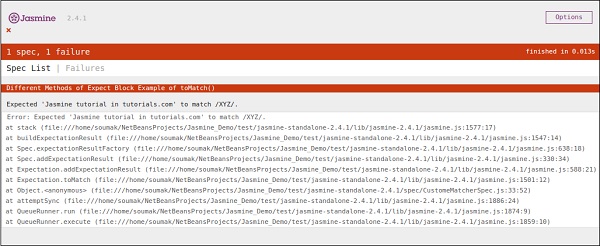
现在让我们将输出更改为其他字符串,该字符串不在预期值中。 然后我们的customerMatcherSpec.js将如下所示。
describe("Different Methods  of Expect Block",function (){
   it("Example of toMatch()", function (){
      expect("Jasmine tutorial in tutorials.com").toMatch(/XYZ/);
   });
});
上面的代码将在期望值中找到“XYZ”字符串。 因为它在预期的字符串中不存在,所以它将抛出一个错误,输出屏幕将相应地变为红色。
JasmineJS - Null Check
Jasmine提供了一种不同的方法来检查实际输出是否为Null,已定义或未定义。 在本章中,我们将学习如何实现不同的Jasmine方法来检查上述场景。
toBedefined()
此匹配器用于检查代码中的任何变量是否已预定义。 让我们根据这个例子修改我们的customerMatcherSpec.js文件。
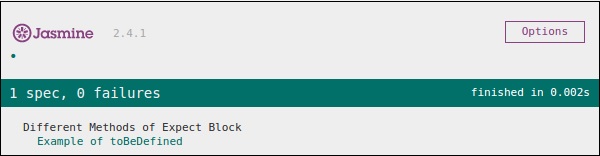
currentVal = 0;
describe("Different Methods  of Expect Block",function (){
   it("Example of  toBeDefined", function (){
      expect(currentVal).toBeDefined();
   });
});
在上面的代码中,toBeDefined()将检查变量currentVal是否在系统中定义。 由于currentVal在开始时被定义为0,因此该测试将通过并生成绿色屏幕截图作为输出。
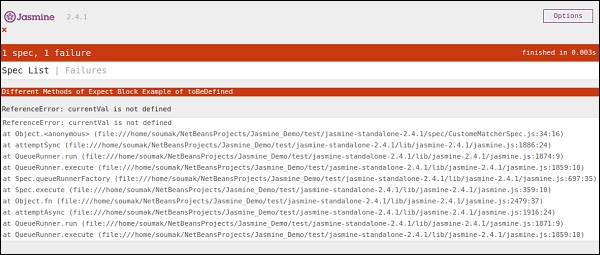
再次在上面的例子中,让我们删除第一行,我们实际定义“currentVal”并再次运行。 然后我们将得到一个红色屏幕,这意味着测试实际上失败了,因为我们期望定义一个未定义的值。 以下屏幕截图将是输出文件。
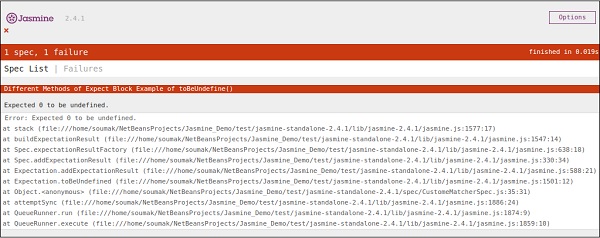
toBeUndefined()
这个匹配器有助于检查以前是否未定义任何变量,基本上它与前一个匹配的toBeDefined相反。 在以下示例中,我们将学习如何使用此匹配器。 让我们修改我们的Spec文件,即带有以下条目的customerMatcher.js文件。
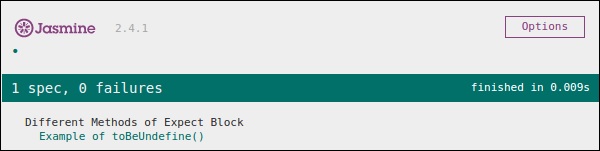
describe("Different Methods of Expect Block",function (){
   it("Example of toBeUndefine()", function (){
      var undefineValue;
      expect(undefineValue).toBeUndefined();
   });
});
在上一节中,我们将验证我们的变量“undefineValue”是否实际上是未定义的。 将此文件添加到SpecRunner后,我们将收到一个绿色屏幕截图作为输出,它告诉我们此值实际上未在之前定义。
再次让我们使用一些预定义的值定义变量,看看它是否会抛出错误。 新的customerMatcher.js如下所示。
describe("Different Methods of Expect Block",function (){
   it("Example oftoBeUndefine()", function (){
      var undefineValue = 0;
      expect(undefineValue).toBeUndefined();
   });
});
上面的代码将抛出错误并生成红色屏幕截图,因为我们已经将“undefineValue”值定义为“0”并期望它未定义。 将在运行SpecRunner.html文件时生成以下屏幕截图。
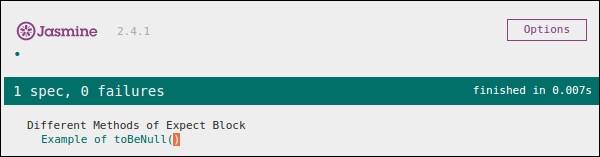
toBeNull()
由于名称表示此匹配器有助于检查空值。 让我们再次使用以下代码修改customerMatcherSpec.js文件。
describe("Different Methods of Expect Block",function (){
   var value = null;
   it("Example of toBeNull()", function (){
      expect(value).toBeNull();
   });
});
在上面的代码中,我们提到了一个变量”value” ,我们已经明确地将这个值提到了null。 在expect块中,toBeNull()匹配器将检查此值并相应地给出结果。 以下是在SpecRunner.html文件的帮助下运行上述代码的输出。
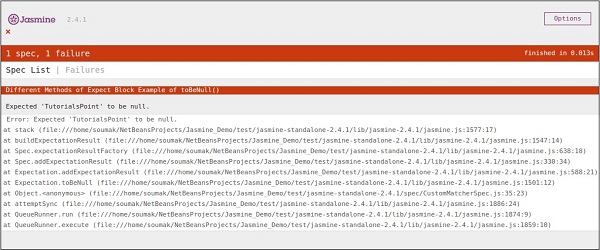
现在让我们通过提供除null之外的一些定义值来进行测试。 请相应地修改customerMatcher.js文件。
describe("Different Methods of Expect Block",function (){
   var value = "IoWiki";
   it("Example of  toBeNull()", function (){
      expect(value).toBeNull();
   });
});
在上面的示例中,我们使用“IoWiki”修改了变量值,该值不是空值。 因此,此测试将失败并生成红色屏幕截图作为输出。
JasmineJS - Inequality Check
到目前为止,我们已经讨论了Jasmine中的不同方法,它们可以帮助我们根据我们的要求测试不同的场景。 在本章中,我们将了解不同的匹配器,它们将帮助我们检查JS文件中的不等式条件。 以下是用于此目的的匹配器。
toBeGreaterThan()
顾名思义,这个匹配器有助于检查大于条件。 让我们使用以下代码修改customerMatcher.js 。
describe("Different Methods of Expect Block",function (){
   var exp = 8;
   it("Example of  toBeGreaterThan()", function (){
      expect(exp).toBeGreaterThan(5);
   });
});
在上面的代码中,我们期望变量“exp”的值将大于5.现在变量“exp”的值是“8”,大于“5”,这块代码将生成绿色屏幕截图。

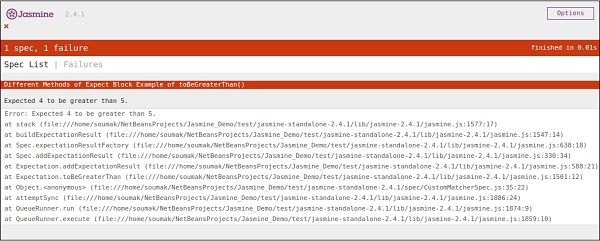
现在再次让我们将变量的值修改为“4”并使此测试失败。 为此,我们需要使用以下代码修改js文件。
describe("Different Methods of Expect Block",function (){
   var exp = 4;
   it ("Example of toBeGreaterThan()", function (){
      expect(exp).toBeGreaterThan(5);
   });
});
此代码将失败,因为值4不能大于5.因此它将产生以下输出。
toBeLessThan()
此匹配器有助于检查测试场景的不足情况。 它的行为与toBeGreaterThan()匹配器的行为完全相反。 现在让我们看看这个匹配器是如何工作的。 我们相应地修改customerMatcher.js文件。
describe("Different Methodsof Expect Block",function (){
   var exp = 4;
   it("Example of toBeLessThan()", function(){
      expect(exp).toBeLessThan(5);
   });
});
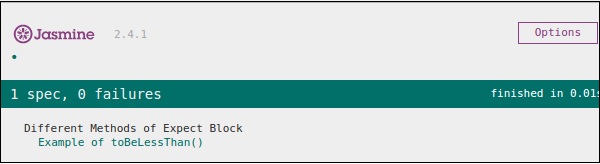
与前面的示例一样,我们有一个值为“4”的变量。 在这段代码中,我们检查此变量的值是否小于5。 这段代码将生成以下输出。
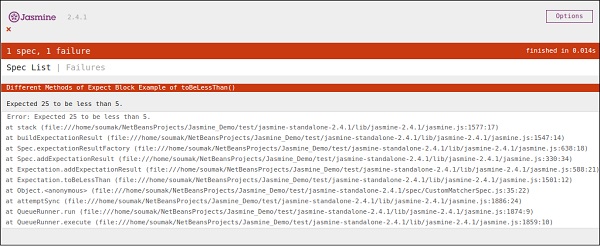
现在要使这个失败,我们需要为变量exp分配一些更大的数字。 让我们这样做并测试应用程序。 我们将为exp分配25作为值,这肯定会引发错误并以红色显示以下屏幕截图。
JasmineJS - Not a Number Check
Jasmine提供了一个特殊的匹配器来检查这种特殊类型的测试场景,即toBeNaN() 。
让我们使用以下代码修改customerMatcher.js 。
describe("Different Methods of Expect Block",function (){
   it("Example of toBeNaN()", function (){
      expect(0/0).toBeNaN();
   });
});
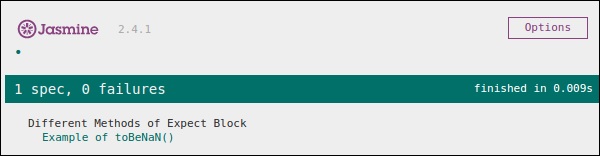
这里我们要测试“0/0”的值是什么,无法确定。 因此,这段代码将生成以下绿色屏幕截图。
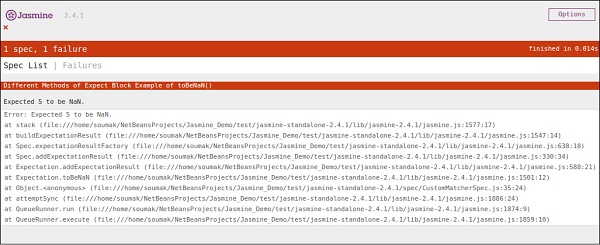
现在让我们再次使用以下逻辑修改代码,其中我们将一个变量exp分配给25并期望结果不是将其除以5的数字。
describe("Different Methods of Expect Block",function (){
   var exp = 25;
   it("Example of toBeNaN()", function (){
      expect(exp/5).toBeNaN();
   });
});
这段代码将产生以下输出。
JasmineJS - Exception Check
除了不同的计算匹配器,Jasmine提供了一些有用的匹配器来检查程序的异常。 让我们使用以下代码集修改JavaScript。
var throwMeAnError = function() {
throw new Error();
};
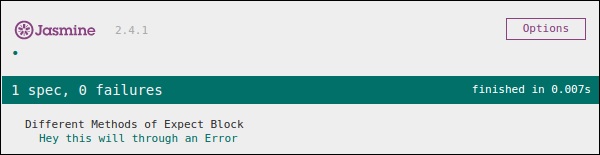
describe("Different Methods of Expect Block", function() {
var exp = 25;
it ("Hey this will throw an Error ", function() {
expect(throwMeAnError).toThrow();
});
});
在上面的例子中,我们创建了一个方法,故意从该方法抛出异常,并在expect块中我们期望捕获错误。 如果一切顺利,那么这段代码将产生以下输出。
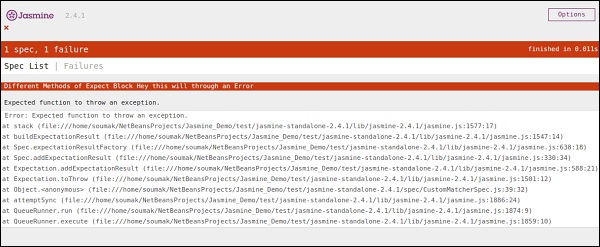
现在,为了使这个测试用例失败,我们需要在函数throwMeAnError省略throw语句。 以下是代码,它将产生红色屏幕截图作为输出,因为代码不符合我们的要求。
var throwMeAnError = function() {
   //throw new Error();
};
describe("Different Methods of Expect Block",function() {
   var exp = 25;
   it("Hey this will throw an Error ", function() {
      expect(throwMeAnError).toThrow();
   });
});
可以看出,我们已经评论了我们的方法抛出异常的行。 以下是成功执行SpecRunner.html时上述代码的输出。
jasmine.any()
Any是我们不确定输出时使用的特殊匹配器。 在下面的示例中,我们将了解其工作原理。 让我们使用以下代码修改customerMatcher.js 。
var addAny = function(){
var sum = this.currentVal;
for (var i = 0; i < arguments.length; i++){
sum += arguments[i];
}
this.currentVal = sum;
return this.currentVal;
}
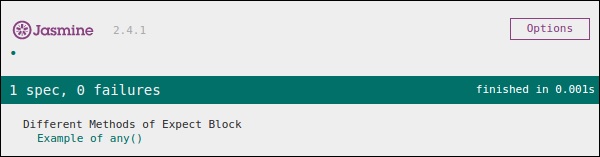
describe("Different Methods of Expect Block",function (){
it("Example of any()", function(){
expect(addAny(9,9)).toEqual(jasmine.any(Number));
});
});
在这里,我们声明了一个函数,它将为我们提供作为参数提供的数字的总和。 在expect块中,我们期望结果可以是任何东西,但它应该是一个数字。
由于总和产量18之后的9和9都是数字,因此该测试将通过并且它将生成以下绿色屏幕截图作为输出。
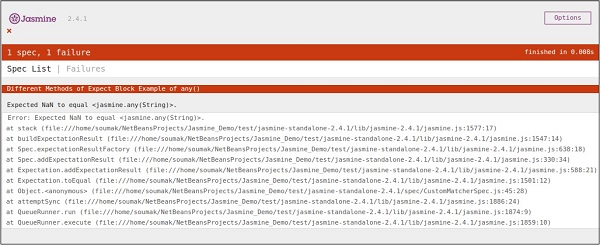
现在让我们根据以下代码更改代码,其中我们期望字符串类型变量作为函数addAny()的输出。
var addAny = function(){
   var sum = this.currentVal;
   for(var i = 0; i < arguments.length; i++){
      sum += arguments[i];
   }
   this.currentVal = sum;
   return this.currentVal;
}
describe("Different Methodsof Expect Block",function (){
   it("Example of any()", function (){
      expect(addAny(9,9)).toEqual(jasmine.any(String));
   });
});
以下是上述代码的输出。
JasmineJS - beforeEach()
Jasmine的另一个显着特征是每个功能之前和之后。 使用这两个功能,我们可以在执行每个规范之前和之后执行一些代码。 此功能对于在应用程序中运行公共代码非常有用。 让我们创建一个如下所示的spec文件。
var currentVal = 0;
beforeEach(function(){
   currentVal = 5;
});
describe("Different Methods of Expect Block",function(){
   it("after each function ", function(){
      expect(currentVal).toEqual(5);
   });
});
虽然我们在开头已经将一个变量声明为“0”,但我们期望该值在期望块中应该等于5。 上面的代码将生成以下输出。
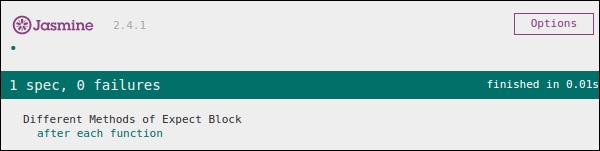
在上面的代码中,5将在执行expect块之前分配给变量currentVal 。 因此,它生成一个没有错误的绿色屏幕截图。
JasmineJS - afterEach()
与beforeEach()一样,afterEach()的工作方式完全相同。 它在执行spec块后执行。 让我们使用以下代码修改前面的示例。
var currentVal = 0;
afterEach(function(){
currentVal = 5;
});
describe("Different Methods of Expect Block",function() {
it("first call ", function(){
expect(currentVal).toEqual(0);
});
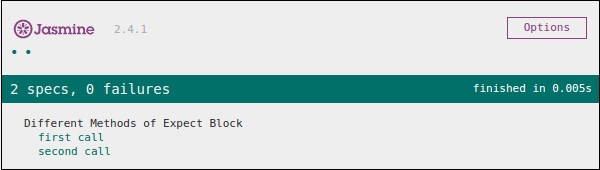
it("second call ", function() {
expect(currentVal).toEqual(5);
});
});
在上面的例子中,当运行第一个spec块时, currentVal值为0.因此,它将通过测试用例但是在运行第一个块后,Jasmine编译运行了afterEach()块,这使得该值的值为currentVal到5.因此它也满足第二种情况并产生绿色屏幕截图作为输出。
JasmineJS - Spies
Jasmine间谍是另一种功能,它的名称与其名称完全相同。 它将允许您监视您的应用程序函数调用。 Jasmine有两种类型的间谍技术。 第一种方法可以使用spyOn()实现,第二种方法可以使用createSpy() 。 在本章中,我们将了解有关这两种方法的更多信息。
spyOn()
spyOn()内置于Jasmine库中,允许您监视一段确定的代码。 让我们创建一个新的spec文件“spyJasmineSpec.js”和另一个名为“spyJasmine.js”的js文件。 以下是这两个文件的输入。
SpyJasmine.js
var Person = function() {};
Person.prototype.sayHelloWorld = function(dict){
   return dict.hello() + " " + dict.world();
};
var Dictionary = function() {};
Dictionary.prototype.hello = function() {
   return "hello";
};
Dictionary.prototype.world = function() {
   return "world";
};
SpyJasmineSpec.js
describe("Example Of jasmine Spy using spyOn()", function() {
   it('uses the dictionary to say "hello world"', function() {
      var dictionary = new Dictionary;
      var person = new Person;
      spyOn(dictionary, "hello");  // replace hello function with a spy
      spyOn(dictionary, "world");  // replace world function with another spy
      person.sayHelloWorld(dictionary);
      expect(dictionary.hello).toHaveBeenCalled();
      // not possible without first spy
      expect(dictionary.world).toHaveBeenCalled();
      // not possible withoutsecond spy
   });
});
在上面的代码中,我们希望person对象说“Hello world”,但我们也希望person对象应该咨询字典对象以给我们输出文字“Hello world”。
看一下Spec文件,你可以看到我们已经使用了spyOn()函数,它实际上模仿了hello和world函数的功能。 因此,我们实际上并没有调用函数,而是模仿函数调用。 这是间谍的特长。 上面的代码将产生以下输出。

createSpy()
获得间谍功能的另一种方法是使用createSpy()。 让我们使用以下代码修改我们的两个js文件。
SpyJasmine.js
var Person = function() {};
Person.prototype.sayHelloWorld = function(dict) {
   return dict.hello() + " " + dict.world();
};
var Dictionary = function() {};
Dictionary.prototype.hello = function() {
   return "hello";
};
Dictionary.prototype.world = function() {
   return "world";
};
SpyJasmineSpec.js
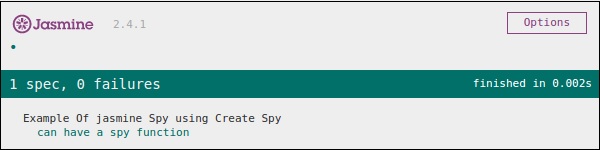
describe("Example Of jasmine Spy using Create Spy", function() {
   it("can have a spy function", function() {
      var person = new Person();
      person.getName11 = jasmine.createSpy("Name spy");
      person.getName11();
      expect(person.getName11).toHaveBeenCalled();
   });
});
看一下spec文件,我们调用Person对象的getName11() 。 虽然spy Jasmine.js中的person对象中不存在此函数,但我们没有收到任何错误,因此输出为绿色且为正。 在此示例中,CreateSpy()方法实际上模仿了getName11()的功能。
上面的代码将生成以下输出。